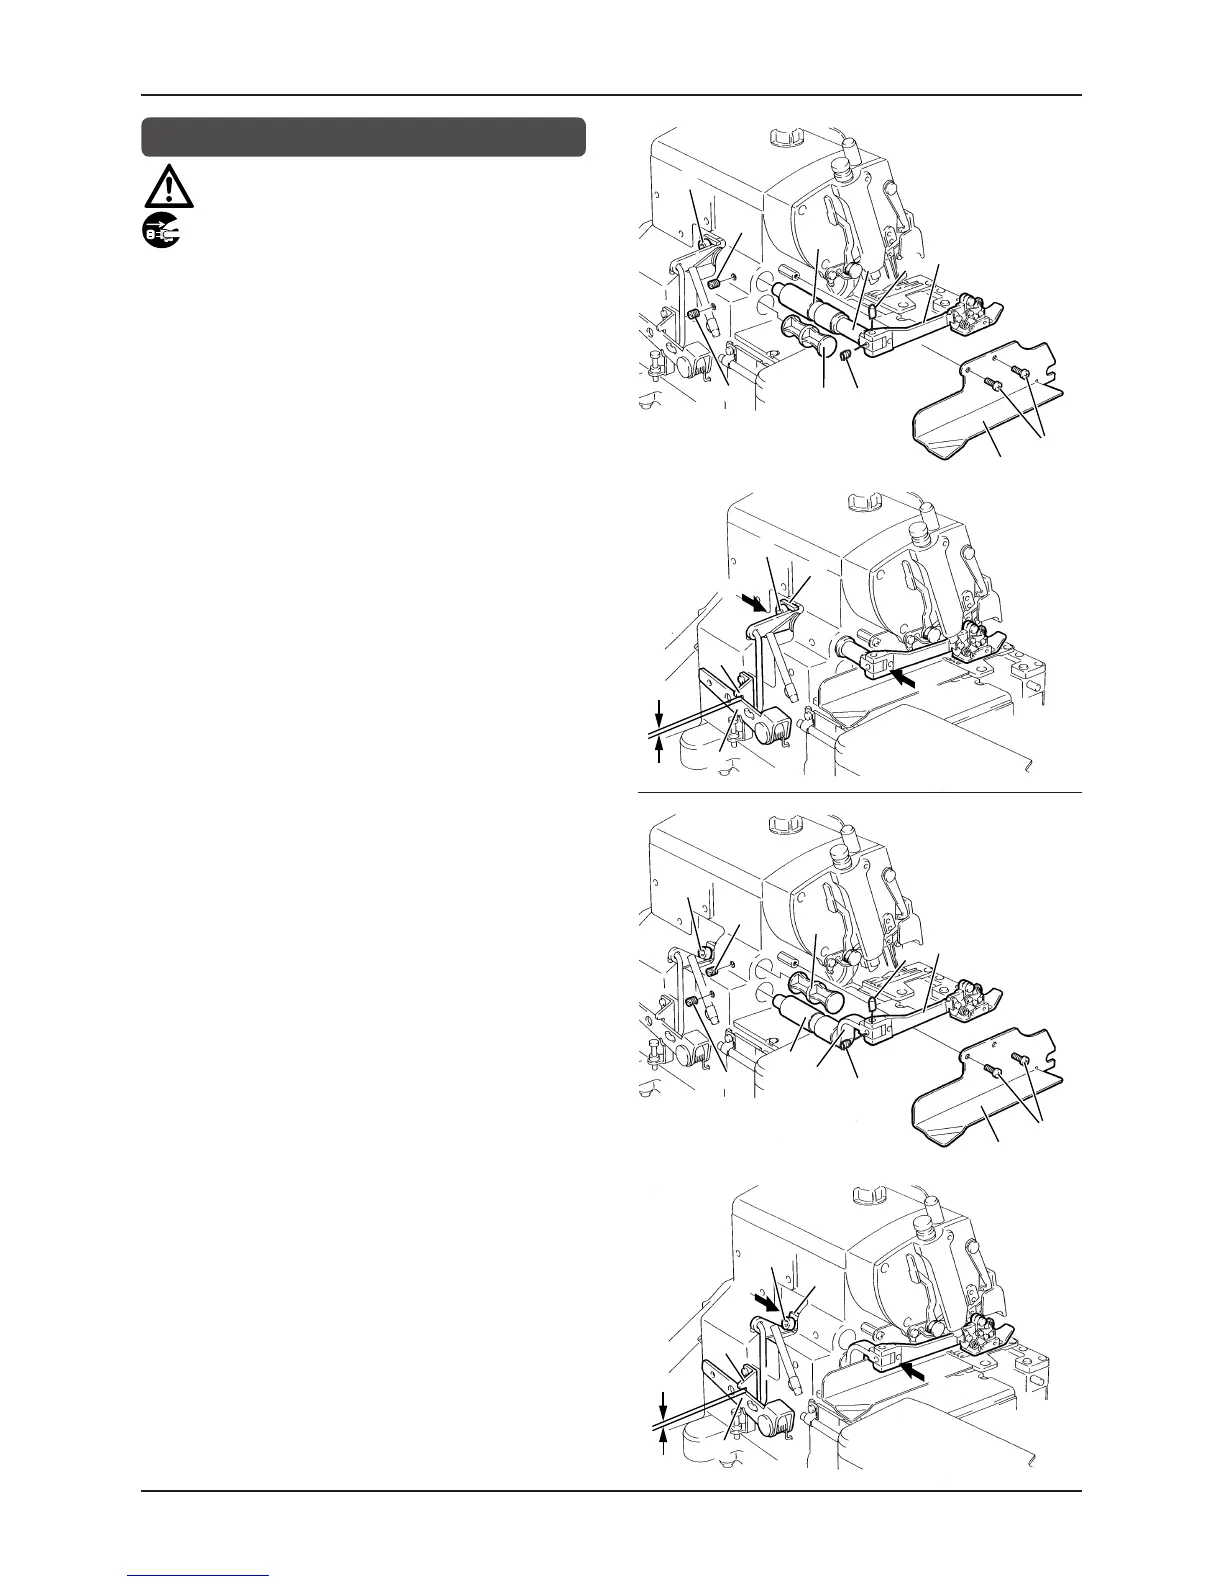
Changing the fulcrum on the presser foot
CAUTION
Always turn off the power, unplug the machine and then only
authorized technicians are allowed to change the fulcrum on the
presser foot.
There are two installation positions available for the shaft for the
presser arm (the fulcrum on the presser foot can be changed), the
upper and lower installation positions. The factory-set installation
position varies according to each subclass.
The upper installation position for the presser foot shaft provides
better feeding efficiency, so it is suitable for sewing knit fabrics.
The lower installation position for the presser foot shaft is effective
for the prevention of fabric puckering, so it is suitable for sewing
woven fabrics.
To change the fulcrum on the presser foot, another optional shaft
that is not supplied with the machine is needed. Please purchase
the optional shaft separately.
Fig. 27 illustrates how to place the presser foot shaft in the
upper installation position. Fig. 28 illustrates how to place the
presser foot shaft in the lower installation position. To change the
installation position, refer to either of these illustrations (Figs. 27
and 28). Parts other than the presser foot shaft can be removed
and then used again without any change in order to change the
installation position.
1.
Remove screws
1
, and then remove fabric guide
2
.
2.
Loosen screws
3
and
4
. Remove presser foot shaft
5
and
bushing
6
. Loosen screw
7
, and then remove pin
8
and
presser arm
9
.
3.
Loosen screw
10
, and then remove plug
11
.
4.
Install the presser foot shaft by referring to either Fig. 27
(upper installation position) or 28 (lower installation position).
Reassembling is a reverse of the removal procedure.
5.
After placing the presser foot in position, bring the feed dog
down to the bottom of its travel by turning the handwheel
manually.
6.
Check to see if the needle drop hole on the presser foot is
aligned with the hole on the needle plate. If it is not aligned,
loosen screw
4
, and then move bushing
6
to the left or right
in order to make this adjustment. After this adjustment is
made, tighten screw
4
.
7.
Move collar
12
in the direction of arrow
B
while pushing
presser foot shaft
5
in the direction of arrow
A
. Tighten
screw
3
. At this time, there should be a play of 1mm between
presser foot lift lever
13
and bracket
14
.
8.
Attach fabric guide
2
with screws
1
.