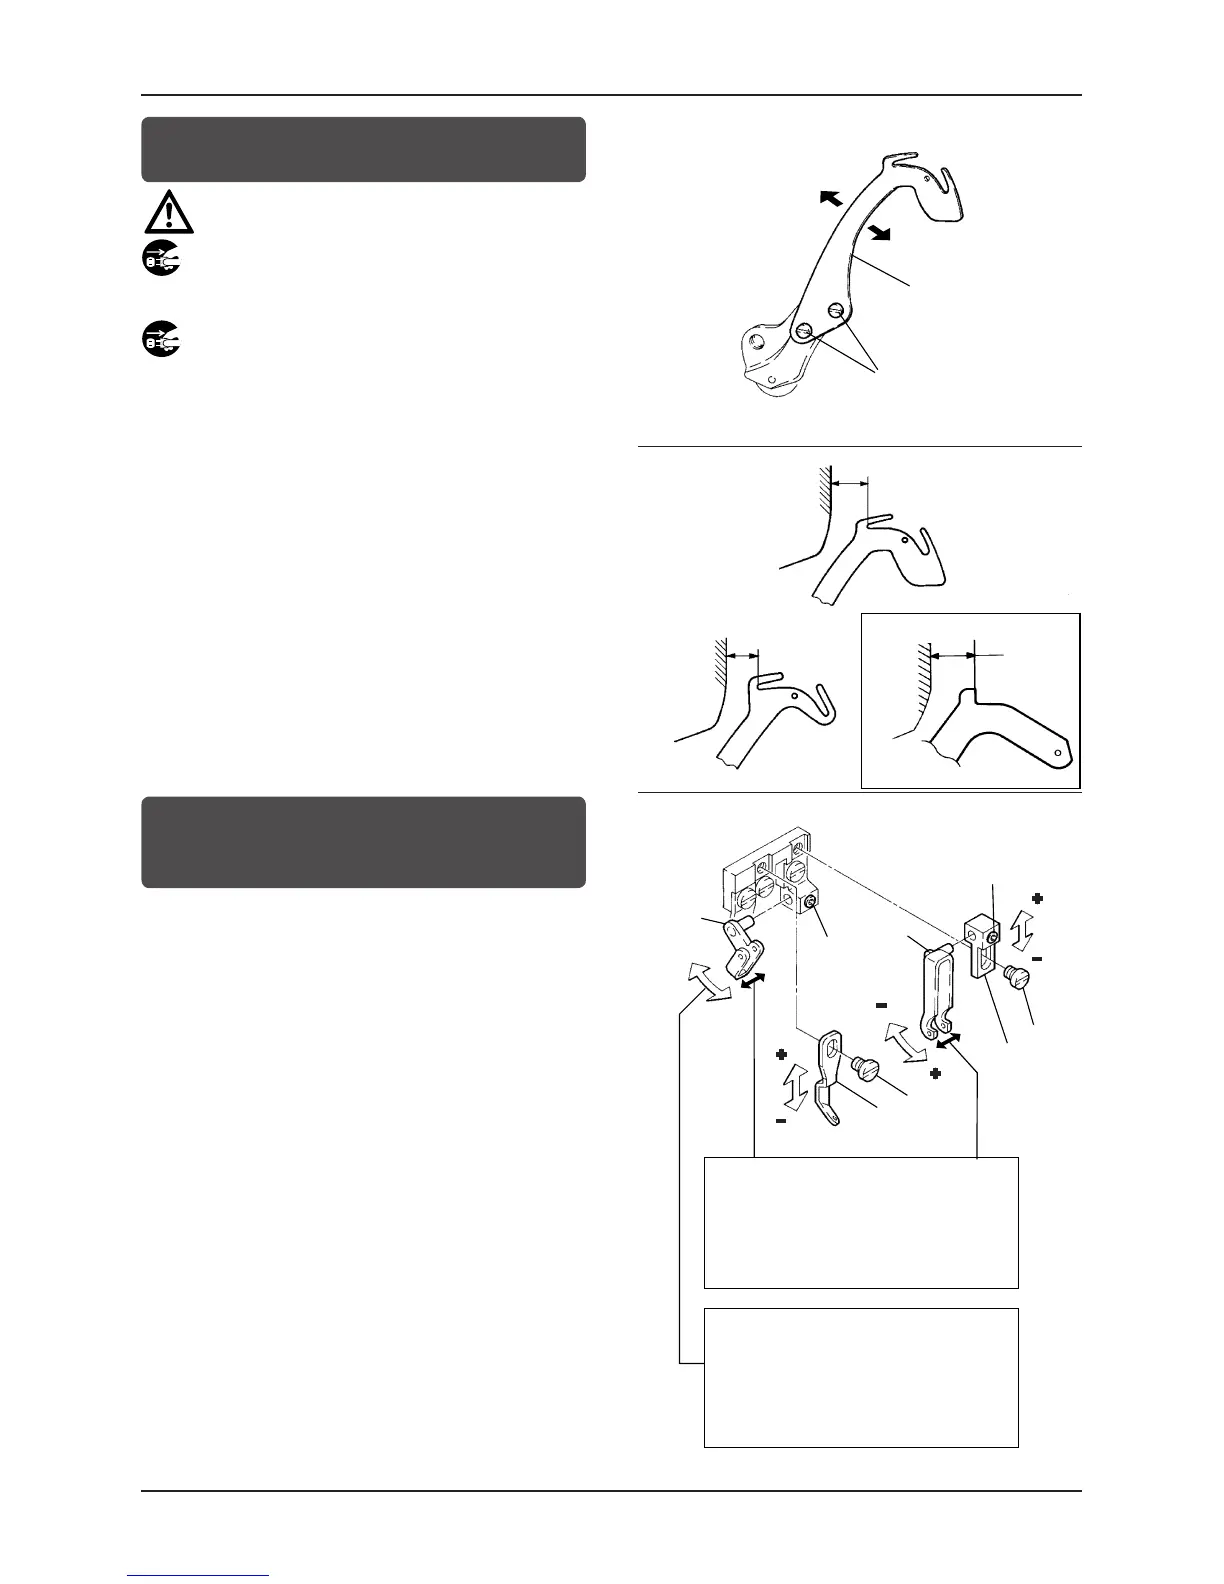
Positioning and adjusting the needle thread take-up
CAUTION
Always turn off the power, unplug the machine and then
authorized technicians are allowed to adjust the needle thread
take-up.
1
2
When needle thread take-up
1
is at the bottom of its travel, adjust
the distance from the front of the arm head to the needle thread
take-up. To make this adjustment, loosen screws
2
.
Positioning the thread guides / Adjusting the amount of
thread to be supplied from the needle thread take-up
The location of each needle thread guide varies with types of
machines. When the needle thread take-up is at the bottom and the
top of its travel, position each needle thread guide according to the
machine being used.
M832 シリーズ 針糸道調整基準
7
10
3
5
6
7
10
M832 Series Adjusting the needle thread guides
Loosen screws
7
to
10
. Adjust thread guides
3
to
5
, and needle
thread bracket
6
by moving them in the direction of the arrows.
To increase the amount of thread to be supplied, move each thread
guide, and needle thread bracket in the direction of
.
To decrease the amount of thread to be supplied, move each
thread guide, and needle thread bracket in the direction of
.
After this adjustment, tighten screws 7 to 10.
45
Adjust thread guides 4 and 5 left or right so
that the needle thread take-up is centered
between the two prongs of each thread
guide.
4 2
If stitches are improperly formed by quick
release of the needle thread from the looper
in double chainstitching, adjust thread
guide 4 by moving it back and forth.
( )
( )
( )
( )
( )
( )
3
10
9
8
7
6
5
4