5-6 DA80F/DA95F AddressRight™ Printers Service Manual (SV61962 Rev. A)
5 • Removal and Replacement
DA80F (WF81) Parts Removal
5.4 Encoder
Assembly
1. Remove the rear cover (see section 5.2), the main processor board (see
section 5.3), and the front bottom cover (see section 5.8).
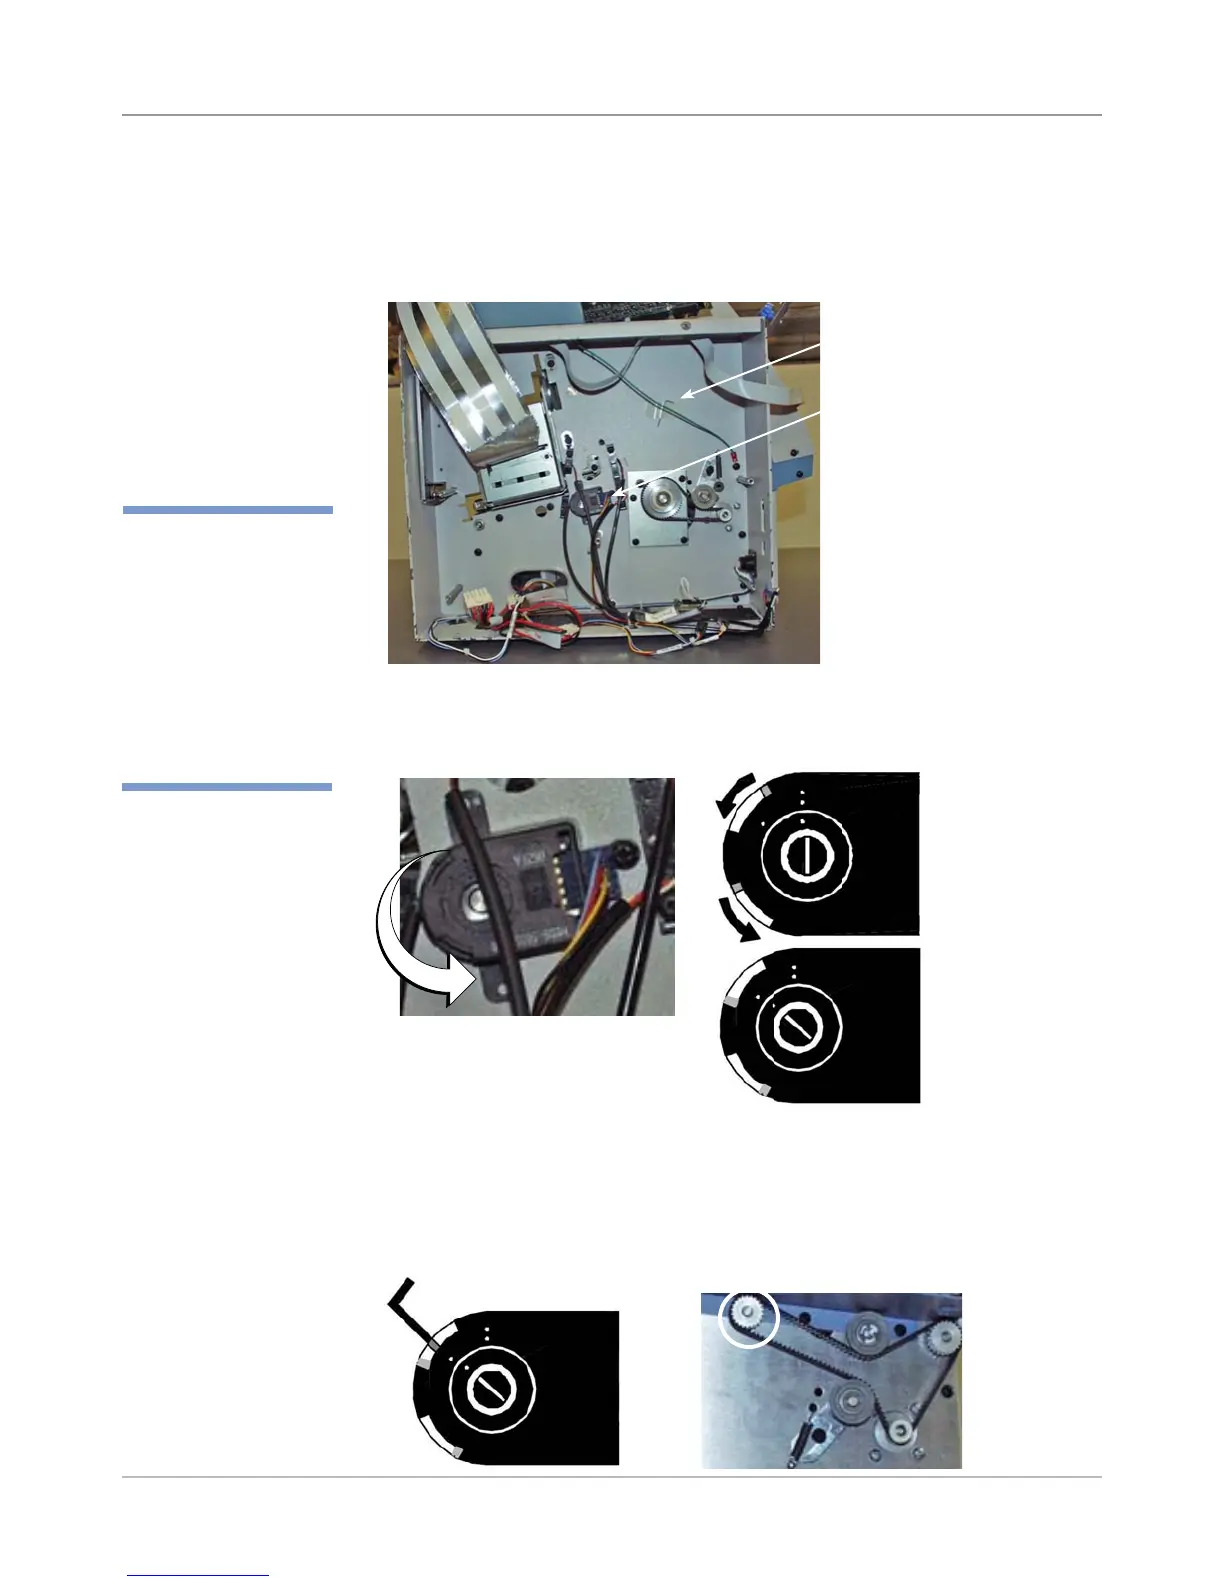
2. Remove encoder allen wrench taped inside the chassis.
3. Use a screwdriver to turn the encoder disc lock screw counter-clockwise
from two-dot stop (locked position) to one-dot stop (unlocked). The screw
recesses and exposes the hole where the allen wrench goes in on top.
Two Dot Position
(Locked)
4. Insert encoder allen wrench into the exposed slot. Rotate the transport
roller pulley (on the non-operator side of the chassis which rotates the
encoder) until you feel the set screw hole. Wiggle the wrench until it is
seated. You may have to bias the of top of the wrench towards the en-
coder base to find the set screw while turning the shaft.
One Dot Position
(Unlocked, ex-
poses hole for
allen wrench)
Encoder Allen Wrench
Encoder
Insert Allen Wrench into
Exposed Hole
Transport
Roller Pulley
(circled)
✍
TIP: Make sure you
have the encoder
alignment bushing tool
(PN# WS71001) han-
dy when you remove
the encoder. You will
need this tool if you
wind up replacing the
encoder backing plate.