Planmeca Intra X-ray unit 21
STANDARD INSTALLATION TO A WALL
Installation manual
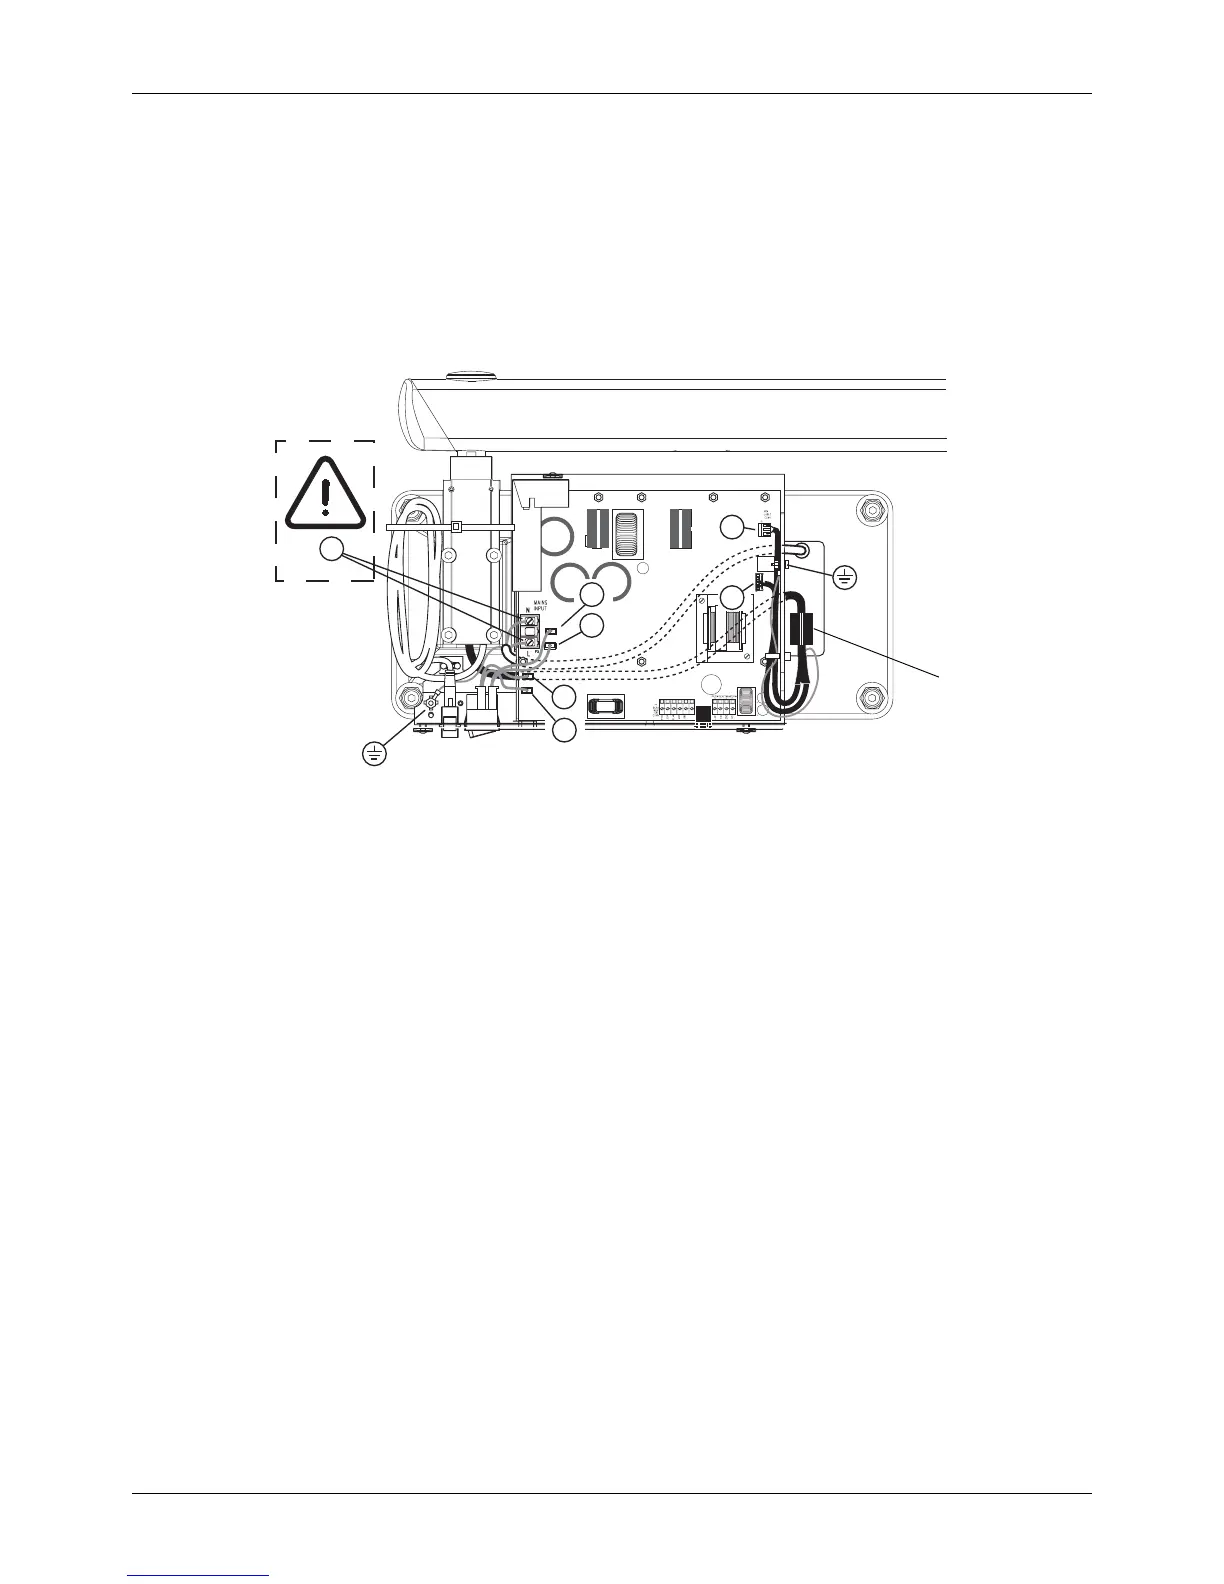
NOTE In case the X-ray units own power supply cable and the strain reliefer are
removed from the generator assembly (mains voltage is supplied via con-
cealed wiring), cover the opening with a plug supplied with the X-ray unit.
Connect the Dixi interconnection cable to the Panel mounted RJ45 adapter located beside the on/off
switch and secure the cable with the cable clamp. If needed, attach the cable to the wall adapter
bearing with a cable tie.
NOTE The Dixi digital intra X-ray system is installed according to the instructions
given in the Dixi digital X-ray systems installation manual.
I_tech_3APSU2.eps
P5
P3
P6
P8
P9
P7
P1
Snap-on ferrite
 Loading...


