Planmeca Intra X-ray unit 37
OTHER INSTALLATION ALTERNATIVES
Installation manual
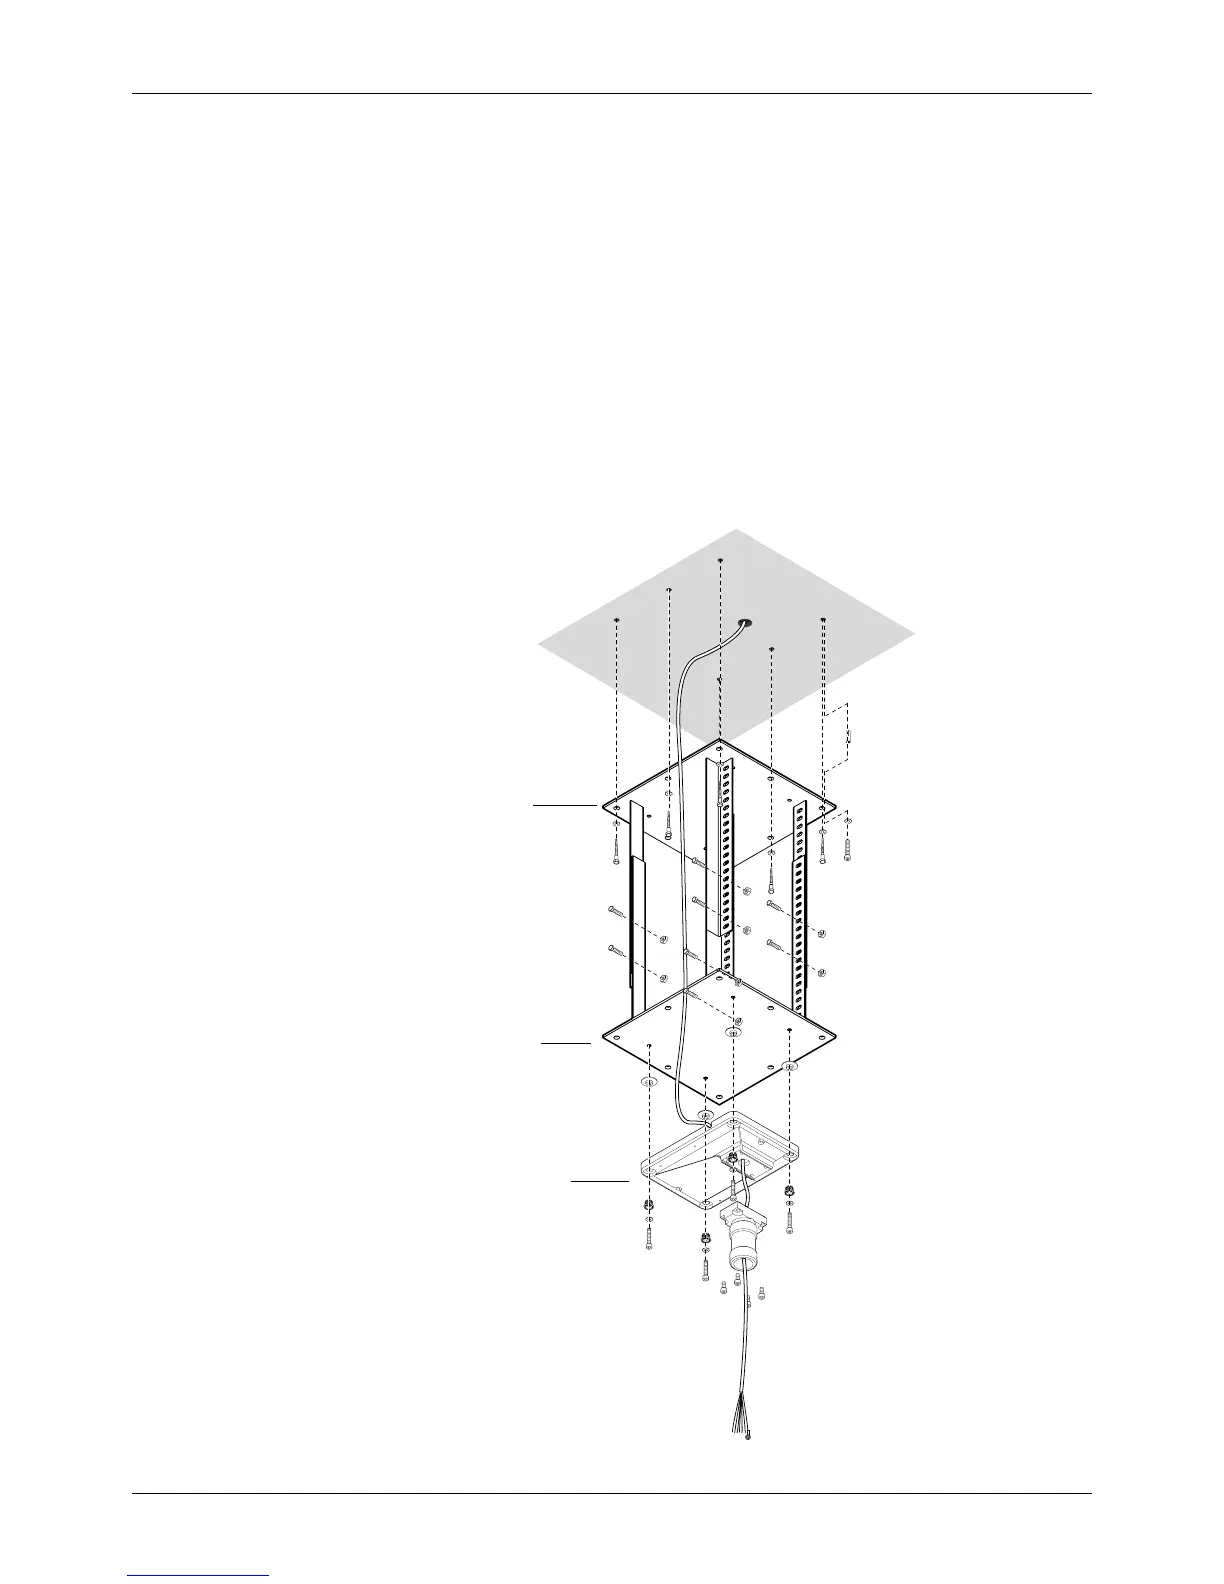
5.2 Adjustable ceiling adapter
Concrete ceiling: Mark the place of the adapter plate to the ceiling. Drill six ø10 mm (0.4 in.),
32...35 mm (1.25 in.) in depth, holes and place the expansion anchors into them. Insert the expan-
sion anchors into the holes. Attach the upper part of the adapter to the concrete ceiling with six
M8x30 DIN 912 screws and ø8.4/17 DIN 125 washers.
Wooden ceiling: Attach the upper part of the adapter to the wooden ceiling with six ø8x80 DIN 571
lag screws. Do not use the expansion anchors with wooden ceiling.
Adjust the height of the ceiling adapter so that the lower plate of the adapter is on a level with the
ceiling. Lock the lower part to the upper part with the eight M8x16 DIN 912 screws and M8 DIN 934
nuts.
Attach the standard adapter plate to the adjustable ceiling adapter with four M8x30 DIN 912 screws
and ø8.4/17 DIN 125 washers. Use the adjustment nuts and the adjustment plates with the screws
at each corner of the adapter plate. Continue the installation according to the instructions given in
section 5.1 “Ceiling installation” on page 25.
Intra ceil.adj.adapter 020597
Upper part of the adjustable adapter
Lower plate of the adjustable adapter
Adapter plate
 Loading...


