TABLE OF CONTENTS
TOC - 1
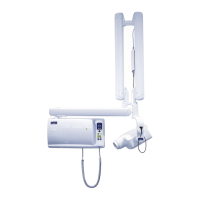
Installation manual
1 INTRODUCTION .................................................................................................................................... 1
2 PRE-INSTALLATION REQUIREMENTS ..................................................................................................... 2
2.1 Environmental requirements ........................................................................................................ 2
Wall construction ......................................................................................................................... 2
Temperature & humidity .............................................................................................................. 2
2.2 Electrical requirements ................................................................................................................ 2
Mains voltage ............................................................................................................................... 2
Mains frequency .......................................................................................................................... 2
Internal mains fuse ratings ........................................................................................................... 3
External mains fuse recommendation ......................................................................................... 3
Grounding .................................................................................................................................... 3
Power consumption ..................................................................................................................... 3
3 INSTALLATION POSSIBILITIES ................................................................................................................ 4
3.1 Mounting alternatives ................................................................................................................... 4
Standard wall mounting in treatment room (see section 4 “STANDARD INSTALLATION
TO A WALL” on page 11) ............................................................................................................ 4
Wall mounting with remote control in treatment room (see section 7 “REMOTE
CONTROL PANEL INSTALLATION” on page 48) ...................................................................... 5
Ceiling mounting in treatment room (see section 5.1 “Ceiling installation” on page 25) .............. 6
Dental unit mounting in treatment room (only Planmeca Compact dental unit)
(see Planmeca Compact installation manual) ............................................................................. 7
X-ray room with generator box/control panel outside the room (see sections
7 “REMOTE CONTROL PANEL INSTALLATION” on page 48 and
5.3 “Single stud installation” on page 38) .................................................................................... 8
3.2 Control panel assembling alternatives ......................................................................................... 9
Standard assembly (see section 4 “STANDARD INSTALLATION TO A WALL” on
page 11) ...................................................................................................................................... 9
Remote assembly (see section 7 “REMOTE CONTROL PANEL INSTALLATION” on
page 48) ...................................................................................................................................... 9
Remote assembly with generator box (see section 6 “ATTACHING THE GENERATOR
BOX WITHOUT THE ADAPTER PLATE” on page 44) ............................................................... 9
Single stud assembly plate with control panel (see section 5.3 “Single stud installation”
on page 38) ............................................................................................................................... 10
Fixed control panel (contains a possibility to make “double exposure button” assembly)
(see section 8 “FIXED CONTROL PANEL INSTALLATION” on page 51) ................................ 10
4 STANDARD INSTALLATION TO A WALL .............................................................................................. 11
4.1 Attaching the standard adapter plate to wall .............................................................................. 11
Attaching alternative 1 (recommended for concrete or brick wall) ............................................. 12
Attaching alternative 2 (for wooden wall, not recommended for concrete wall) ......................... 14
4.2 Assembling the arm ................................................................................................................... 15
4.3 Changing the bracket arm movement area ............................................................................... 16
4.4 Mounting the arm ....................................................................................................................... 18
4.5 Installing the generator assembly .............................................................................................. 18
4.6 Connecting the cables ............................................................................................................... 20
Arm cable ................................................................................................................................... 20
Mains cable (concealed wiring) .................................................................................................20
4.7 Attaching the control panel holder to the generator housing ..................................................... 22
4.8 Mounting the generator housing ................................................................................................ 23
4.9 Connecting the control panel cable ........................................................................................... 24
5 OTHER INSTALLATION ALTERNATIVES ................................................................................................ 25
5.1 Ceiling installation ...................................................................................................................... 25
Concrete ceiling ......................................................................................................................... 25
 Loading...


