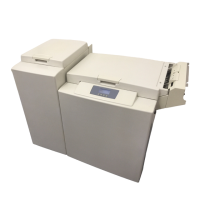
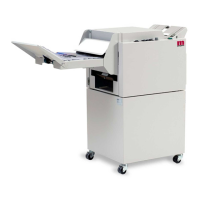
Bookletmaker SR 85 February 2001PAGE
PURPOSE
The purpose of the Self diagnostic system control (SDS) is to provide a functional check of
the components of the Bookletmaker SR 85.
PROCEDURE
NOTE1: The Interlock switch or the Interlock bypass switch has to be actuated and the four
DIP switches on the controller PCB has to be to the left (left when facing the PCB)
and the SR 85 has to be cleared from paper sheets in order to perform the SDS.
NOTE2: If the SDS is repeated, switch off the power, wait a few seconds, switch on the
power again to return the motors and solenoids to home position.
CAUTION1: Always handle the PCB and micro processor in accordance with electrostatic
discharge procedures (ESD). The PCB contains components that are sensitive
to ESD damage.
CAUTION2: Do not switch of the power during SDS. If there is a loss of power during SDS,
reset the EEPROM according to PRG 6.1.1
1. Switch off the power.
2. Press and hold the Auto/Manual button. Switch on the power. Release the Auto/Manual
button.
• First the Auto LED is flashing: The SR 85 is testing the EEPROM.
• Then the Manual LED is flashing: The SR 85 is testing the 24 voltage, the 36
voltage, motors and solenoids.
• At last all of the LEDs are lighting on the control panel: The test is complete.
3. Press the five buttons on the control panel one at the time.
• All of the LEDs should be switched off except the Staples LED.
4. Press the two buttons to the left on the control panel at the same time.
• The last LED on the control panel should be switched off.
If all of the LEDs are off, the SDS is complete, no errors found.
If any faults was detected during SDS, the last six LEDs will provide a fault code pattern.
Press the Auto/Manual button to display any other faults that were detected during the
SDS.
Refer to SDS Fault code table and locate the lighting pattern of the LEDs.
FIP 8.1 Self diagnostic system control (SDS)
8.1.1