Chapter 2: Installation
11
• SuperSwap 1600: Connect a SATA-to-SATA data cable (not included)
from one of the Port connectors on the FastTrak card to the Interface
connector on the SuperSwap. See Figures 1 and 2.
Repeat this action for each SuperSwap enclosure in your system.
4. Attach one end of the three-wire management cable (included with
SuperSwap) from the I2C/SMBus connector on the FastTrak card to the
Management connector on the back of the SuperSwap.
The SuperSwap enclosure does not use the LED pins on the FastTrak card.
Without a SuperSwap Enclosure
To connect the FastTrak card without a SuperSwap enclosure:
1. Install the physical drives into the open drive bays of your system.
2. Attach the SATA end of a SATA data to SFF-8482 data/power cable to one
of the Ports on the FastTrak card. See Figures 1 and 2.
3. Attach the SFF-8482 end of the SATA data to SFF-8482 data/power cable
to your SATA or SAS physical drive.
4. Attach the power end of the SATA data to SFF-8482 data/ power cable to
one of the connectors on your power supply.
5. Repeat steps 2 though 4 for all or your physical drives.
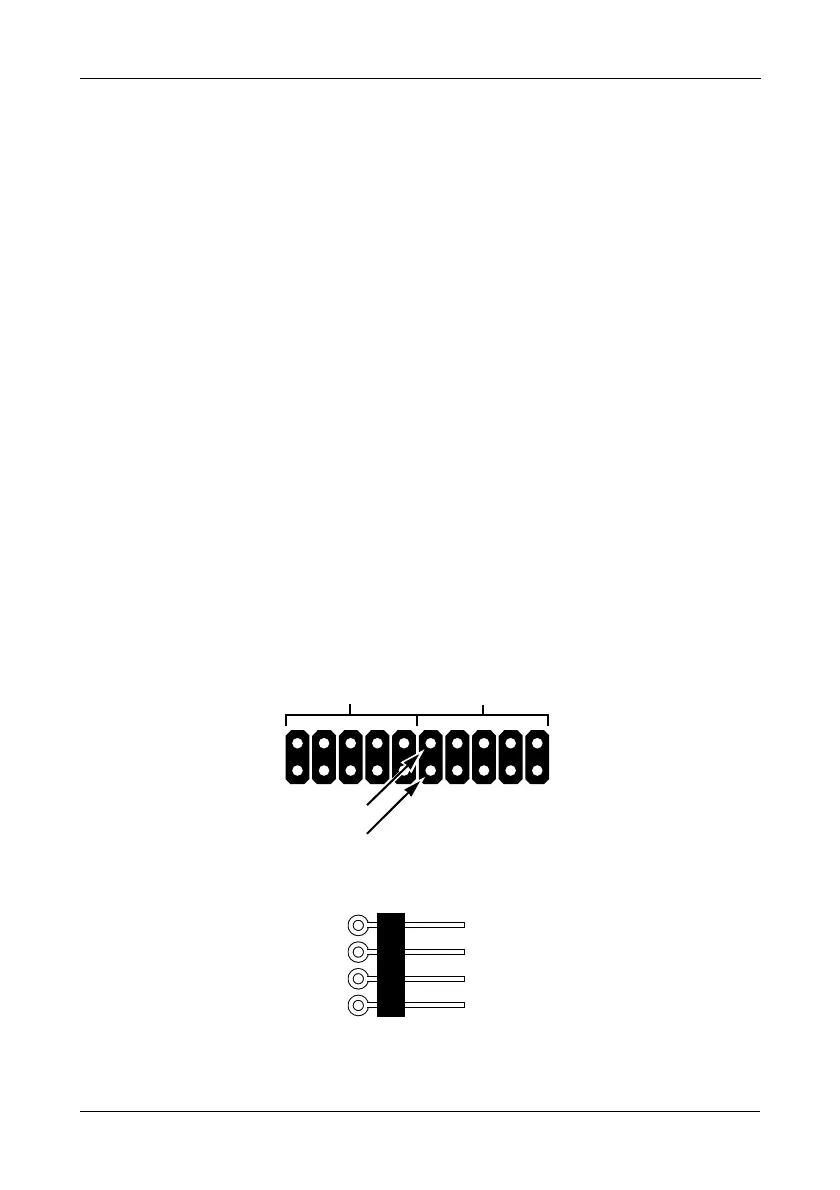
6. Optional. To connect your LEDs, follow one of the following diagrams:
• Individual LEDs.
• Aggregated or Global Activity LEDs.
Fault LEDs – CN7
(planned feature)
Activity LEDs – CN8
+
–
–
+
1234
Ground
Unused
Port/Channel
+
+
–
–
 Loading...