Matrix 832 / 832+ / 424
Page 14 RINS428-5
Section 3: Mounting Procedure
3.1 Mounting Procedure for Matrix – Plastic & Metal Case
The following steps illustrate basic mounting procedure for matrix plastic & metal case.
(See section 12 for complete wiring diagrams)
Step 1 - Remove the case lid from the matrix panel and check all parts and components are in place.
Step 2 - Decide where the matrix panel will be situated. The matrix panel may be housed in the loft or
different rooms in the premises. A discrete and concealed place is advisable, as only the Matrix keypads need
to be seen.
Step 3 - Secure the matrix panel to a sturdy and stable surface, using the mounting screws provided. First
mark the wall where the panel is to be situated (using the mounting holes), drill holes in the wall, and fasten
the panel base to the wall using the screws supplied.
Step 4 - Before the panel base is completely secured to the wall feed cables for keypads / AC power supply /
and accessories through the cable entry holes as illustrated.
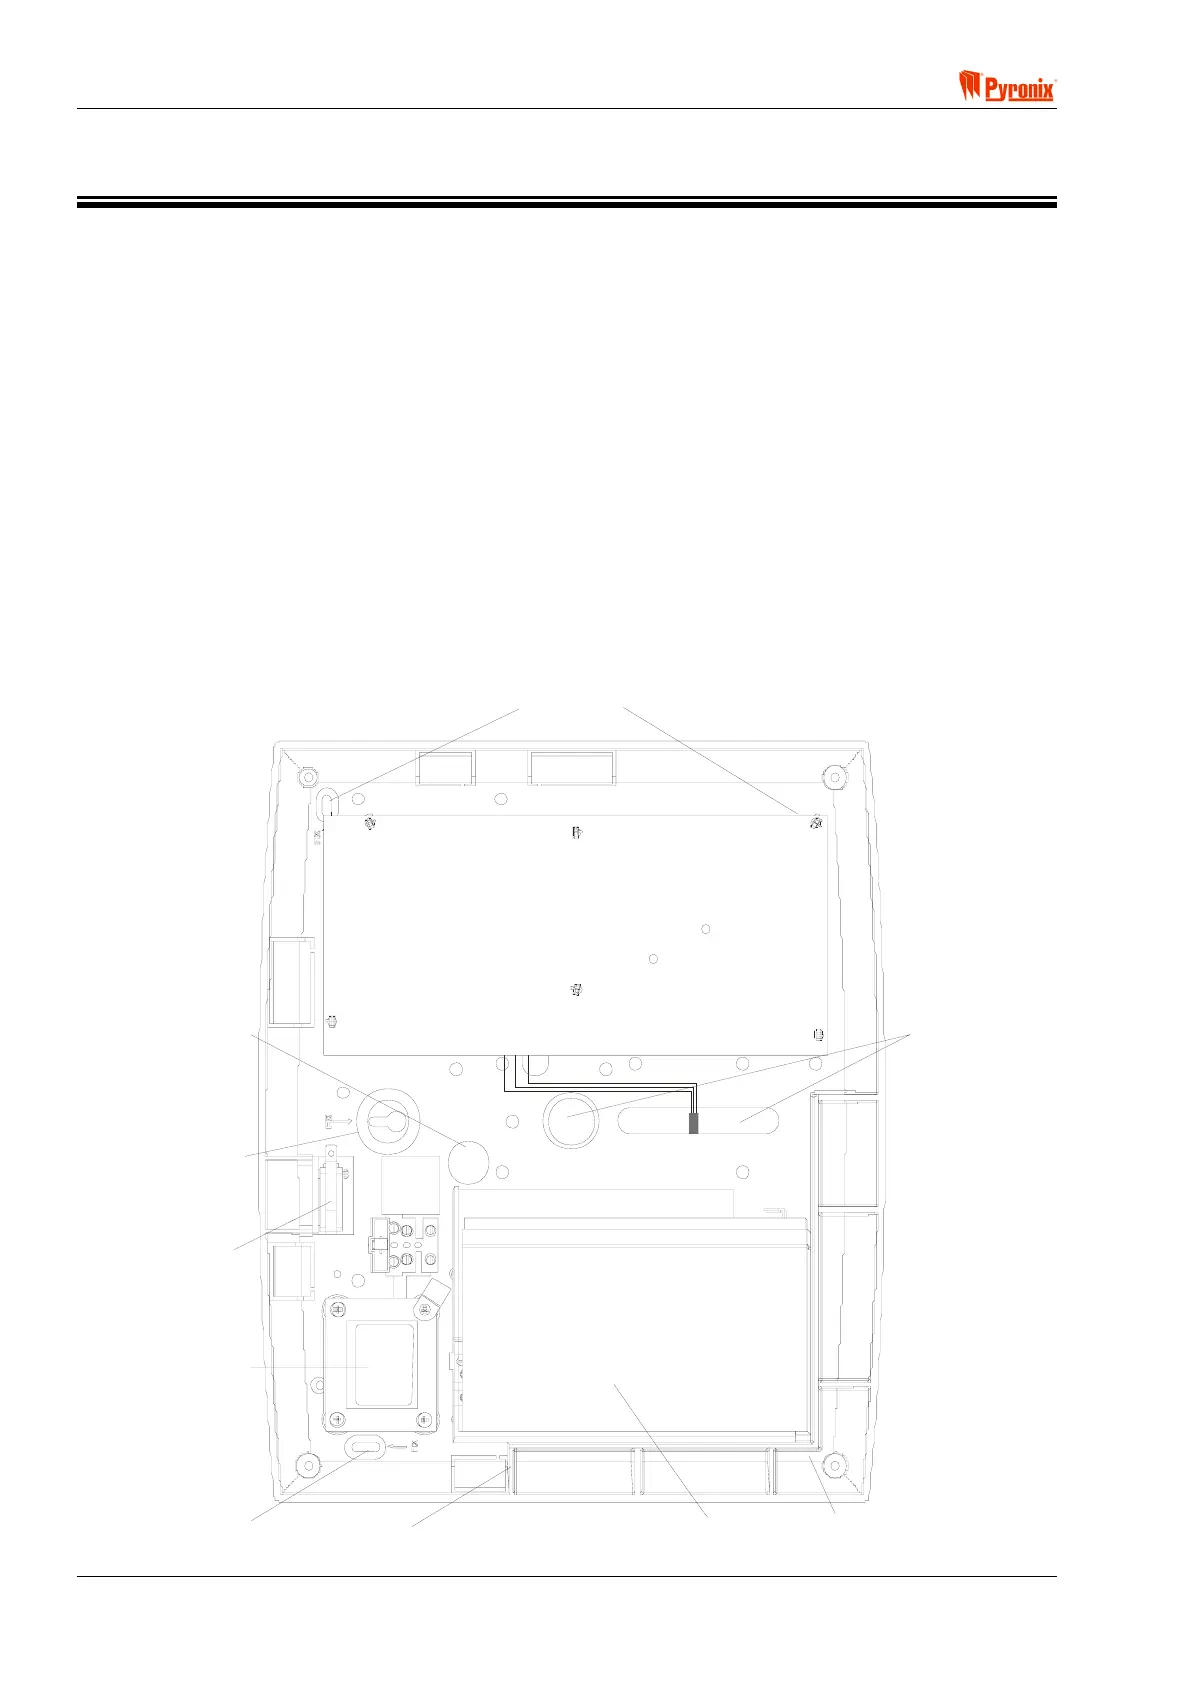
3.2 Panel Layout – Plastic Case
Battery
Support
Battery
Wall Fixing
Hole
Wall Fixing
Hole
Tamper
Switch
Wall Fixing
Holes
Transformer
Mains Cable
Entry Hole
Cable Entry
Hole
Wall Fixing
Hole