APPENDIX
131
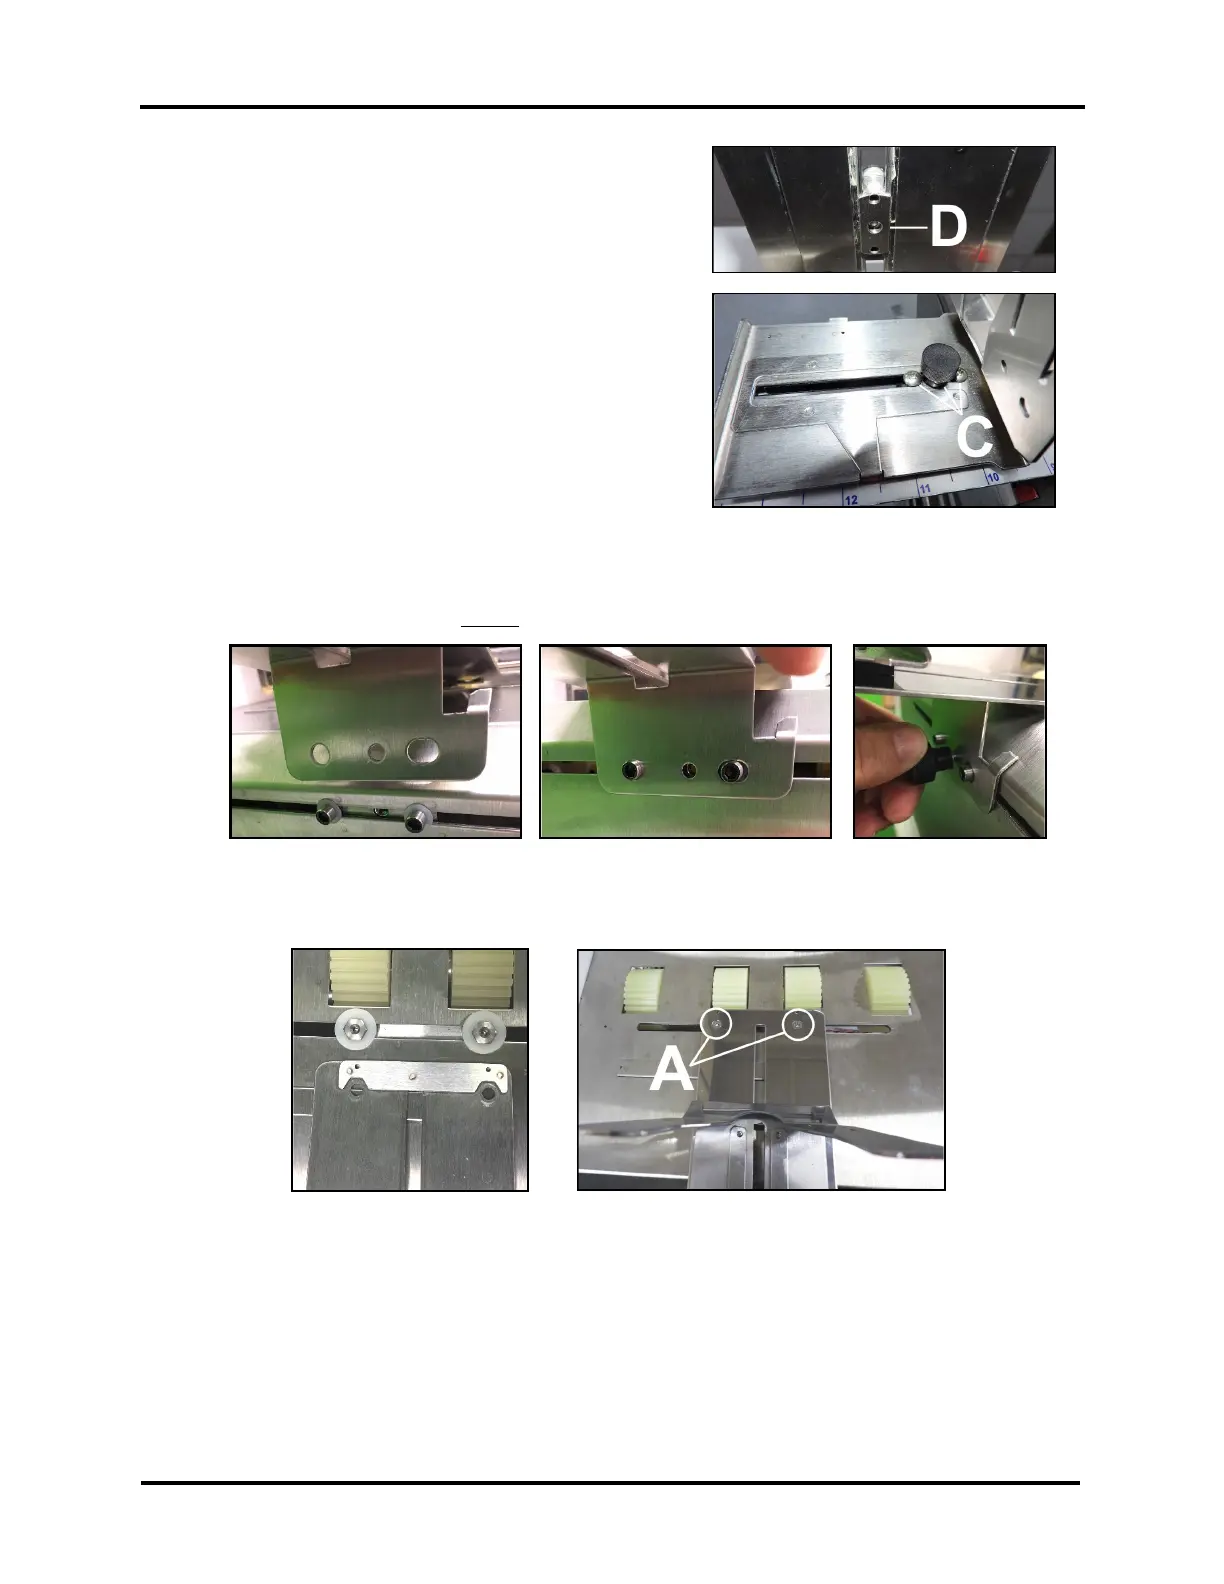
4. Install the Sled onto the Extended Rear Media Support
Guide.
a. Install the Support Nut [D] from below.
b. While holding the Support Nut [D] into position,
secure the Sled to the Support Nut using the
Locking Knob and (2) screws [C], that were
removed in Step 3.
5. Install the Extended Rear Media Support Guide/Sled Assembly onto the Printer.
a. Align the two outside holes, in the Rear Media Support Guide/Sled Assembly, over the posts
(Allen screws). Then loosely install the Locking Knob, removed in Step 2.
b. Install (2) screws [A], removed in Step 1, to secure the front of the Assembly to the Center Plate.
IMPORTANT: Be sure to align the Nuts on Mounting Block, with the cut-outs in the bottom of
the Guide, before installing and securing screws.
6. Finished. Adjust Extended Rear Media Support Guide/Sled as needed.
Tip: Once the Extended Rear Media Support Guide (47-116-06) is installed, there shouldn’t be any need to remove
it from the printer. You can store your “original” Rear Media Support Guide plate for possible future use.
NOTE: Part # 47-116-06 may also be referred to as “Long Media Support” in other documentation.