SECTION 2
INSTALLING PRINTER
33
Connecting Printer via Network (Ethernet Connection)
Use this procedure to install the Print Driver for a Network connection. If you plan to connect printer via USB,
please see section titled “Connecting Printer via USB”.
NOTE: Copy the 12-digit Hardware ID number listed on the Printer(s), on the label just below Ethernet port, so you
can identify Printer(s) in a later step.
1. Check that the printer is turned OFF. If not, power-down by pressing the Soft-Power button. Wait until
the blue light, on the Soft-Power button, goes out. Then it is safe to turn off the Main Power Switch.
2. Connect Ethernet Cable between an active network and the Printer’s Ethernet port.
3. Turn ON and Power-up the Printer. Plug in Printer. Turn ON Main Power Switch. Press Soft-Power
Button to Power-up the Print Engine.
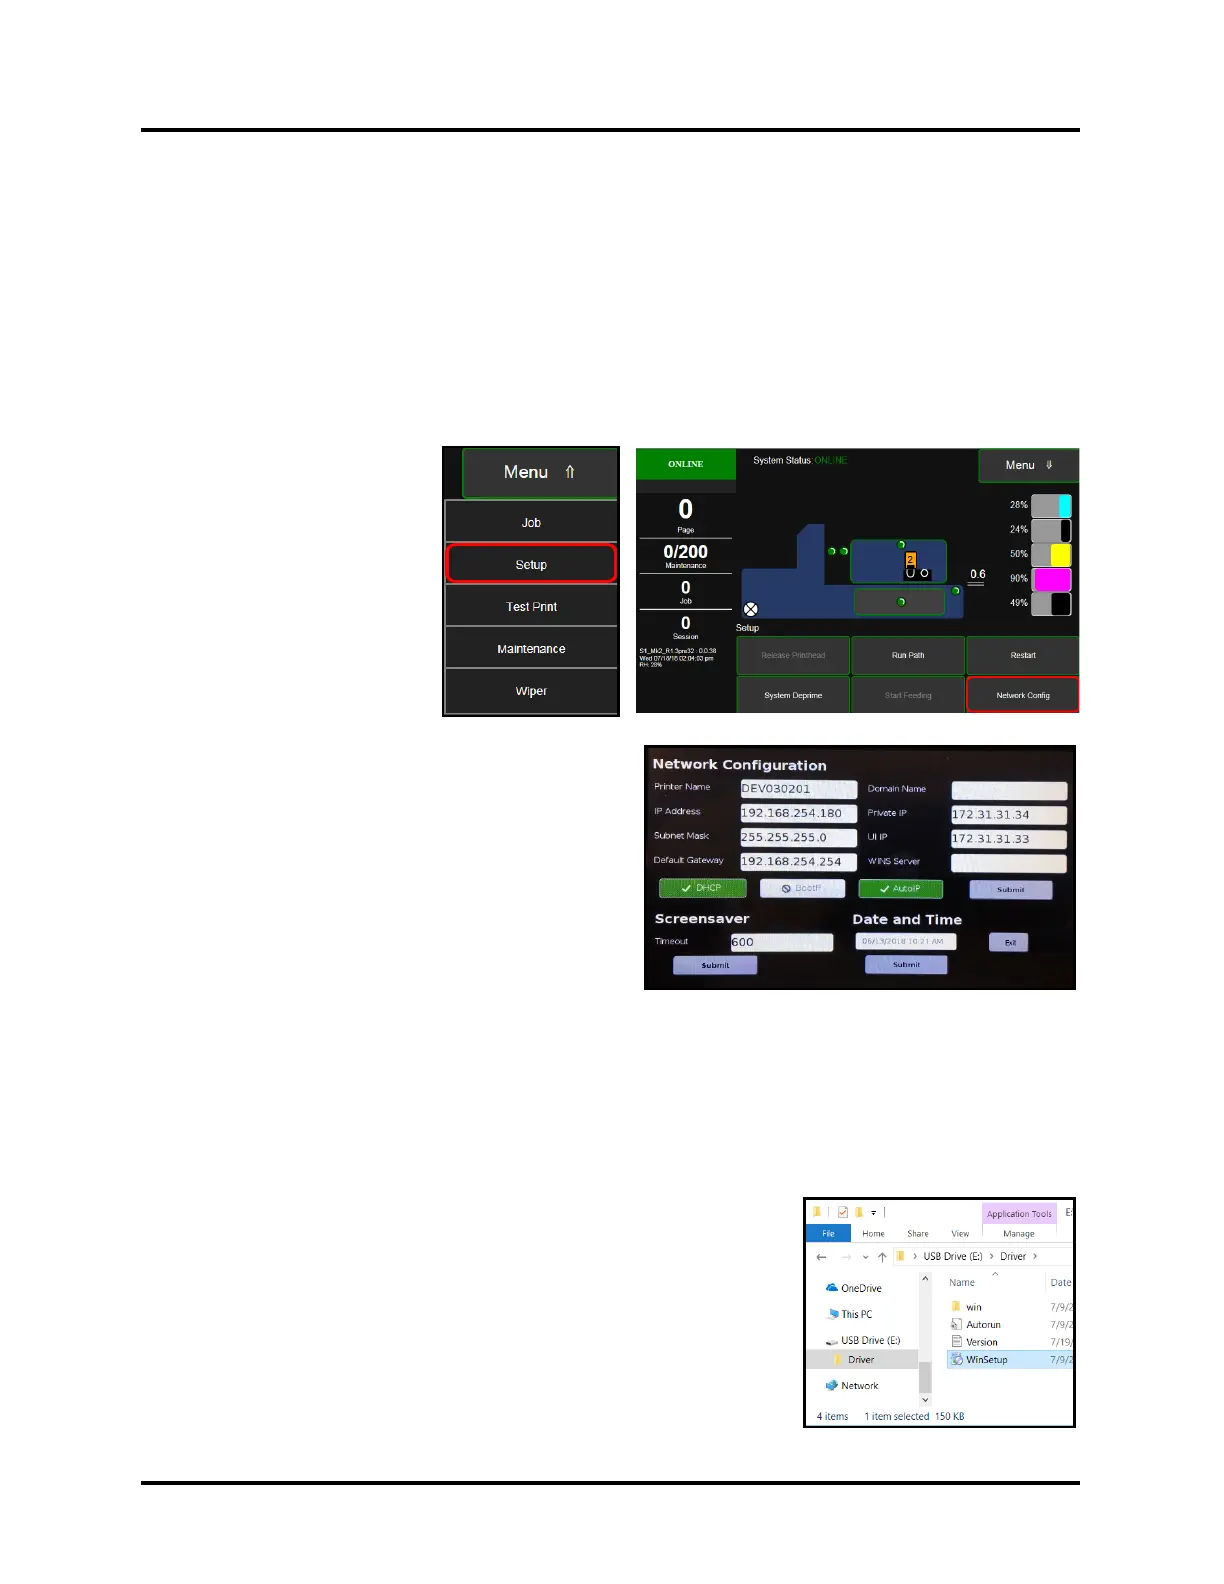
4. From the printer’s
Touchscreen, tap
“Menu” then tap
“Setup” from the drop-
down list.
5. Select “Network
Config” from the choices
provided at the bottom of
the screen.
6. The “Network
Configuration” screen
will be open.
Tip: By default, the printer is shipped with DHCP,
and Auto IP enabled. If your network uses these
features, it will automatically assign an IP address
to the printer during printer power-up. However,
we strongly recommend that you turn off DHCP
and Auto IP and use a “static” IP address. Using a
“static” IP address eliminates the possibility that
the IP address may be reassigned when the
printer’s power is cycled, causing loss of
communication.
Ask your IT support person to select/fill-in the necessary information (or you can get it from them)
then tap “Submit”.
NOTICE: SNMP configuration features are located in the Toolbox, Commands Help Menus. These
features can be accessed by a technician via the Toolbox, Service Menus.
7. Make a note of the IP Address entered/displayed.
Tap “Exit” to close the Network Configuration screen.
8. Connect USB Flash Drive, supplied with Printer, to USB port on your
computer.
9. Browse the USB Flash Drive. Locate folder labeled “Driver”. Open
“Driver” folder, locate and run WinSetup.exe.
Tip: For best results, Right-click and “run as administrator”.