SECTION 5
MAINTENANCE
97
Replacing Ink Tanks
Replace Ink Tanks when ink is low or runs out.
1. Look at the Touchscreen Display.
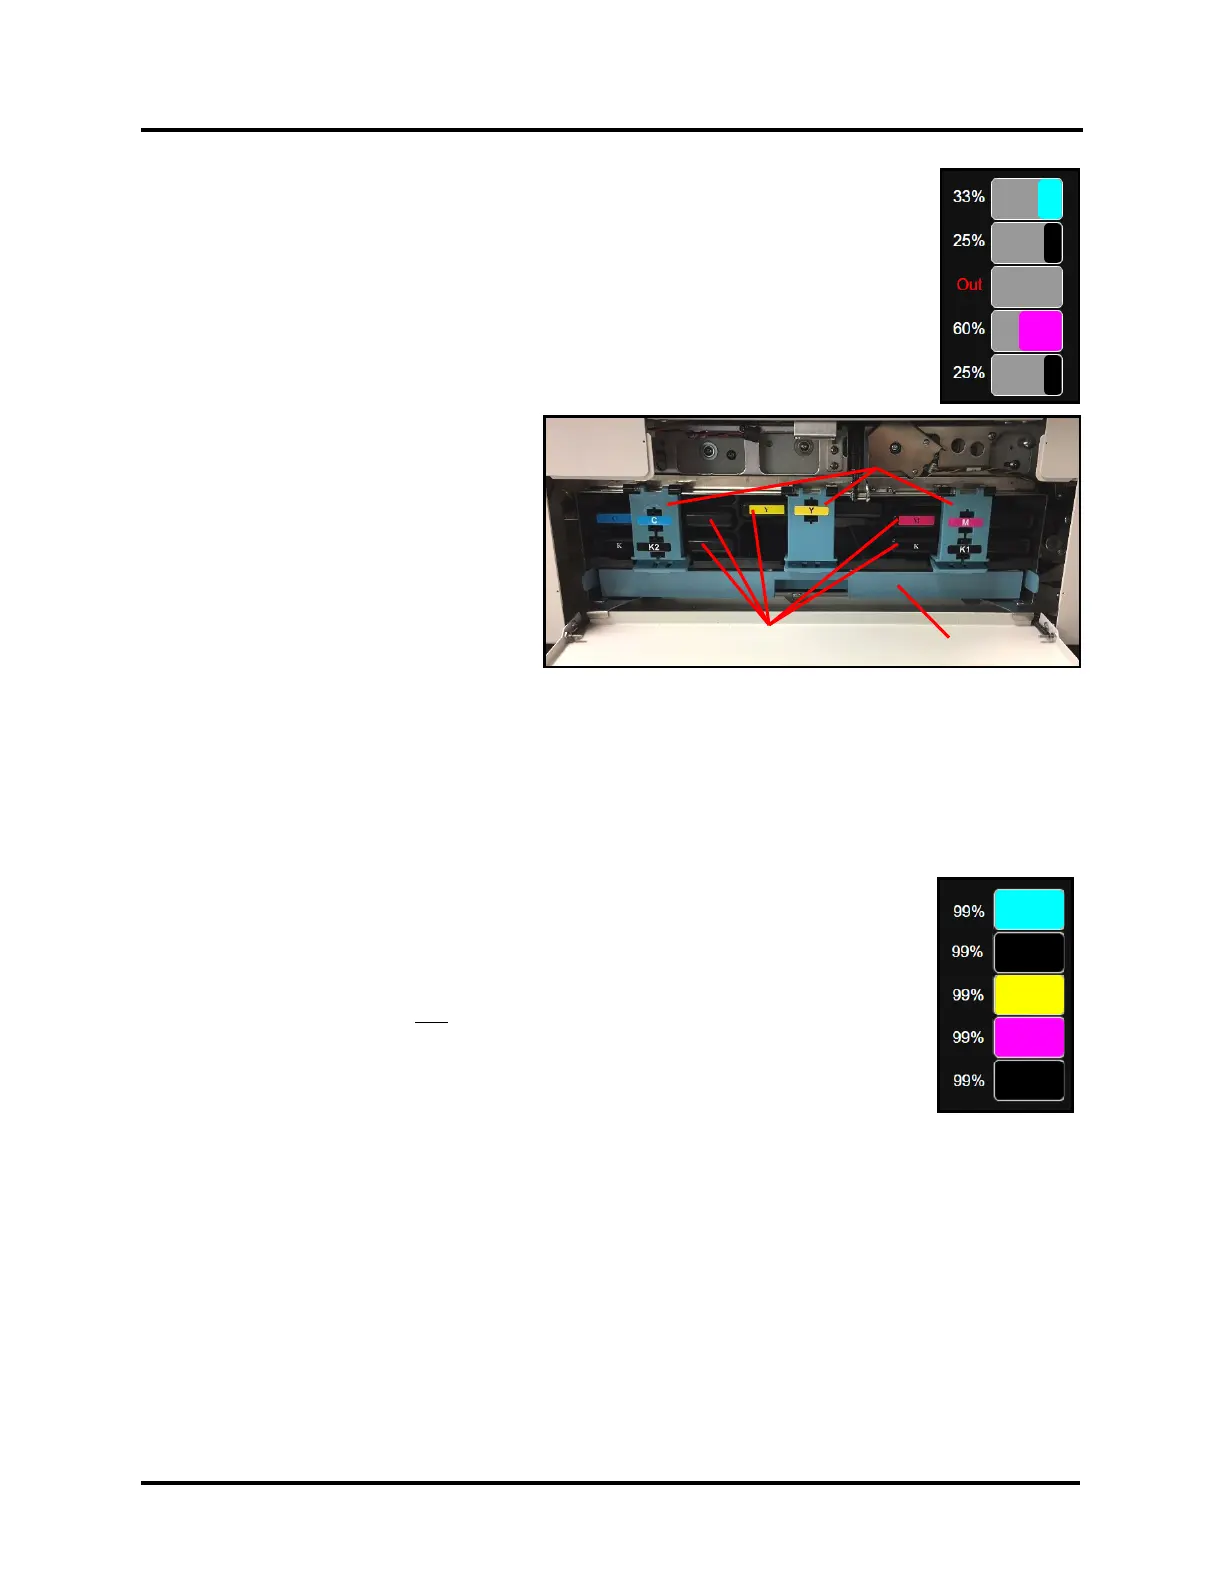
Ink Tank Status information appears on the right side of the Touchscreen.
Note that some or all of ink boxes may be low or empty.
2. Open Ink Tank Door (hinged at bottom).
NOTE: Opening the Ink Tank Door automatically disconnects Printer communication
with Ink Tanks, allowing safe Ink Tank removal and replacement.
3. Open Ink Tank Latches [A]. Pull up
on bottom of Latch to release and
swing Latch open (hinged at top).
4. Remove desired Ink Tank(s) [B]
from Printer.
Tip: This would be a good time to
inspect the Waste Ink Tray [C].
Verify that it is not full and that it is
securely installed. Latched into frame
at both sides.
5. Remove new Ink Tank(s) from packaging.
6. Insert Ink Tanks (label side up) into their appropriate color slots [B]
INSTALLATION TIP:
Make sure Ink Tanks seat properly.
Insert Ink Tank into appropriate color slot. Push Ink Tank forward firmly and then pull back about an inch.
Then push Ink Tank forward firmly again. This helps to ensure that Septum Needles penetrate seals on Ink
Tank.
7. Close and Lock Ink Tank Latches [A]. Make sure bottom of Latch is securely locked
at both sides.
8. Close the Ink Tank Door. Ink Tank colors should appear in Ink Tank Status area.
NOTE: Image shows all new Ink Tanks, which will display as 99%.
If ink colors do not fill-in after a few seconds, open the Ink Tank Door, remove and
reinstall the related Ink Tank(s).
NOTE: If Ink Tank is properly installed, but Ink Tank indicator still does not refresh, see
section titled “Cleaning Ink Tank Contacts & Prism”.