882 Video Test Instrument User Guide (Rev A.35) 301
6. Press the Content key and choose one of the audio images used for frequency
adjustment (for example, Audio_1f).
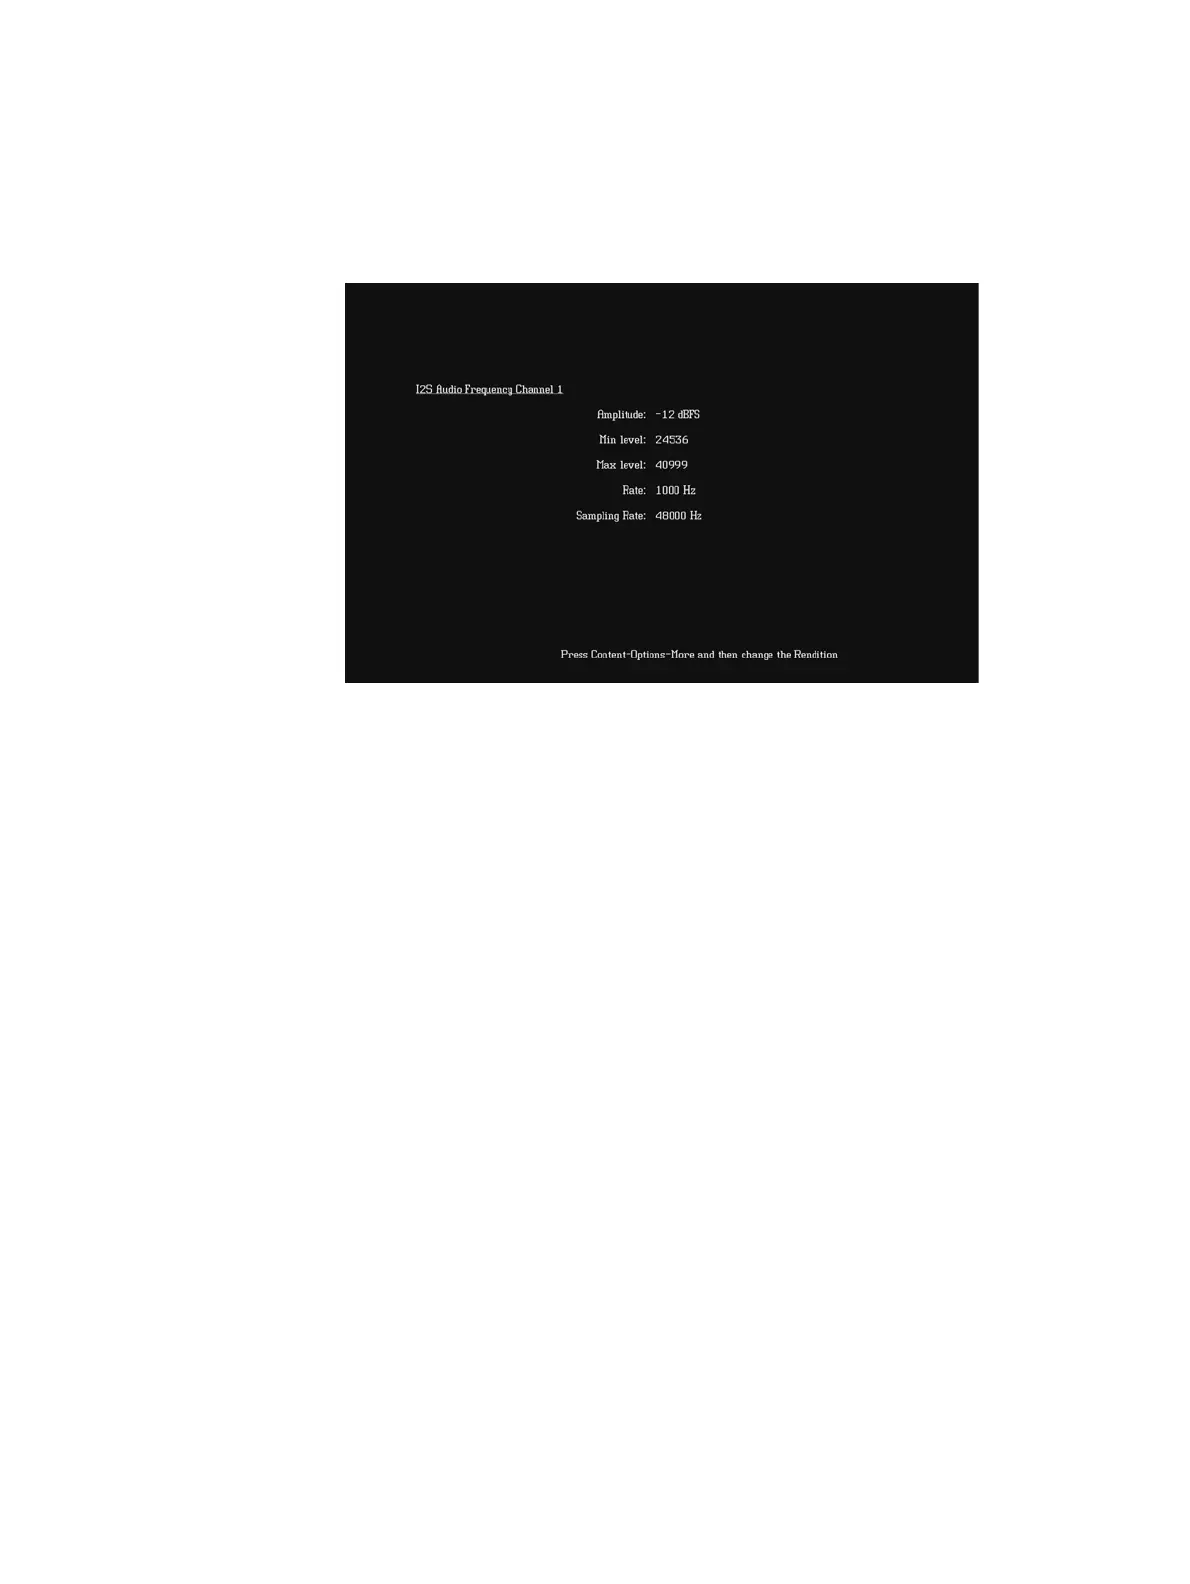
The image appears on the connected HDMI display. The image shows the current
settings for the HDMI audio output. For example, the Audio_1f image is shown below.
Alternatively, to select the audio image using the command line interface, enter the
following commands:
IMGP /tffs0/Library/Images // Set image path to 882 memory
IMGL AUDIO_1f // Loads the Audio_1f image
IMGU // Activates the Audio_1f image
7. To verify proper HDMI audio handling, check the following on the HDMI display:
• Audio is output from the proper channels (left, right, or both).
• When frequency is adjusted, the pitch is subsequently changed.
8. Press the Content key and choose the AudioRAT image to test the sampling rate.
The AudioRAT image appears and shows the current settings for the HDMI audio
output. Note that the sampling rate image (AudioRAT) adjusts the sampling rate for all
audio images.
Alternatively, to select the AudioRAT image using the command line interface, enter the
following commands:
IMGP /tffs0/Library/Images // Set image path to 882 memory
IMGL AUDIORAT // Loads the AudioRAT image
IMGU // Activates the AudioRAT image