The backrest angle is adjusted by altering the position of
the pin in the backrest mounting. The pin (1) must be
completely clicked into place in the hole pattern on both
sides, this gives you an angle adjustment of 8.5°.
Fit the red plastic pins into the unused holes. To reach a
smaller angle increment (3.5°), you open the allen key
screw (2) and re-set the screw into the second hole.
Please use the relevant torque force (see matrix) to
tighten the screw (2).
This gives you 12° change in the back angle. Then move
the pin (1) in the opposite direction to the next hole, which
gives you 12° - 8°= 3.5° change. (Fig. 4.21)
To reduce the play in the backrest, the nut (1) can be
released, then the optimal position can be set using the
set screw (2). Then re-tighten the nut (1). (Fig. 4.22).
CAUTION !
adjustment will be lost.
Release the backrest by pulling the cord. At the same
time, push it forward to fold it down. To return the backrest
to its original position, this must be pulled back as far as
possible, until it locks into place on both sides.
CAUTION !
When folding the backrest down, please make sure that
your fingers do not get caught.
Backrest
Fig. 4.21
1
2
Fig. 4.22
1
2
Fig. 4.20
4
5
6
Fig. 4.19
BALL
3
2
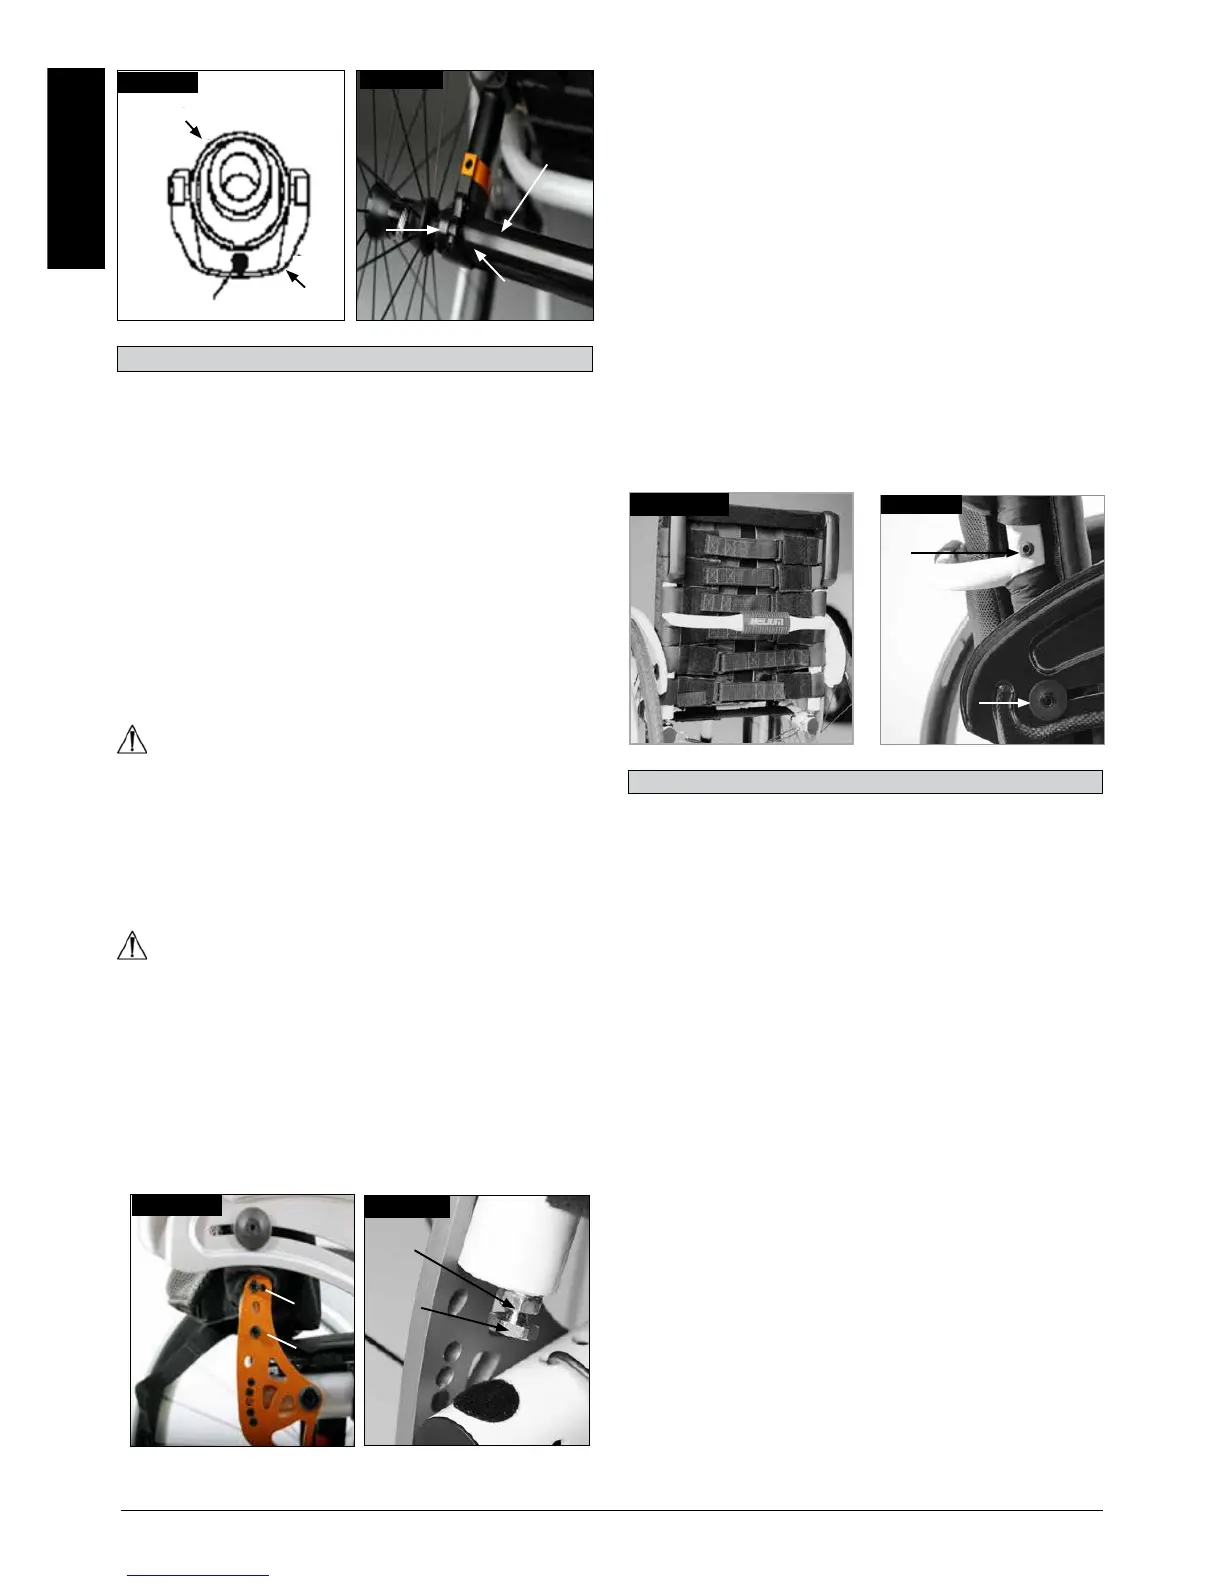
The adjustable back sling can be adjusted for tension by
using several straps.
The back sling upholstery can be accessed from the
inside via an opening and can be padded to suit individual
tastes (Fig. 4.23).
The backrest may be set to various back heights, in 2.5
cm steps. The adjustment ranges are 25- 30 cm, 30- 35
cm, 35- 40 cm and 40- 45 cm. Release the screws (1+2)
and set the backrest to the desired height. Tighten up the
screws again (see the page on torque). (Fig. 4.24).
Fig. 4.23
Fig. 4.24
1
1
(Fig.4.25-4.28).
1. Installation
a. Slide the outer armpost into the receiver mounted to
the wheelchair frame.
b. The armrest will automatically lock into place.
2.
a. Rotate height release lever (2) to second stop.
b. Slide armrest pad up or down to desired height.
c. Return lever to locked position against arm post.
d. Push arm pad (4) until upper arm post locks firmly into
place.
a. Pull lever 3 and lift entire arm.
a. Slide armrest back into receiver until arm latches in
place.
 Loading...