Chapter 9: Using the data application 217
=
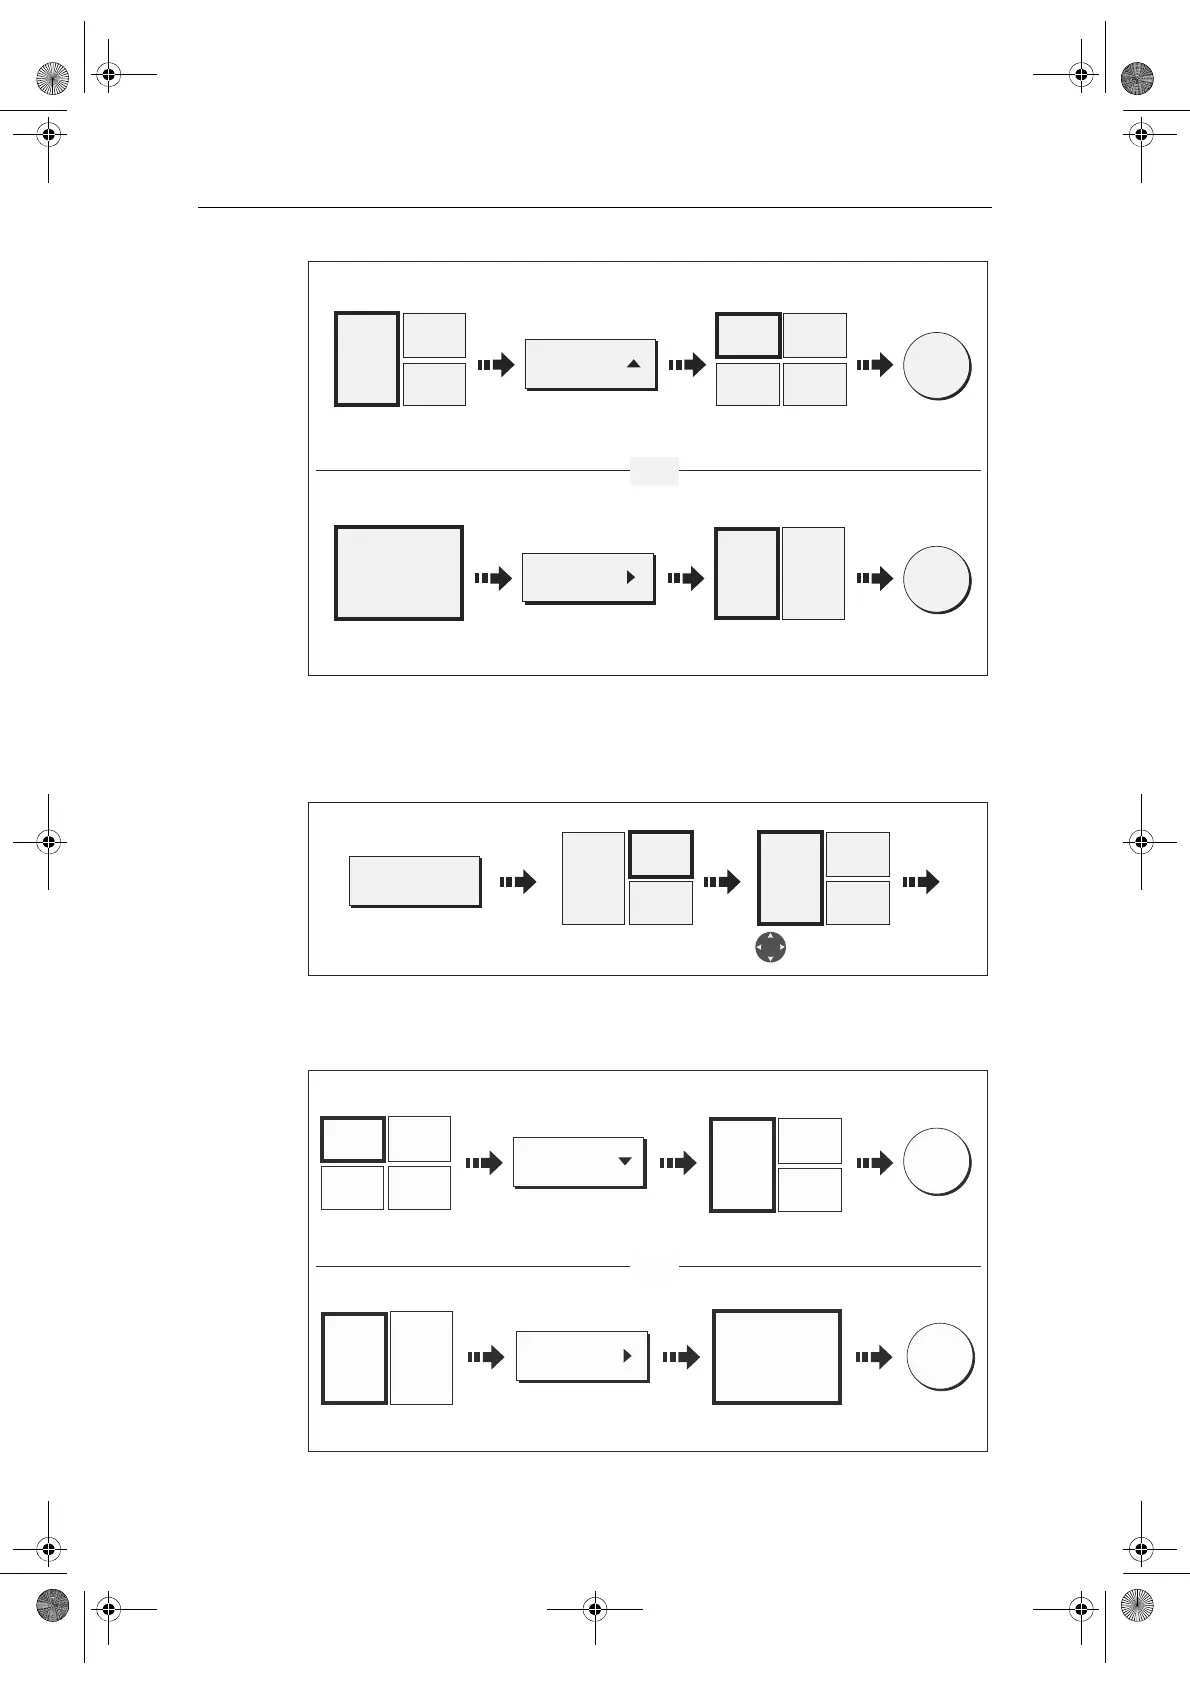
Merging a cell
Use the MERGE CELLS function to make a cell larger and therefore easier to see:
1. Select the relevant cell within the required panel:
The direction in which the selected cell can be merged is indicated on the soft key.
2. Merge the highlighted cell (horizontally or vertically):
D8730_1
OK
SPLIT CELL
Heading
296
0
T
Speed
20.0kt
Trip
13.85nm
Heading
296
0
T
Speed
20.0kt
Trip
13.85nm
Depth
48.5ft
Cell for splitting
selected
e.g.
e.g.
Cell splits horizontallySoft key indicates
direction of split
OK
SPLIT CELL
Heading
296
0
T
Heading
296
0
T
Speed
20.0kt
Cell for splitting
selected
e.g.
e.g.
Cell splits verticallySoft key indicates
direction of split
Split horizontally
Split vertically
OR
D9107_1
NAVIGATION
Press and hold
relevant soft key
e.g.
Active cell highlighted
Move highlight
to relevant cell
Heading
296
0
T
Speed
20.0kt
Trip
13.85nm
e.g.
Heading
296
0
T
Speed
20.0kt
Trip
13.85nm
e.g.
D8731_1
OK
MERGE CELLS
Heading
296
0
T
Speed
20.0kt
Trip
13.85nm
Heading
296
0
T
Speed
20.0kt
Trip
13.85nm
Depth
48.5ft
Cell for merging
selected
e.g.
e.g.
Cell merges
horizontally
Soft key indicates
direction of merge
OK
MERGE CELLS
Heading
296
0
T
Heading
296
0
T
Speed
20.0kt
Cell for merging
selected
e.g.
e.g.
Cell merge vertically
Soft key indicates
direction of merge
Merge horizontally
Merge vertically
OR
81244_4.book Page 217 Thursday, January 31, 2008 1:53 PM