RED RAVEN OPERATION GUIDE
COPYRIGHT © 2016 RED.COM, INC 955-0127_V6.3, REV-E | 63
CREATE AND EDIT OVERLAYS
1. Go to Menu > Settings > Display > Monitor Control > Overlay.
2. Select Create, or select an existing overlay and select Clone or Edit.
3. If creating a new overlay, enter a name for the overlay and select OK.
4. Select any of the following check boxes to add the corresponding guides to the overlay:
‒ Frame Guide
‒ Action Guide
‒ Title Guide
5. Select a button on the matrix to add a user interface element to that position on the matrix.
By default, the Magnify indicator (MI) is on the top left, the Record indicator (REC) is on the top right, the
Clip Name (CLIP) is on the bottom left, and the Timecode (TC) is on the bottom right.
6. Selecting one (1) of the buttons opens a new dialog that lets you choose a user interface element.
7. Select the Item that you want to add.
8. Select the Size of the item.
9. If adding a Custom Label (LBL), enter the Custom Text for that item.
10. Select Add to return to the previous screen.
11. Add all of the items to the overlay.
12. Select Create or Save.
The new overlay displays in the Camera list.
NOTE: Except for the Custom Label (LBL), you can only add each element once. If you add an element you have
already added to the overlay, the element moves to the new position.
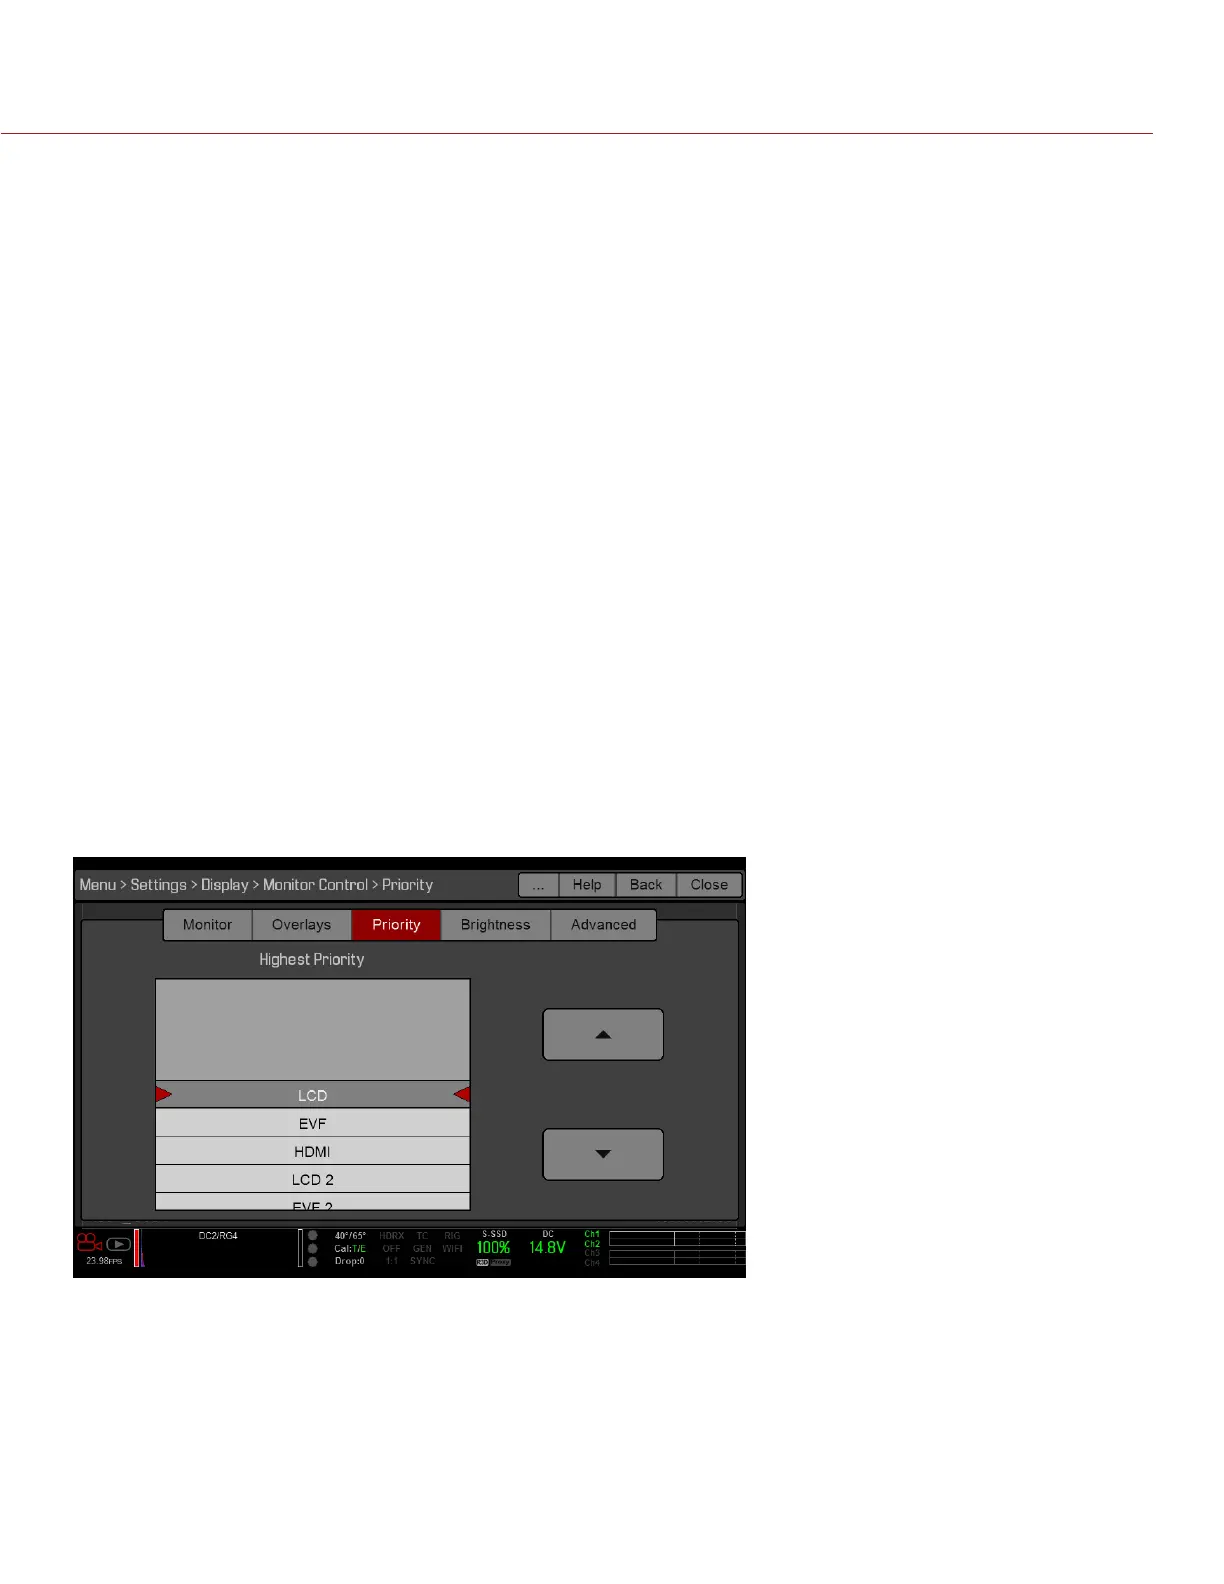
PRIORITY
The camera can only have one (1) control monitor for interacting with camera settings. The Priority tab determines
the order in which a monitor becomes the control monitor. If you plan on removing or adding monitors during a
shoot, set up the priority list ahead of time.
For a monitor to become the control monitor, the following must occur:
The monitor must be set to Overlay mode in the Monitor Control menu.
Each monitor that has higher priority on the list must be either detached or not set to Overlay mode.