6
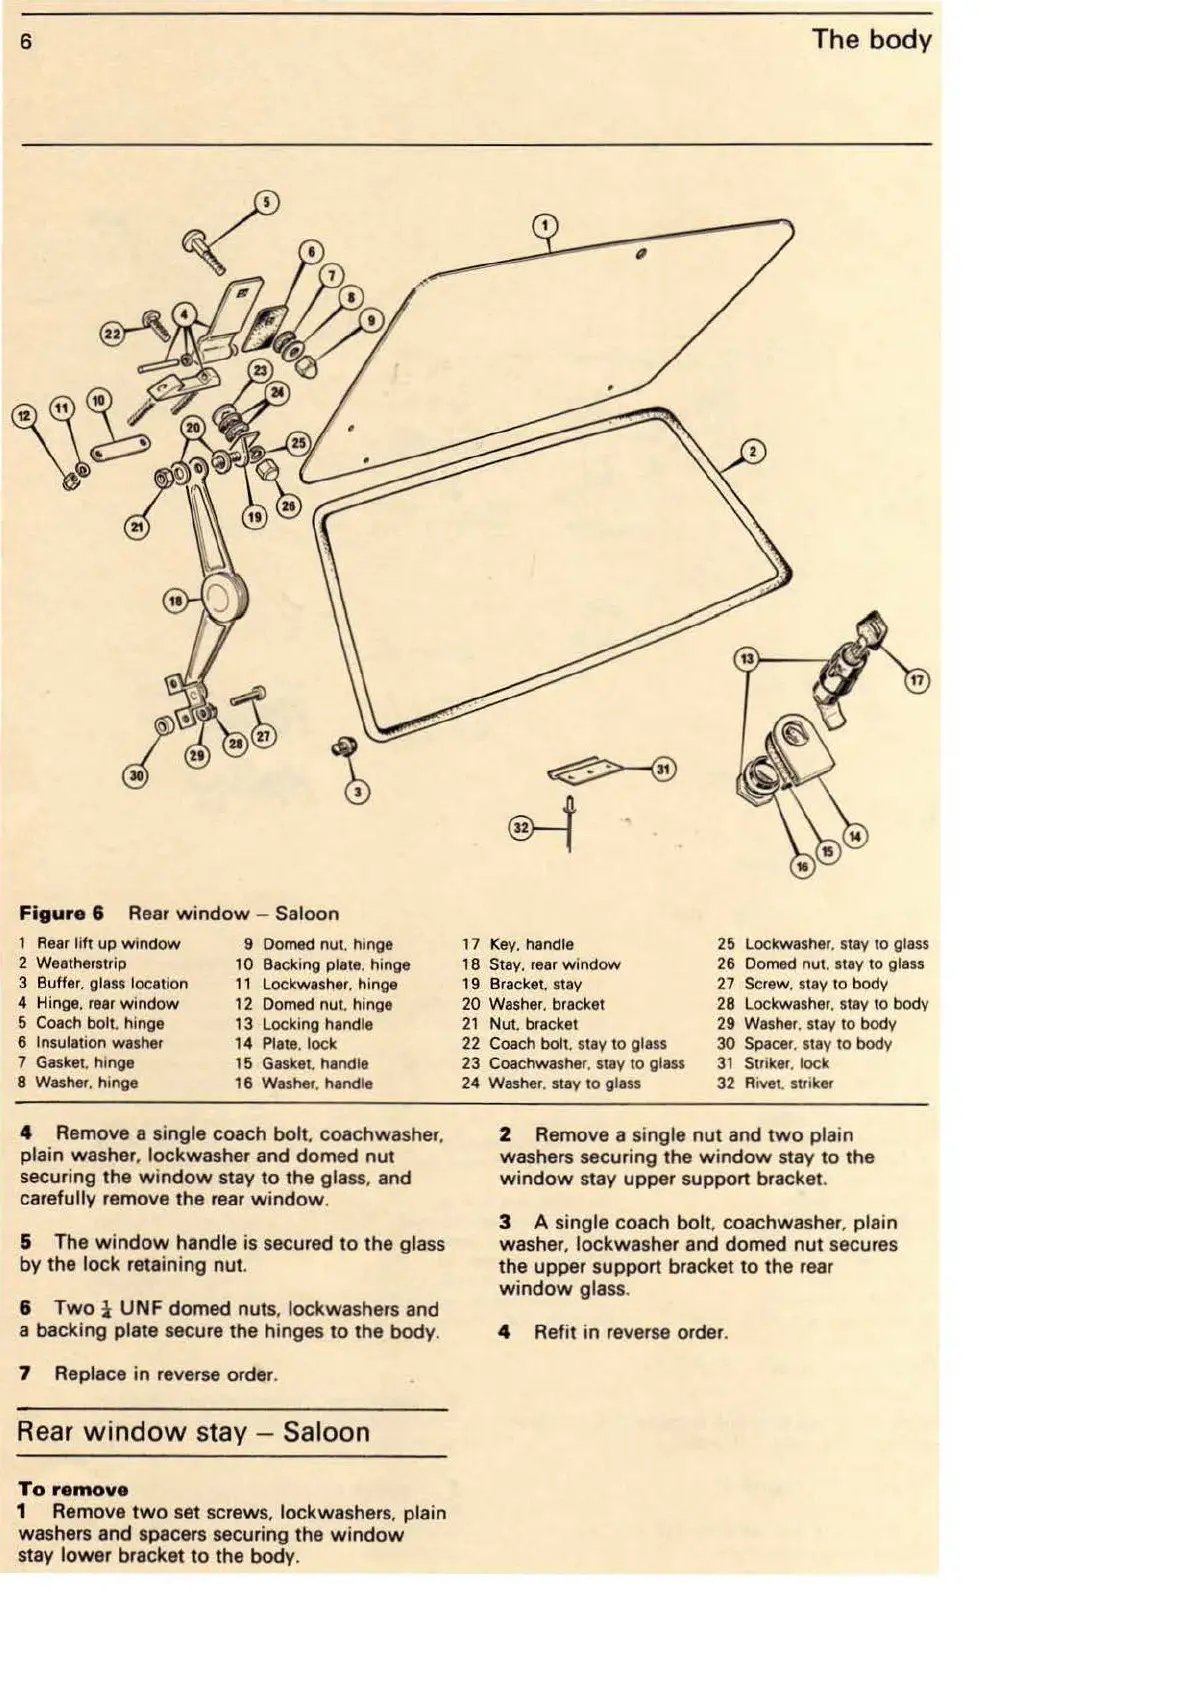
Figure
6
Rear
window
- Saloon
1
Rear
lift
up window
2 Weatherstrip
3 Buffer.
glass location
4 Hinge.
rear
window
5 Coach bolt. hinge
6
Insulation washer
7 Gasket. hinge
8
Washe
r. hinge
9 Domed nut. hi
nge
10 Backing plate. hinge
11
Lockwasher. hinge
12 Domed nut. hinge
13 Locking
handle
14 Plate. lock
15
Gaske
t. handle
16
Wa
sher. handle
4 Remove a single coach bolt. coachwasher,
plain washer, lockwasher and domed
nut
securing the
window
stay
to
the glass, and
carefully remove the
rear
window
.
5 The
window
handle is secured
to
the glass
by the lock retaining nut.
6
Two
i UNF domed nuts, lockwashers and
a backing plate secure the hinges
to
the body.
7 Replace in reverse order.
R
ea
r
window
stay - Saloon
To
remove
1 Remove
two
set screws. lockwashers. plain
washers and spacers securing the
window
stay lower bracket
to
the body.
17
Key
, handle
18 Stay, rear
window
19 Bracket. stay
20 Washer. bracket
21
Nut. bracket
22 Coach
bolt. stay to g
lass
23
Coa
chwasher. stay to g
la
ss
24
Washer. stay to gl
as
s
The
body
25 Lockwasher. s
ta
y to gla
ss
26 Domed nut. stay to glass
27 Screw. stay to body
28 Lockwasher. stay to body
29
Wa
s
her
. s
ta
y to body
30
Spa
cer.
st
ay to body
31
St
nk
er
. lock
32 Rivet. stnk
er
2 Remove a single nut and
two
plain
washers securing the
window
stay to the
window
stay upper support bracket.
3 A single coach
bolt, coachwasher, plain
washer, lockwasher and domed
nut
secures
the upper support bracket to the rear
window
glass.
4 Refit in reverse order.