The b
ody
Section Q
3 Three i UNF nuts, lockwashers, plain
washers and studs secure upper and lower
hi
nges
to
the door.
4 Replace in reverse order.
Rear
doo
r
lock
mechanism
To
re
m
ove
(see
Figu
re
3)
1 Remove
two
No
. 8 countersunk screws and
withdraw
door handle from lock mechanism.
2 Unscr
ew
six No. 8 countersunk
wood
screws and remove door lock.
3
If
it
is necessary
to
remove the dovetail
use
a 3·97mm
(~in)
dia. drill and then tap the
rivet shafts into the door.
4 The dovetail on the body is retained by four
rivets and should
be
removed using the method
above but
with
a 5·56mm b \ in) dia. drill.
5 To remove striker plate from body, first prise
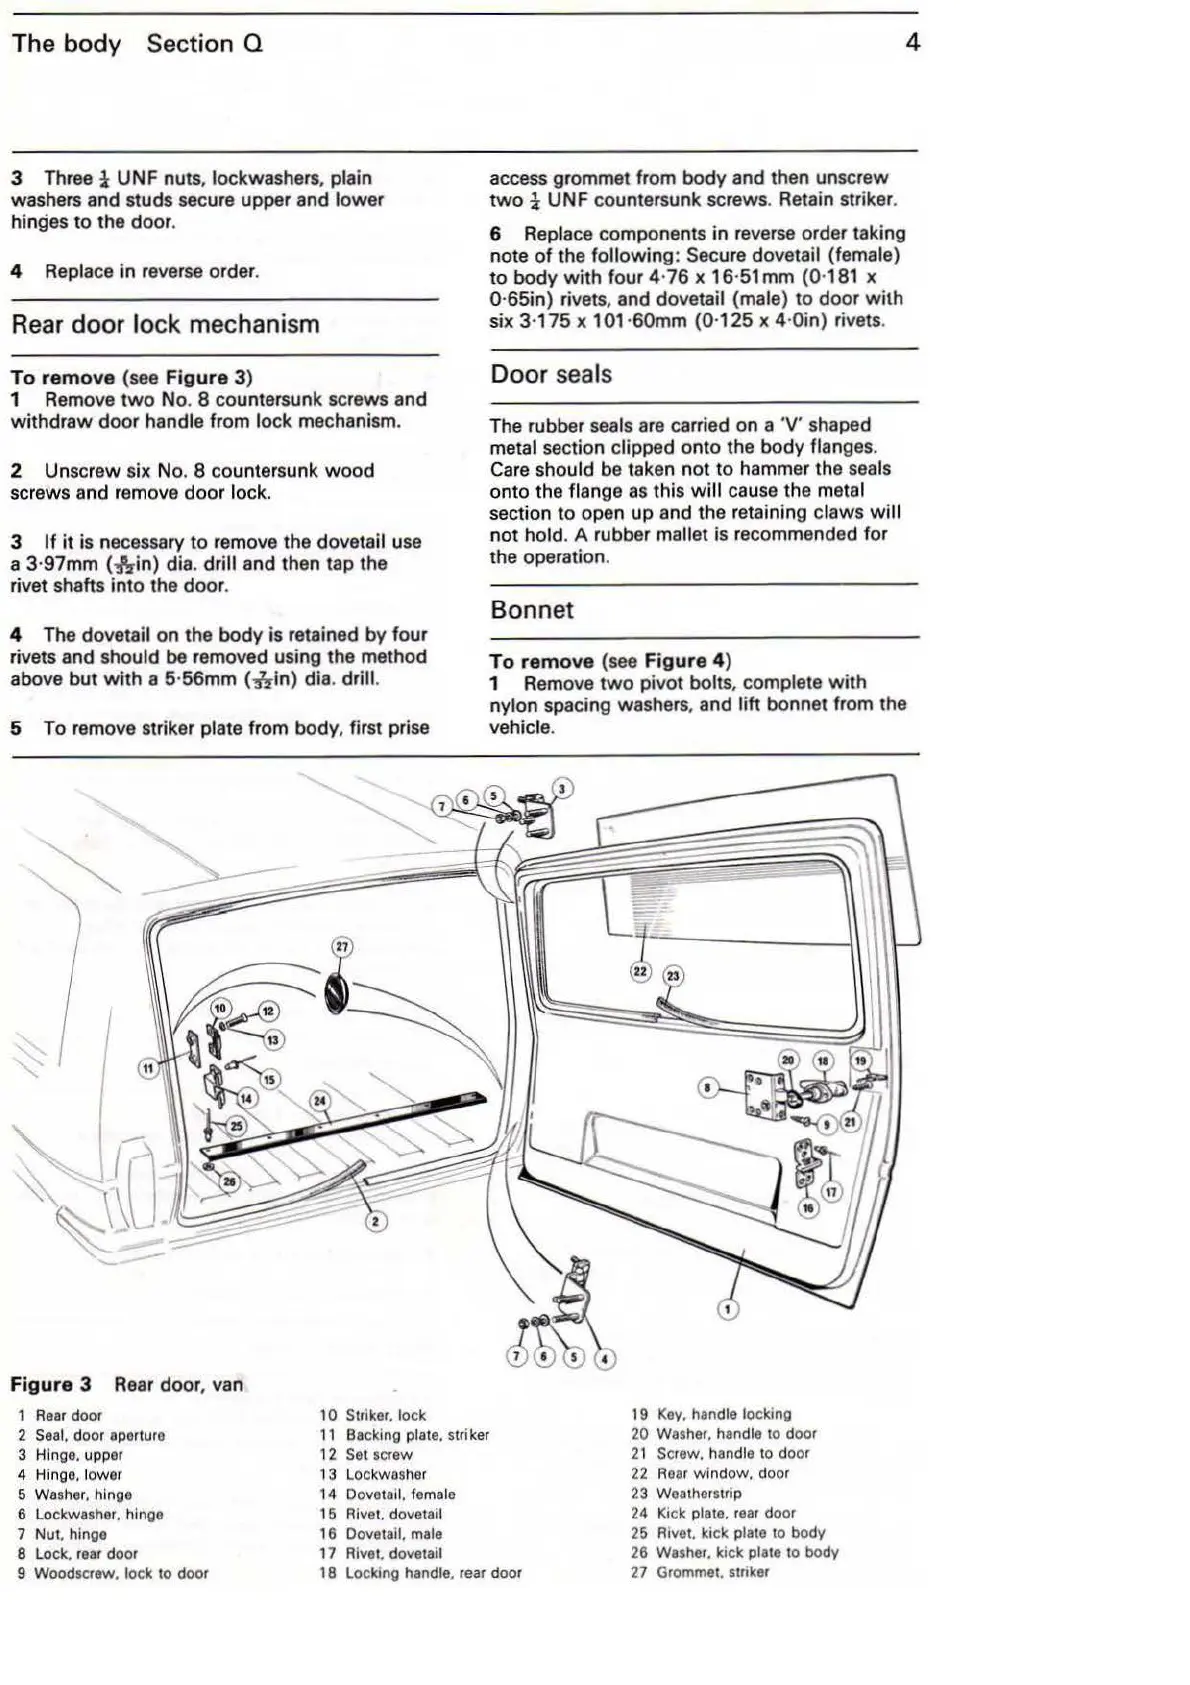
Figur
e 3
Rear
door, van
1 R
ea
r door
10 Striker. lock
4
access grommet from body and then unscrew
two
i UNF countersunk screws. Retain striker.
6 Replace components
in
reverse
order taking
note
of
the following: Secure dovetail (female)
to
body
with
fo
ur
4·
76
x 16·
51
mm (0·
181
x
0·65in) rivets, and dovetail (male) to d
oo
r
with
six 3·
175
x 1
01
·60mm
(0
·
125
x 4·0in) rivets.
D
oor
sea
ls
The rubber seals
are
carried on a ·v· shaped
metal section clipped onto the body flanges.
Ca
re should be taken
not
to hammer the seals
onto the flange
as
this
wi
ll cause the metal
section
to
open up and the retaining claws
will
not
hold. A rubber mallet is recommended for
the operation.
Bonnet
To r
emove
(
see
Figure
4)
1
Rem
o
ve
tw
o pivot bolts, complete
with
nylon
spa
cing washers. and lift bonnet from the
vehicle.
19
Key.
handle locking
2
Seal. door aperture
3 Hinge. upper
11
Backing plate. strik
er
12
Se
t screw
20
Washer.
handle to door
21
Screw. handle to door
22
Rear
window. door
4 Hing
e.
lower
6
Wa
sher. hinge
6 Lockwash
er.
hinge
7 Nut. hinge
8 Lock.
rear
door
9 Woodscrew.
lock to door
1 3 Lockwasher
14 Dovetail.
f
emale
16 Rivet. dovetail
16
Dovetail. male
17 Rivet. dovetail
18 Locking handle. rear door
2 3 Weatherstrip
24
Ki
ck
plato.
rear
door
26
R•vet.
kick plate to body
26
Washer.
kick plate to body
27 Grommet. striker