Cooling system Section E
neck
of
the radiator, allowing water to
flow
thr
ough until clean.
Note
:
It
is advisable
to
leave an indication on
the vehicle that the cooling system
has
been
drained, shou
ld
the vehicle
be
left standing.
To
refill
1
Rep
lace the drain plugs
to
radia
tor
and
cylinder block.
2
If ant
i-
freeze solution has been
in
use
and
has been retained return
it
to
the cooling
system.
If
the liquid retained is not sufficient
to
fi
ll the system add additional anti-freeze
as
required. Do n
ot
add plain water, otherwise the
solution may
be
weakened making
it
less
effective in adver
se
conditions.
Note
: Water used
for
the cooling system should
be clean and free from obvious impurities.
3 Do not
overfill the radiator.
4
Start the eng
in
e and run at normal operating
temperature
to
clear away any a
ir
pockets in
the system.
Stop engine and recheck coolant
level,
topp
ing
up
if
necessary.
5 Replace radiator
filler cap.
Checking
for
wat
er
leaks
After refilling the system, ensure that all hose
connections are securely tightened.
Start the
engine and check
for
water leaks.
In the event
of
the cooling system being
disturbed, e.g. cylinder head removal
or
water
pump change, it is recommended that a Barseal
pellet (Part No. 9947) is introduced through the
radiator
filler neck.
New
gaskets should always
be fitted and fixing nuts tightened
to
the correct
torque to prevent possible ingress
of
water
to
the oil system.
Radiator
Description
The radiator, comprising an upper and
lower
tank connected by a matrix, is mounted
to
the
body by
two
support brackets.
An
ove
rf
low
pi
pe
drains surplus coolant to the road should
the system be
overfilled.
To
remove
(see
Figure
3)
1 Drain the cooling system
as
previously
described.
2
Slacken hose clips and disconnect radiator
hos
es
from water pump and thermostat housing.
3 Disconnect water
out
let pipe and fresh air
tube from heater, after slackening retaining
clips.
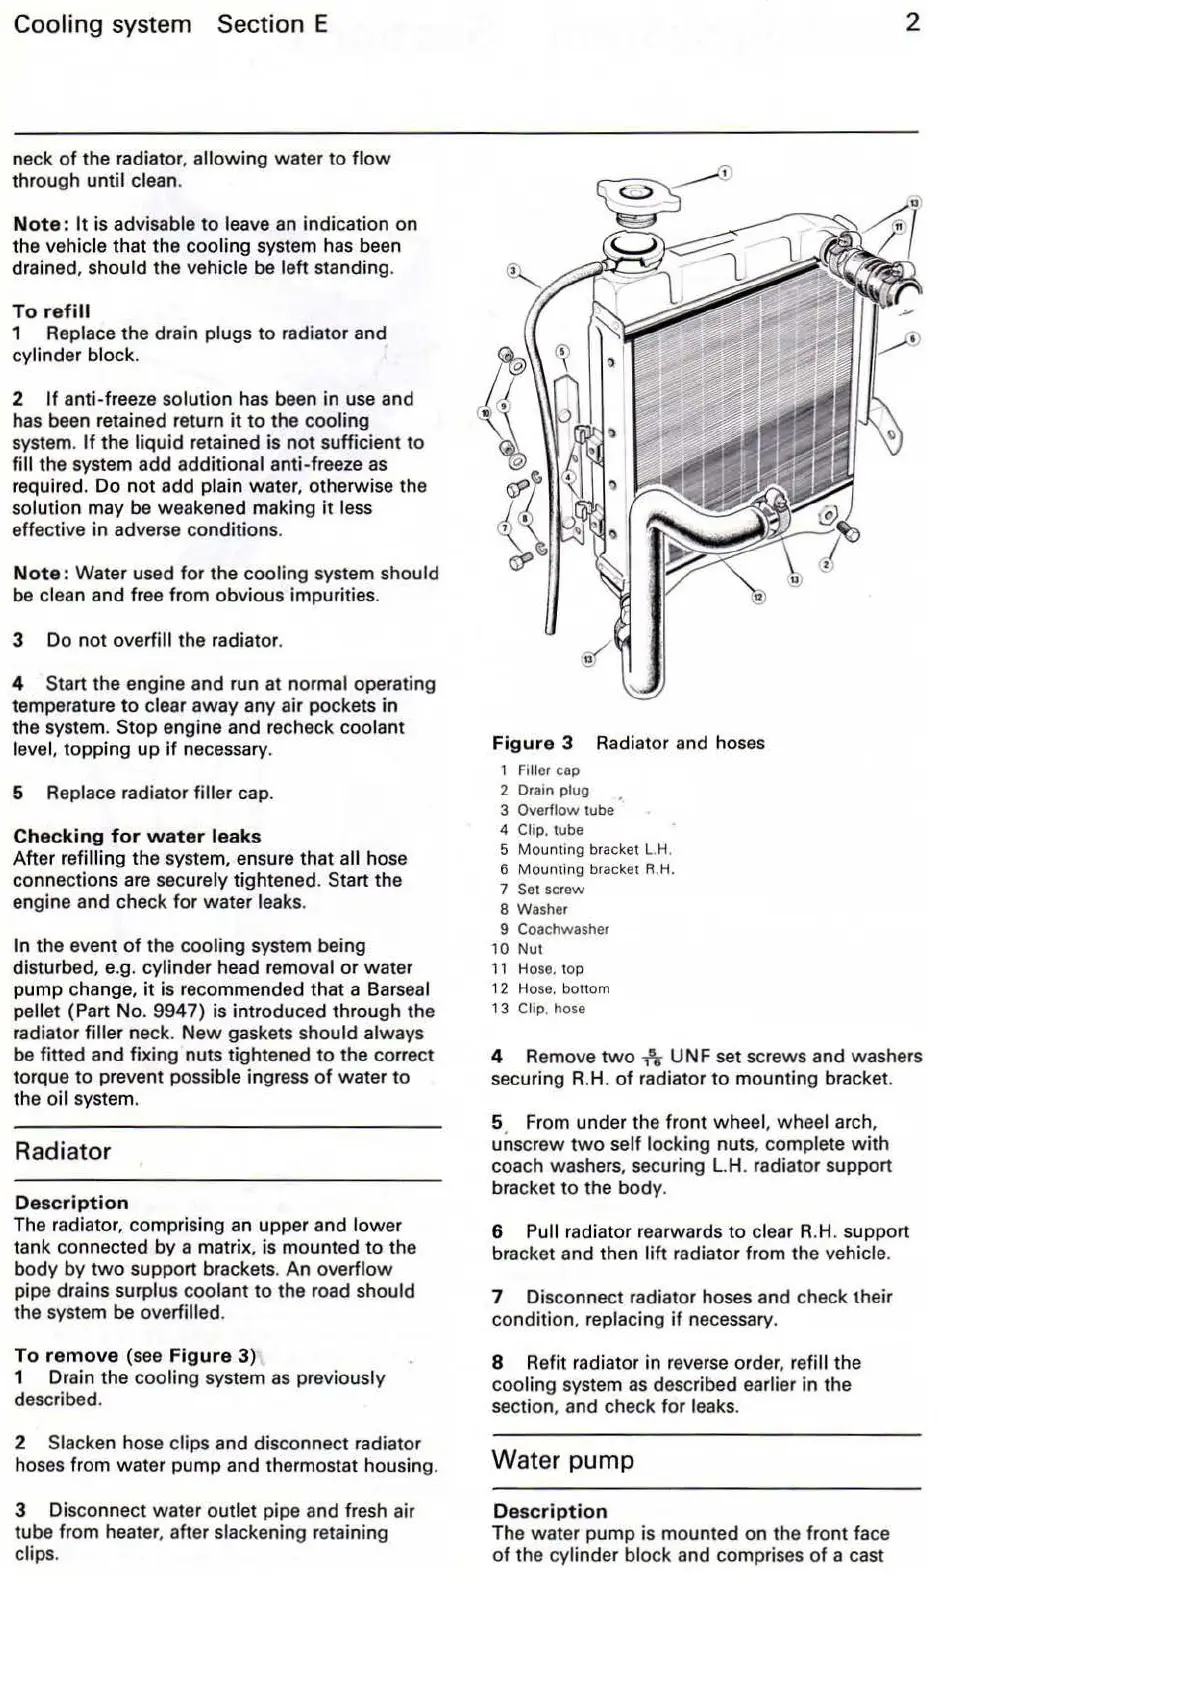
Figure
3 Radiator and hoses
1
Fi
ll
er
cap
2 Drain plug
3 Overflow tube
4 Clip. tube
5
Mount
ing brac
ke
t
l.H
.
6
Mounting
bracket R.H.
7 Set screw
8 Washer
9 Coachwasher
10
Nut
11 Hose. t
op
1 2 Hose. bottom
13
Clip. hose
2
4 Remove
two
fir
UNF set screws and washers
securing R.H.
of
radiator to mounting bracket.
5 From under the front wheel. wheel arch,
unscrew
two
self locking nuts. complete
with
coach washers, securing L.H. radiator support
bracket
to
the
body
.
6
Pu
ll radiator rearwards
to
clear R.H. support
bracket and then
lift
radiator from the vehicle.
7 Disconnect radiator hoses and check their
condition, replacing
if
necessary.
8 Refit radiator in reverse order,
refill the
cooling system
as
described
ea
rlier in the
section, and check
for
leaks.
Water pump
De
sc
ription
The water pump is mounted on the front face
of
the cylinder block and comprises
of
a cast