The engine Section F
F
ig
ure
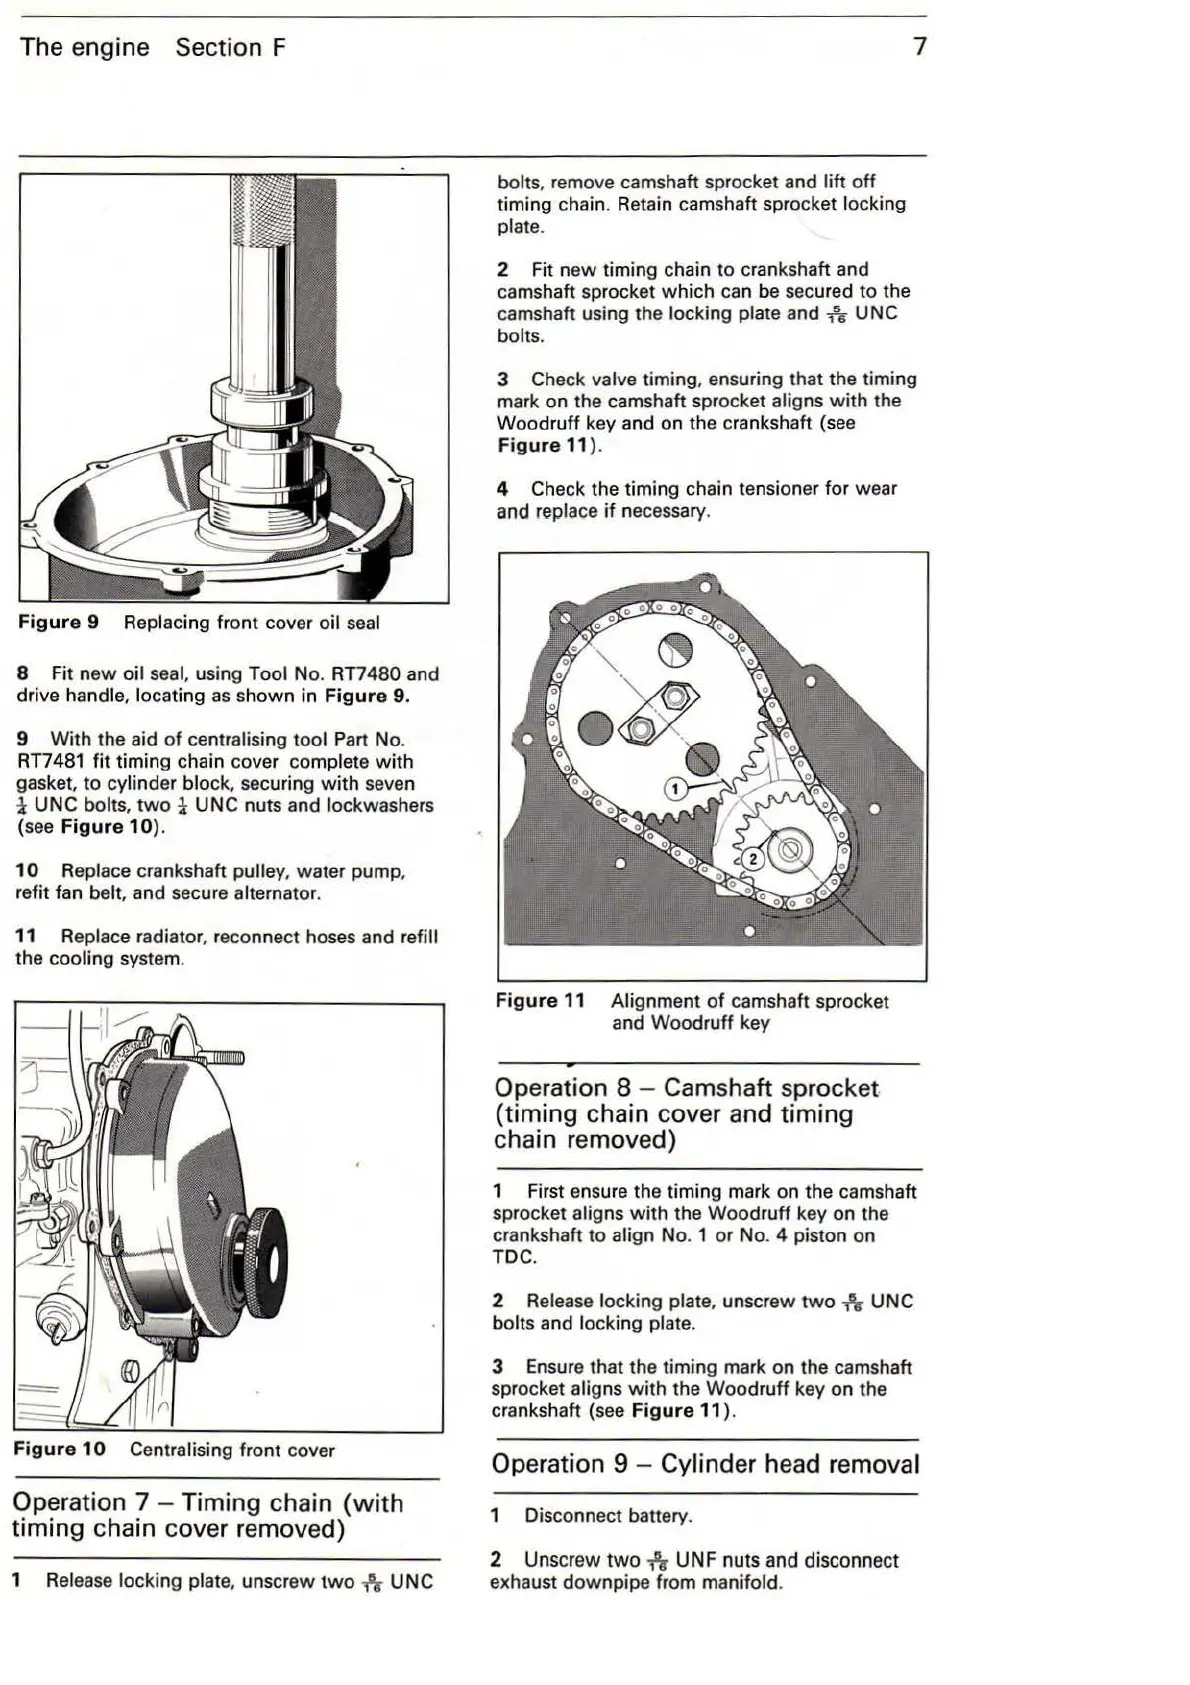
9 Replacing front cover oil seal
8 Fit
new
oil seal, using Tool No. RT7480 and
drive
handle, locating
as
shown in
Figure
9.
9 With the aid
of
centralising
tool
Part No.
RT7481
fit
timing chain cover complete
with
gasket, to cylinder block, securing
with
seven
-1
UNC
bolts,
two
-1
UNC nuts and lockwashers
(see
Figure
10).
10
Replace crankshaft pulley,
wat
er pump,
refit fan belt, and secure alternator.
11
Replace radiator, reconnect hoses and refill
the cooling system.
Figure
10
Centralising front cover
Operation 7 - Timing chain
(with
timing chain cover removed)
1 Release locking plate, unscrew
two
-h
UNC
bolts,
remove camshaft sprocket and
lift
off
timing chain. Retain camshaft sprocket locking
plate.
2 Fit
new
timing chain to crankshaft and
camshaft sprocket
which
can be secured to the
camshaft using the
locking plate and
-h
UNC
bolts.
7
3 Check valve timing, ensuring that the timing
mark on the camshaft sprocket
aligns
with
the
Woodruff key and on the crankshaft (see
Figure
11
).
4
Check the timing chain tensioner for wear
and
replace
if
necessary.
Figure
11
Alignment
of
camshaft sprocket
and Woodruff key
Operation 8 - Camshaft sprocket.
(timing chain cover and timing
chain removed)
1 First ensure the timing mark on the camshaft
sprocket
aligns
with
the Woodruff key on the
crankshaft to
align No. 1 or No. 4 piston on
TDC.
2 Release locking plate, unscrew
two
-h
UNC
bolts and locking plate.
3
Ensure
that the timing mark on the camshaft
sprocket
aligns
with
the Woodruff key on the
crankshaft (see
Figure
11
).
Operation 9 - Cylinder head removal
1 Disconnect battery.
2 Unscrew
two
n UNF nuts and disconnect
exhaust downpipe from manifold.