Replace Maintenance Kit
6
1
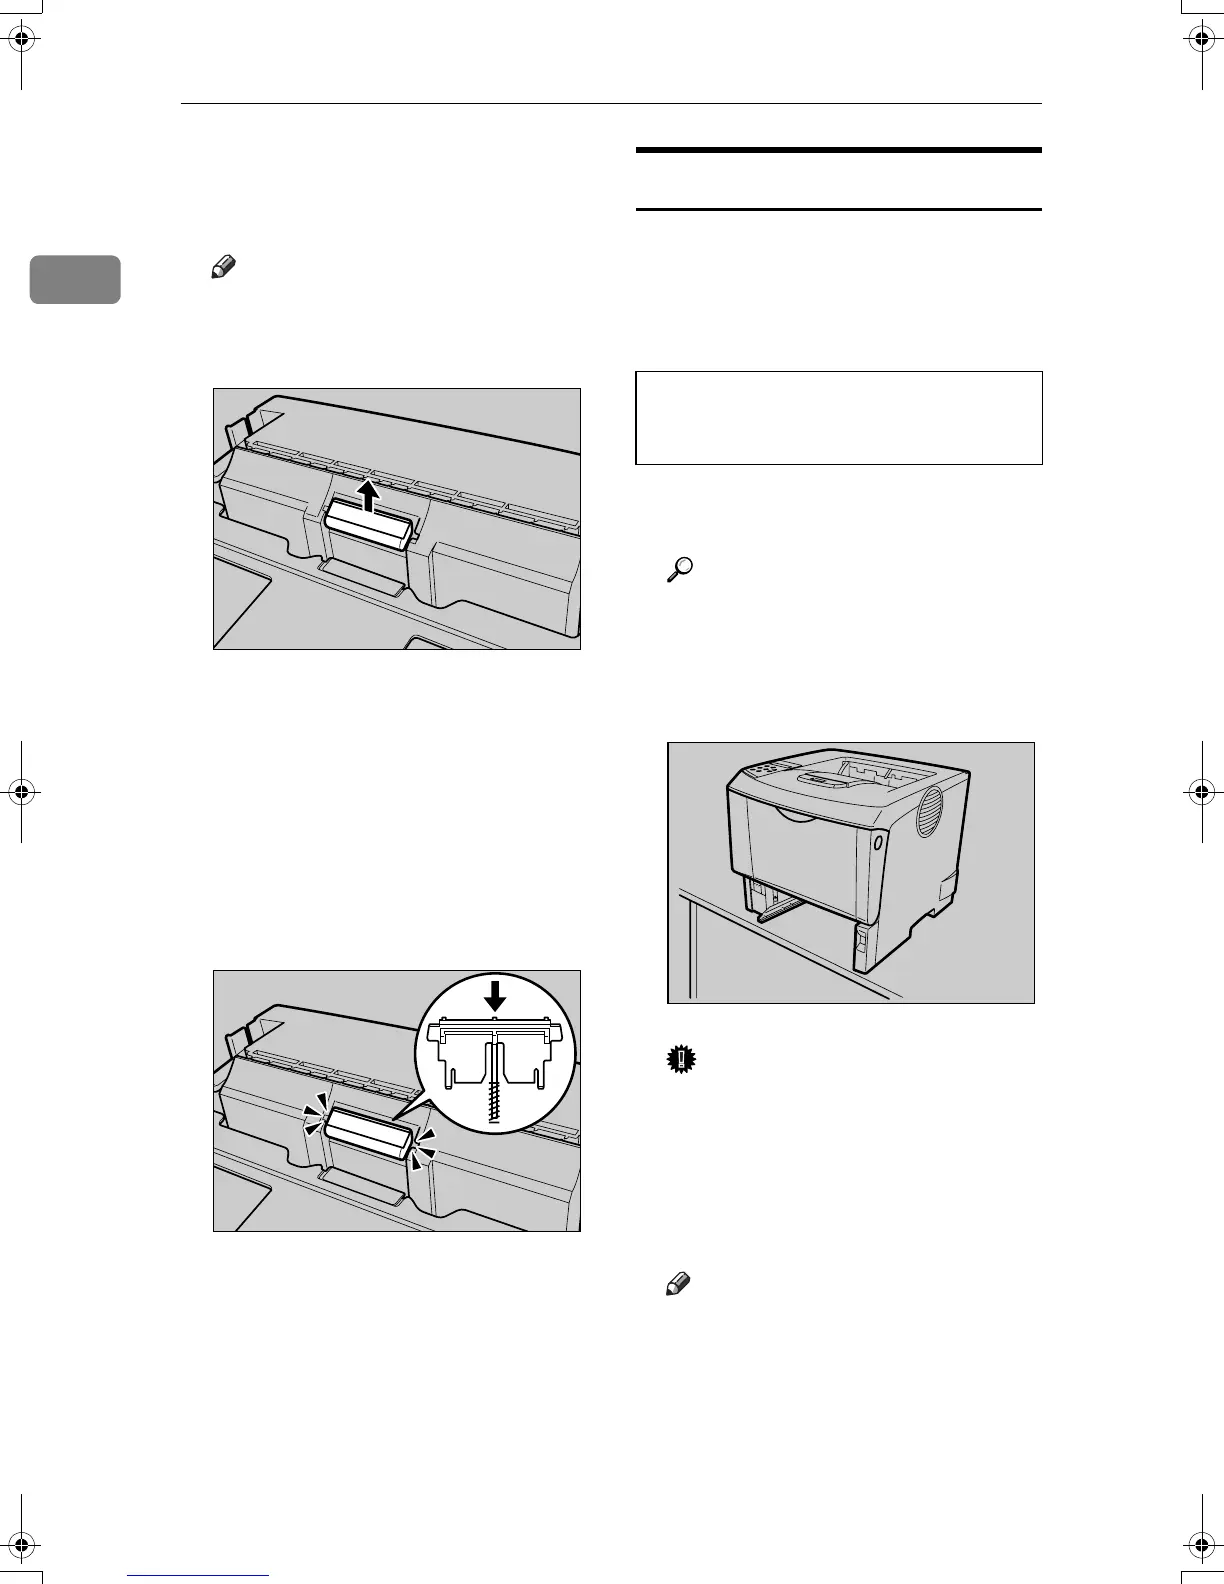
E Return the paper tray to its origi-
nal position, and remove the fric-
tion pad from the tray.
Note
❒ The friction pad spring may
come off. Be careful the spring
does not fall off and become lost.
F Insert the new friction pad in the
paper tray.
Attach the central projection of the
new friction pad to the spring and
align the projection of the both
sides of the friction pad with the
holes of the paper tray. Then push
the friction pad as shown in the il-
lustration until it clicks.
After pushing in the friction pad,
press on it several times to check it is
properly installed. If it jumps back
into position due to the force of the
spring, it is properly installed.
G Repeat the replacement procedure
for any optional paper feed units
that are installed.
Replacing the Paper Feed Roller
The following procedure shows how
to replace the paper feed rollers of the
printer and the optional paper feed
units.
CAUTION:
A
If the optional duplex unit is in-
s
talled, uninstall it from the printer.
Reference
See “Moving and Transporting
the Printer”, Hardware Guide.
B Move the printer to the edge of a
sturdy and stable table or desk.
Important
❒ Be sure to move the printer hor-
izontally. Moving the printer up
and down may cause toner to
scatter.
❒ Do not put the printer on an un-
stable or tilted surface.
Note
❒ If the printer is equipped with
the optional paper feed unit, do
not move the printer and the
unit together. They are not se-
curely attached.
AUB302S
AUB303S
When lifting the machine, use the inset
grips on the both sides. Otherwise the print-
er could break or cause injury if dropped.
AUB308S
SincereP1_pera_maintkitA-GB_F_FM_forPaper.book Page 6 Monday, October 16, 2006 3:48 PM
 Loading...


