Chapter 5 Appendix Chapter 5 Appendix
Chapter 5 Appendix
5-2 Using the Engraving Cutter
75
Chapter 5 Appendix
2.
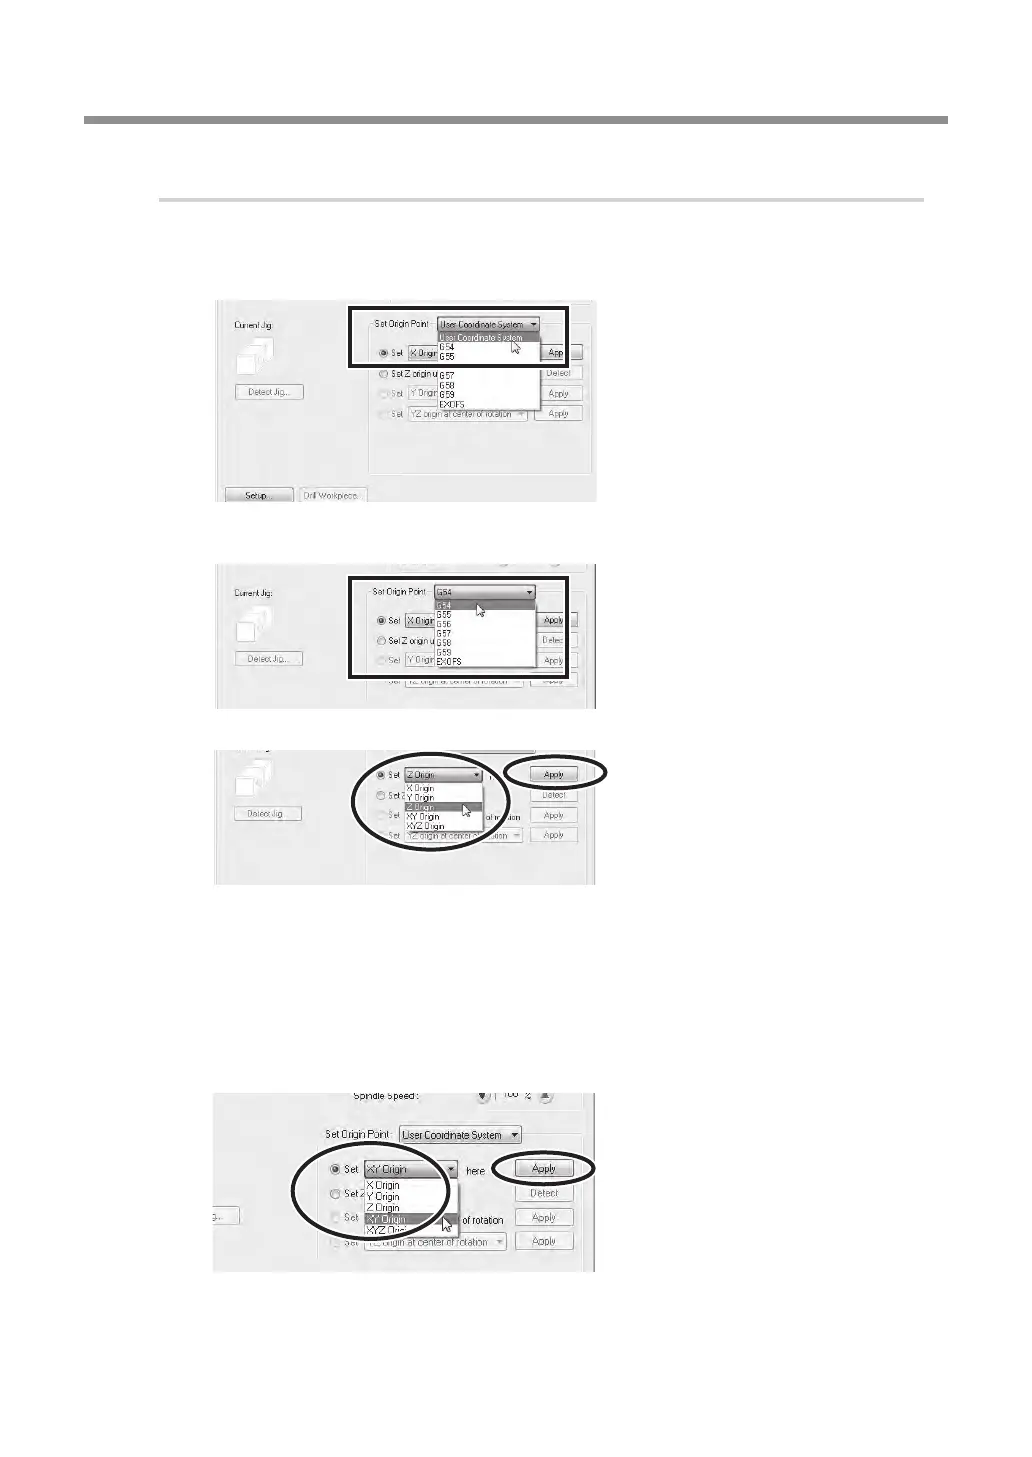
Make the settings for the Z, and XY origin point.
Close the front cover.
For the RML-1 cutting data
When "Selected automatically
(RMX-1/NC Code)" is selected
with the command set selection,
choose "User Coordinate Sys-
tem" with Set Origin Point.
If "RML-1" is selected with the command
set selection, only "User Coordinate
System" is selectable with the Set Origin
Point.
For the NC code cutting data
With "Set Origin Point", select the
workpiece coordinate system that
matches the cutting data.
Select "Set "Z Origin" here", and
click [Apply].
The Z origin point has been set.
Raising the tool.
Subsequently, perform movement along the X and Y directions. Raise the tool to a position
where the tool does not come in contact with the workpiece.
P. 48, "Moving the Tool"
Move the cutter to the location you want to make the XY origin point.
P. 48, "Moving the Tool"
With "Set Origin Point", select the
[Set "XY Origin" here], then click
[Apply].
The XY origin has now been set.
 Loading...