Chapter 4 Getting Ready for and Performing Cutting
59
Chapter 4 Getting Ready for and Performing Cutting
4-2 Installing a Tool
Tool Selection
Select a tool matched to the purpose. It's a good idea to use the tools selectively, according to the work
process (such as rough cutting or nish cutting) and the design.
Note: Tool is an optional part.
Features of the Tools
End mill
Straight end mill: The end cutting edge is at-shaped. It is suitable for fashioning a at surface or
steps.
Ball end mill: The end cutting edge is ball-shaped. It is suitable for fashioning a curved surface or
waveform.
Engraving cutter
Character cutter: This tool is suitable for engraving in general with broad versatility. It is appropriate
for character engraving on the plate.
Parallel cutter: This cutter is suitable for engraving wide surfaces. This cutter enables engraving large
characters and surface leveling (to atten the surface of the material) of the table where the material
is placed. Because both sides have a cutting blade, it is not possible to make a deep cut in the Z-axis
direction.
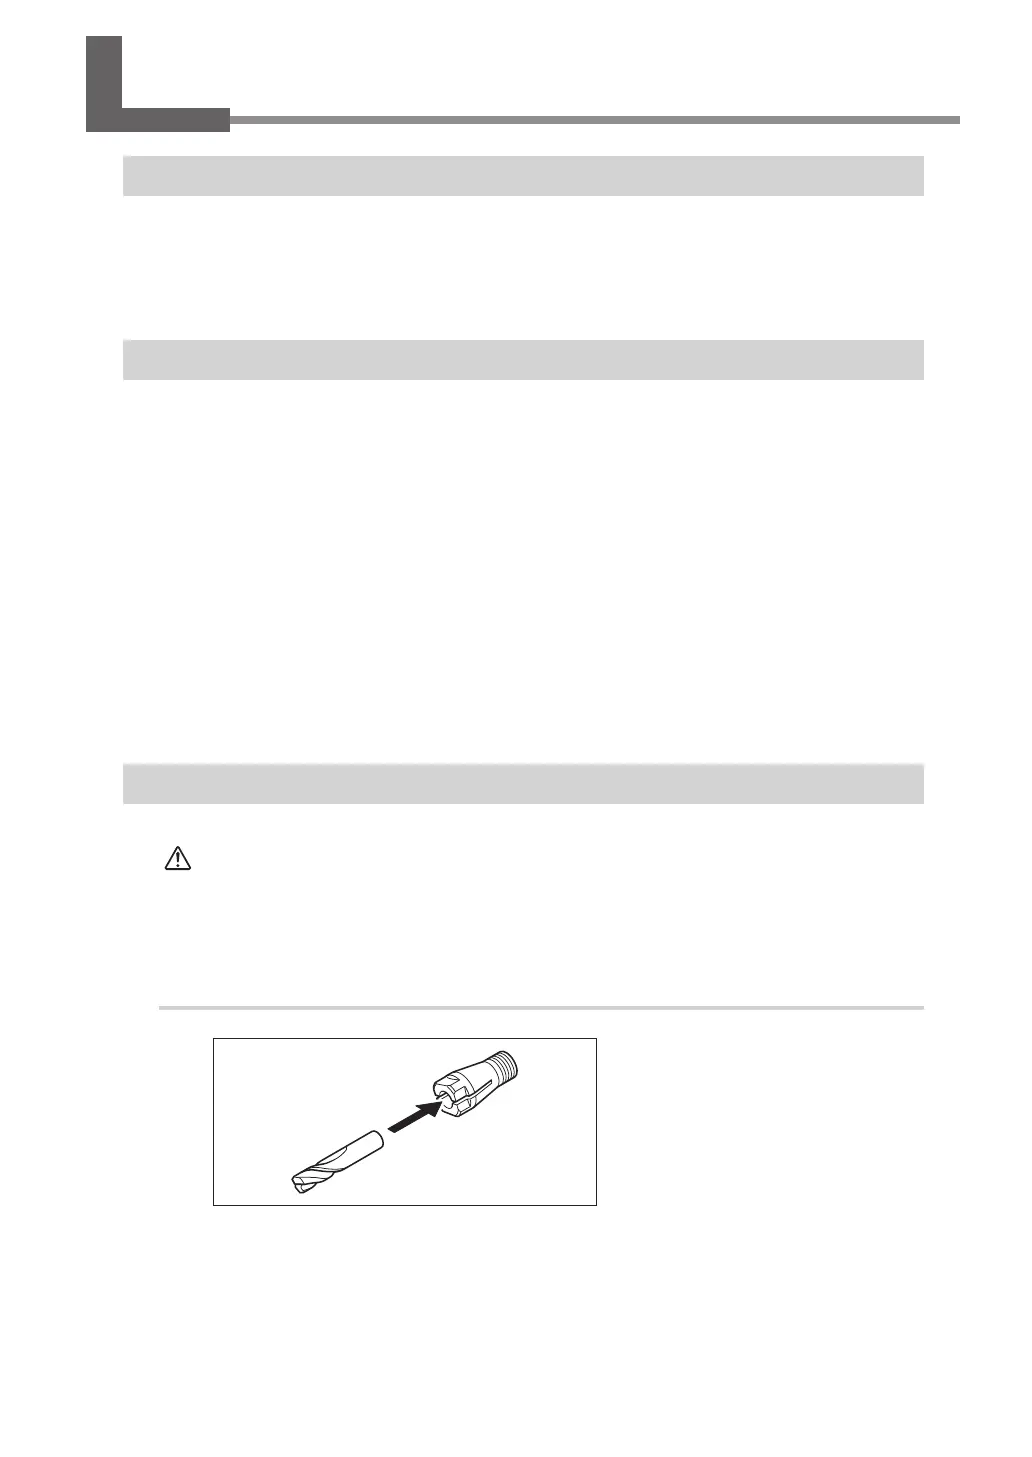
Installing a Tool (End mill)
CAUTION
Do not touch the tip of the blade with your ngers.
Doing so may result in injury.
For the installation of engraving cutter, refer to P. 73, "Installing the Engraving Cutter and Setting the Origin
Point"
Procedure
Insert the tool into the collet.
Tool
Collet
 Loading...