Section 7: Replacement Procedures
CG4 Series Service Manual Page 7-11
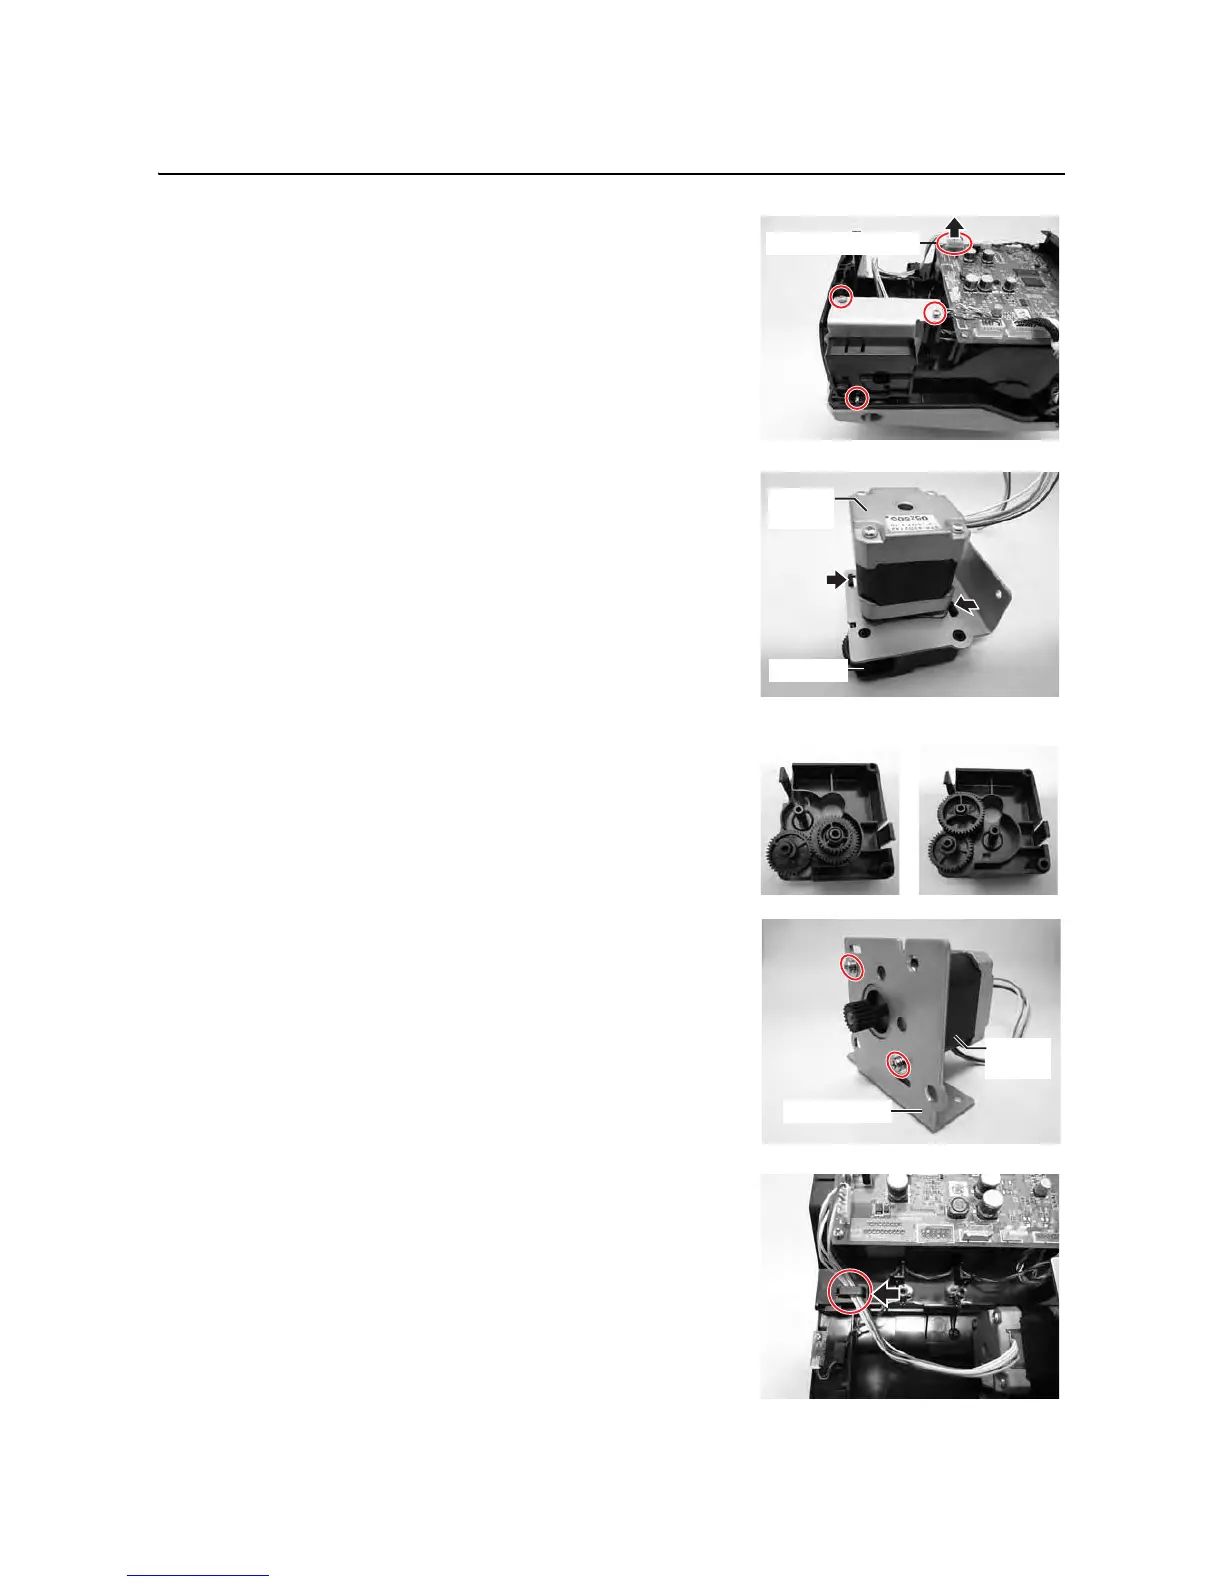
7.8 STEPPER MOTOR REPLACEMENT
1. Remove the Bottom Housing Cover as explained in the
earlier
Section 7.3 Removal of the Bottom Housing cover.
2. Remove three screws (circled) securing the Stepper motor
assembly
to the printer.
3. Disconnect the MOTOR cable assy from the MAIN PCB.
4. With the gear box positioned at the bottom, press the two
catches to remove the gear box from the Stepper motor
assembly
.
When removing the
gear box, be careful not to lose the
gears. If the gears have dropped off, place the gears to their
position according to the print head resolutions.
5. Remove two screws (circled) securing the Stepper motor
to the Motor bracket.
6. Replace the new Stepper motor and follow the above
steps in reverse sequence, to reassemble the parts.
Notes:
• Position the Stepper motor assembly ensuring the gear
interlock with the gear of the platen roller.
• Ensure the wiring routes neatly as shown.

 Loading...


