Section 8: Appendix
Page 8-2
CG4 Series Service Manual
8.1 OPTIONAL ACCESSORIES - CUTTER
8.1.1 To install the optional Cutter
1.
Make sure the printer is powered off and disconnect the
power cable and interface cable.
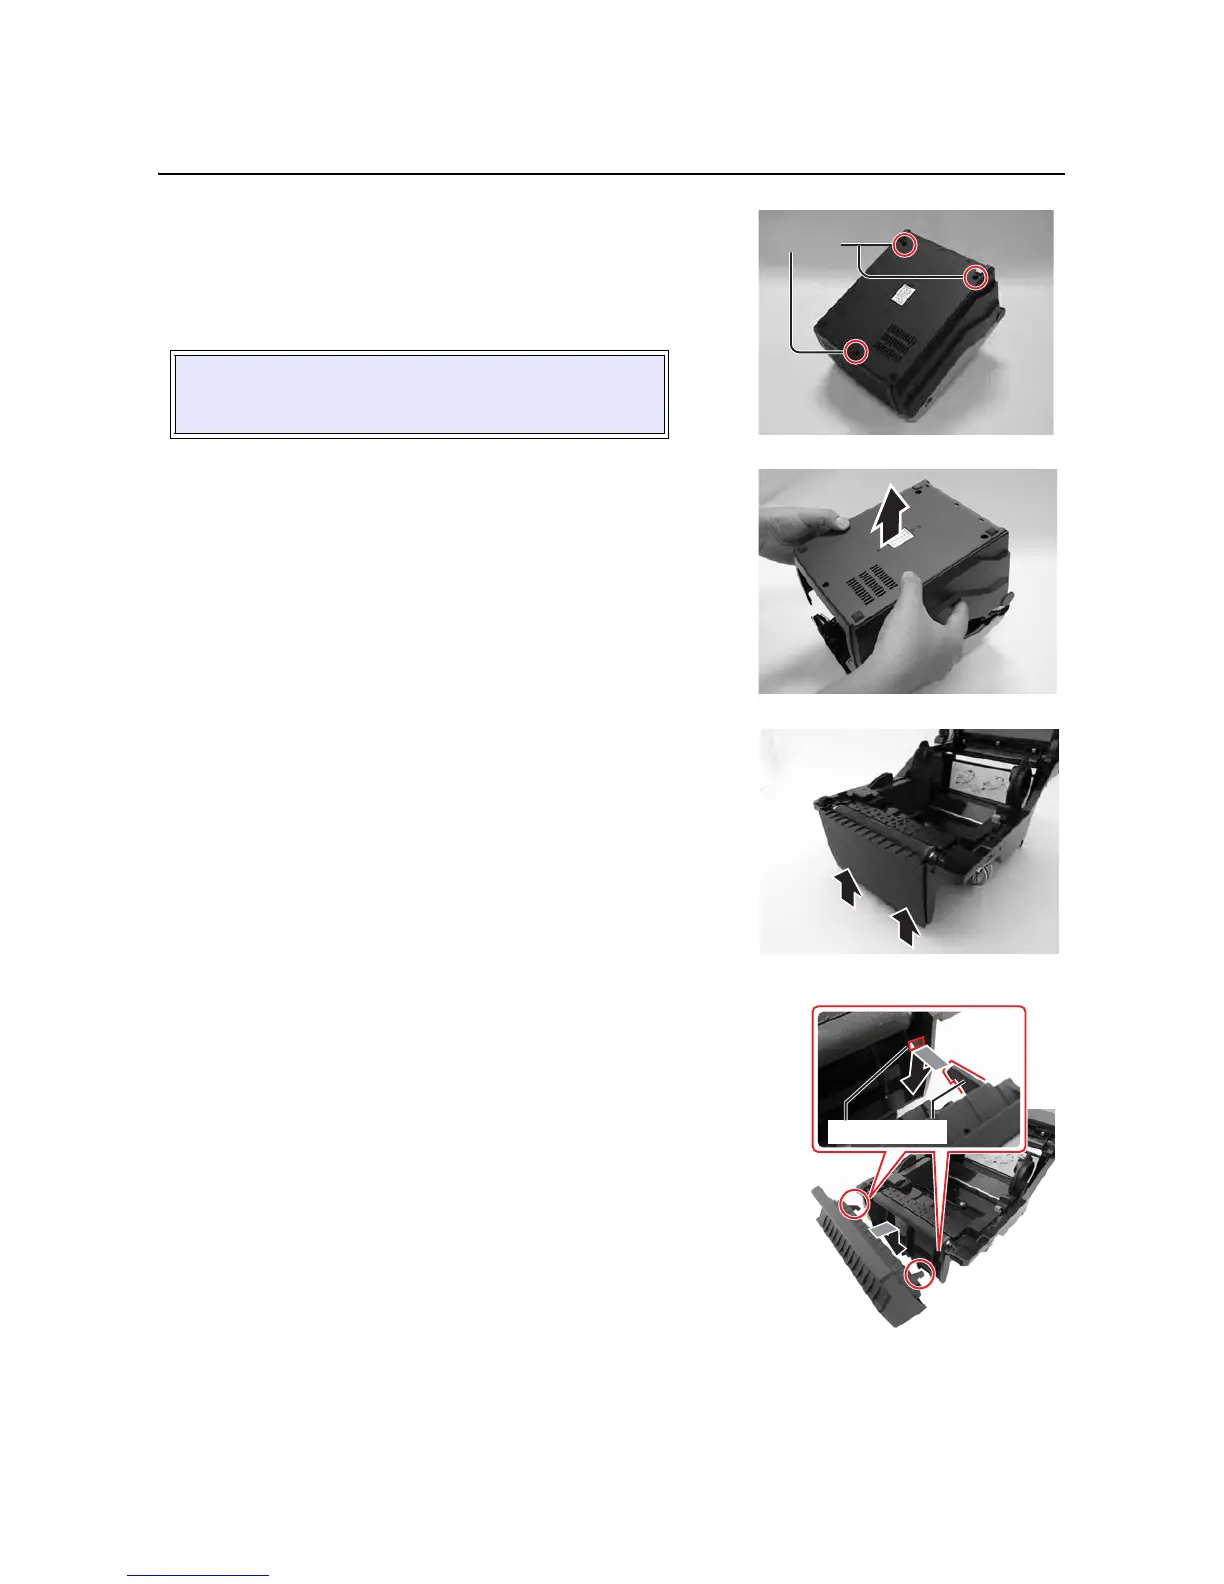
2. From the base of the printer, remove three screws (circled)
as shown.
3. Remove the Bottom Housing cover.
4. Turn over the printer in upright position. Pull the cover
open/close latches
on both sides of the printer toward you
to unlock the
Top cover, and then open the Top cover.
Remove the
lower front cover by lifting it upward.
5. Attach the latches of the Cutter kit onto the holes located
below the two sides of
platen roller of the printer.
Close the
top cover and turn the printer over again, with
the
Main PCB is facing upward.
CAUTION:
Ensure not to scrape the window portion when the printer
is turned over.

 Loading...


