Section 7: Replacement Procedures
Page 7-14
CG4 Series Service Manual
7.10 RIBBON END SENSOR REPLACEMENT
(Only for CG408 TT and CG412 TT Thermal transfer printer)
1.
Ensure the printer is turned off, and remove the power
cable.
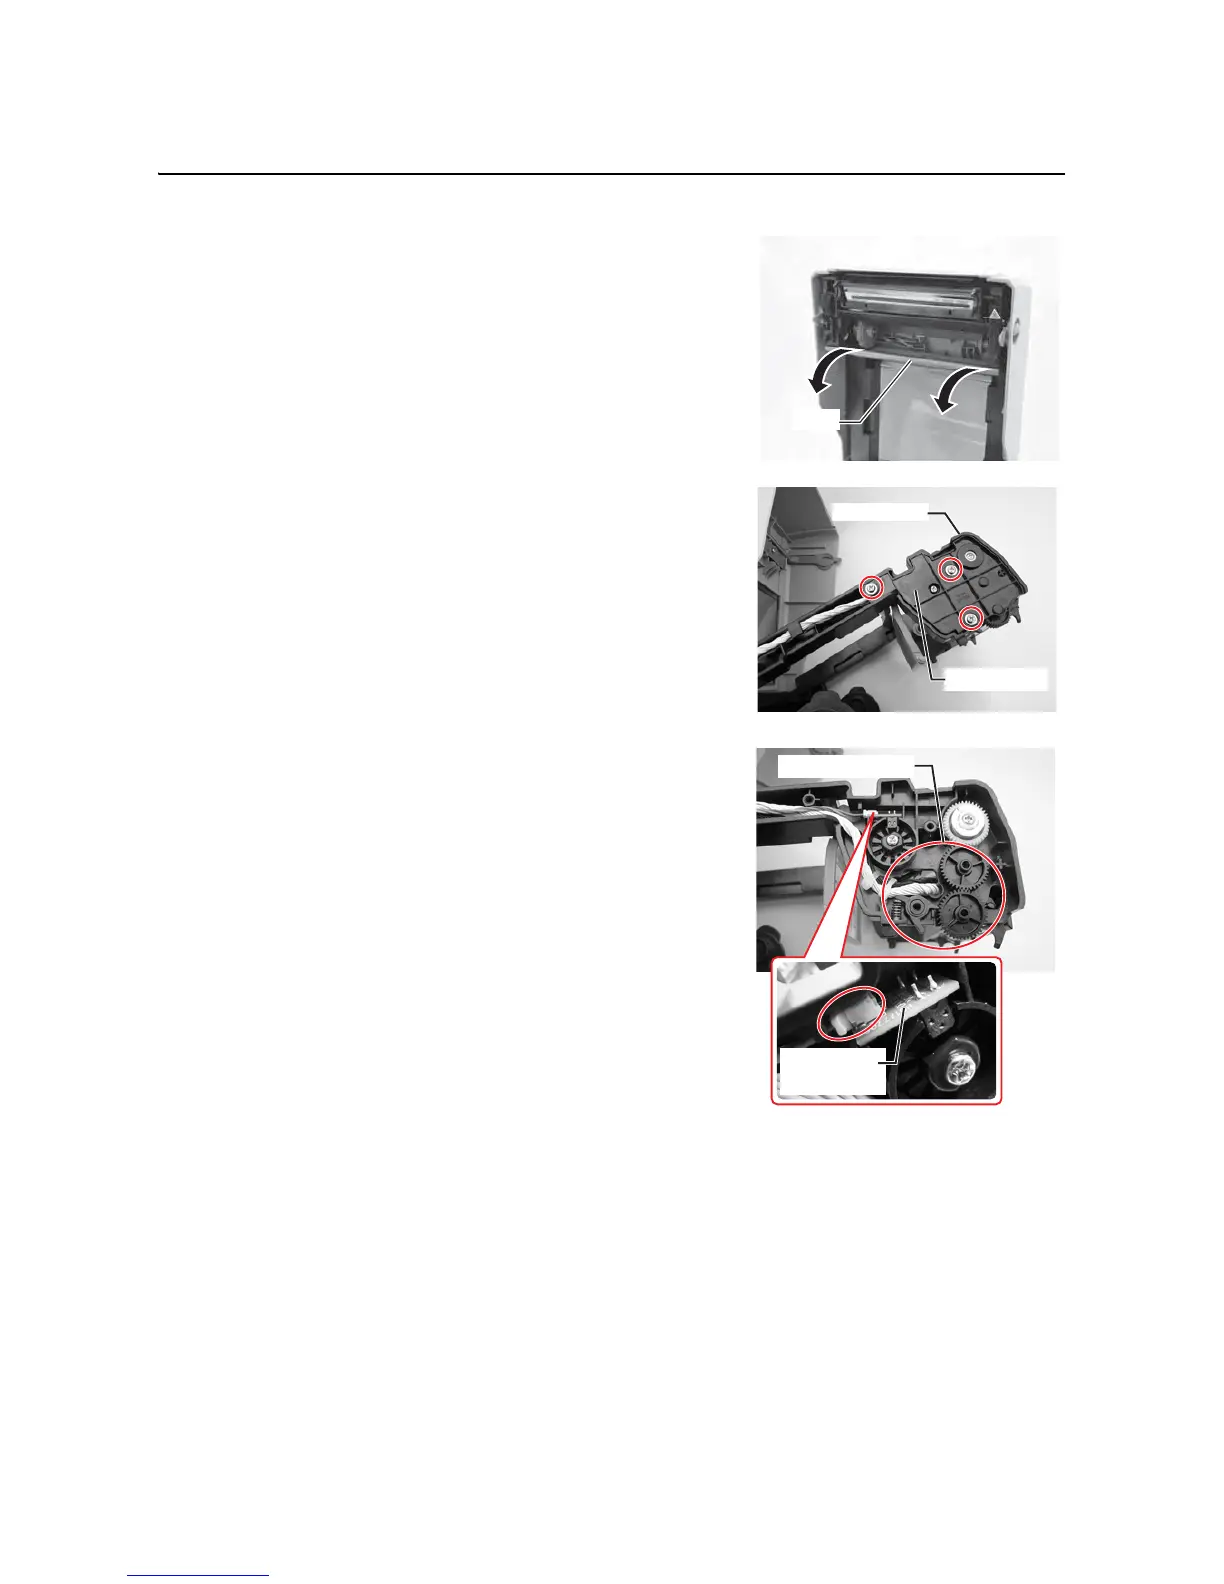
2. Lift the Top Cover.
3. Pull the lever on the middle of the ribbon unit downward to
pull out the
ribbon unit. Then, simply let down the ribbon
unit
. There is a stopper midway through its movement
range that will prevent the ribbon unit from snapping down.
4. On the left of the ribbon unit, remove three screws
(circled) securing the
Frame cover of ribbon unit. Remove
the
Frame cover.
Note:
When the Frame cover is removed, be careful not to lose
the gears or the attached spring.
5. Take out the defective Ribbon end sensor board and
disconnect the
cable connector.
6. Replace the new Ribbon end sensor board and follow the
above steps in reverse sequence, to reassemble the parts.
Note:
Place the Ribbon end sensor such that the encoder is in
between the sensor.

 Loading...


