Section 8: Appendix
Page 8-10
CG4 Series Service Manual
8.4 OPTIONAL ACCESSORIES - REAL TIME CLOCK (RTC) KIT
8.4.1 To install the optional RTC kit
1.
Make sure the printer is powered off and disconnect the
power cable and interface cable.
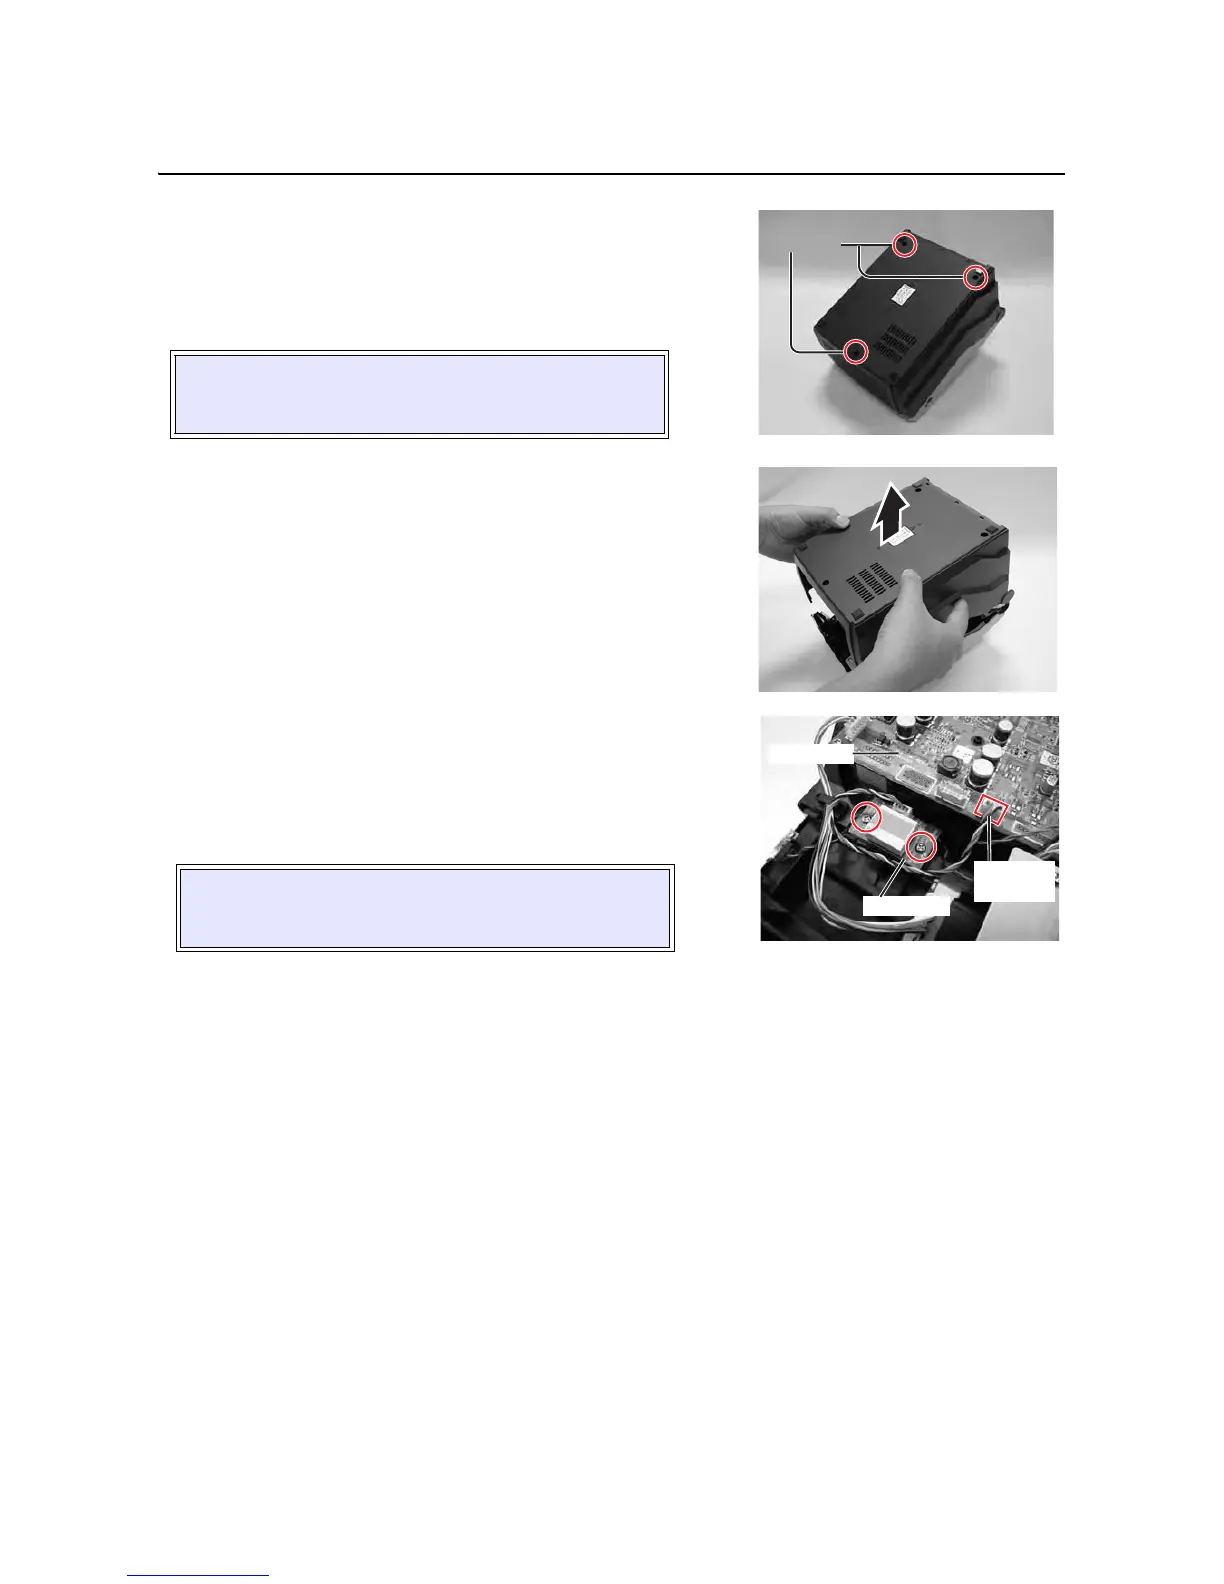
2. From the base of the printer, remove three screws (circled)
as shown.
3. Remove the Bottom Housing cover.
4. Place the RTC board on the printer in the position as
shown. Secure the
RTC board with two supplied screws to
the
bosses of the printer. Connect the RTC kit’s cable to the
RTC connector on the MAIN PCB.
5. Assemble the Bottom Housing cover back to the printer
and secure with the three
screws removed in step 1.
8.4.2 To set the calendar (Date and time) of the optional RTC
1.
Send the calendar setting command to set the date and time accordingly as follows.
Commands:
<WT>aabbccddee
The defination of the variables are:
aa: Year (00 to 99), bb: Month (01 to 12), cc: Day (01 to 31), dd: Hour (00 to 23), ee: Minute (00 to 59)
Example: To set the date as year 2010, 6th October and time as 15:29 (3:29 pm).
<A>
<WT>1010061529
<Z>
2. Turn off the printer, and then turn it on again after waiting for 30 seconds or more. (This is to make sure
that the battery is working properly.)
3. Send the print data including the calendar print command for printing the date and time.
Example: <XM><WA>DD/MM/YYhh:mm, please refer to the Programming Manual for more details.
4. Check the print result to be sure that the time and date are printed on the label correctly.
5. If the printed time and date are not correct, repeat the above procedures before replace the RTC kit.
CAUTION:
Ensure not to scrape the window portion when the printer
is turned over.
CAUTION:
Ensure that no cables are pinched between parts when
you are assembling the cover.

 Loading...


