Section 7: Replacement Procedures
CG4 Series Service Manual Page 7-5
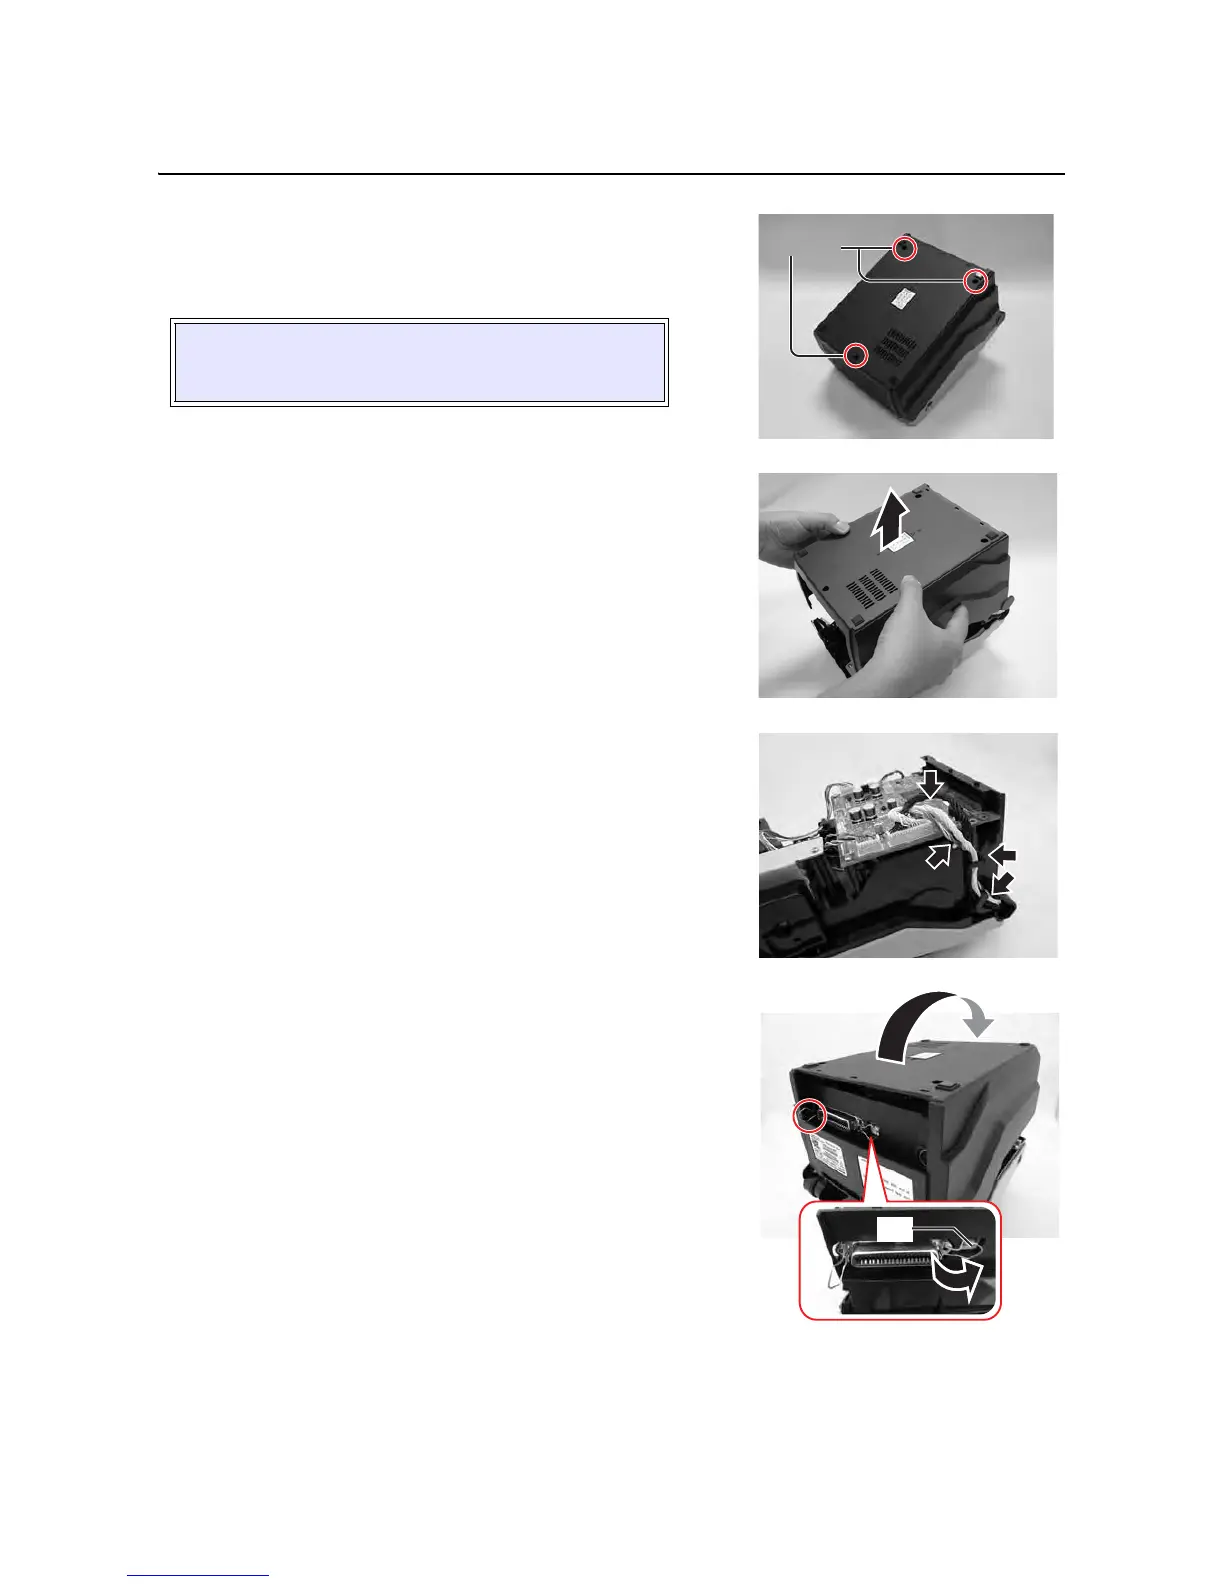
7.3 REMOVAL OF THE BOTTOM HOUSING COVER
1. Make sure the printer is powered off and disconnect the
power cable and interface cable.
2. From the base of the printer, remove three screws (circled)
as shown.
3. Remove the Bottom Housing cover.
Proceed the necessary procedures to perform your desired
task on Installation, Adjustment or Replacement.
4. Follow the above steps in reverse sequence to reassemble
the
Bottom Housing cover.
Notes:
• Ensure the wiring route neatly as shown and arrange all
the wiring to avoid from being pinched when fitting the
bottom housing cover.
• When reassemble the
Bottom Housing cover to the
printer with
IEEE interface terminal, flip one of the clip
of the interface terminal as shown. Then fix the
Bottom
Housing cover
while holding the other clip, pulling the
Bottom Housing cover forward and downward.
CAUTION:
Ensure not to scrape the window portion when the printer
is turned over.

 Loading...


