5200 Multi Purpose and 5200 Multi Purpose HF Gas Analysers
05230001A / Revision 930
5.3.2 Setting the clock
Use the following procedure to set the date and time:
1. Press the soft key to display the Menu screen, use the and soft
keys to highlight the "Settings" menu option, then press the soft key. The
Settings screen will then be displayed.
2. Use the and soft keys to highlight the "Clock" menu option, then
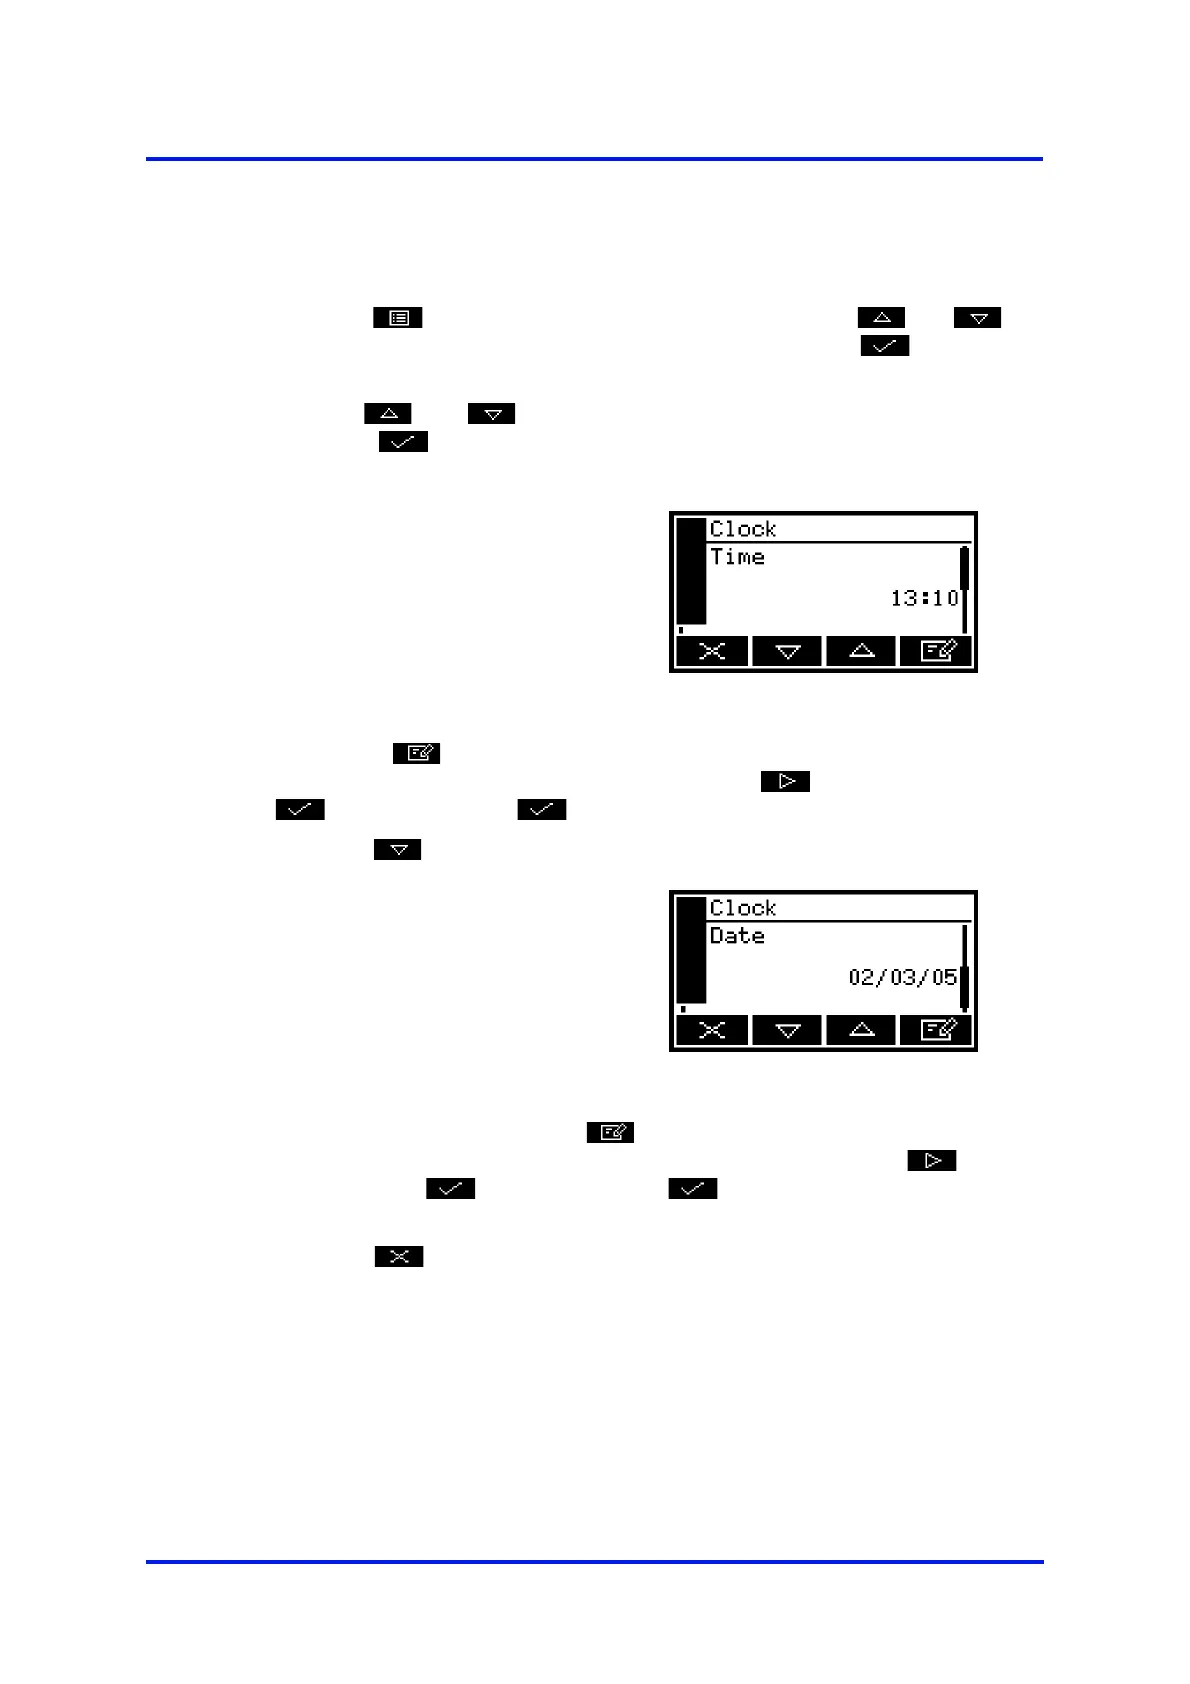
press the soft key. The Clock (time) screen will then be displayed, as
shown in Figure 13.
3. Press the soft key, then edit the displayed time as described in
Section 4.10. When you change the last digit, the soft key changes to the
soft key. Press the soft key to show the Clock (time) screen again.
4. Press the soft key to show the Clock (date) screen, as shown in Figure 14.
5. To change the date, press the soft key, then edit the displayed date as
described in Section 4.10. When you change the last digit, the soft key
changes to the soft key. Press the soft key to show the Clock (date)
screen again.
6. Press the soft key twice to display the Menus screen.
+
Time is always shown
in 24-hour format.
Figure 13 - The Clock (time) screen
+
You can change this
format from day/month/
year to month/day/year:
refer to Section 5.3.3.
Figure 14 - The Clock (date) screen
+
The date format can be set to your regional preference (’day/month/year’ or
’month/day/year’ format): refer to Section 5.3.3.
+
On a Multi Purpose without an optional rechargeable battery: once set, date
and time will remain set until approximately 1 week after the Multi Purpose
has been disconnected from the electrical supply. If the Multi Purpose is left
connected to the electrical supply, date and time will remain set indefinitely,
even if the Multi Purpose is switched off.