NOTICE
If t
he system plug is mounted with excessive force, the contacts can break or bend.
b
Plug in the system plug carefully.
b
Do not force it.
Prerequisites
T
ool required:
•
TX10 Torx wrench
Approach
1. Make sure that the environment is clean and clear of fog, moisture, and dust.
2. Disconnect the connecting cables to the system plug.
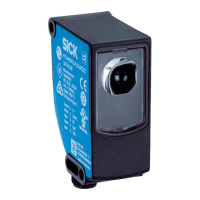
3. Unscrew screws in the defective system plug and remove the system plug from the
safety laser scanner.
4. Make sure that the seal is seated correctly.
5. Carefully push the new system plug into the safety laser scanner.
6. Screw in the system plug using the captive screws. Tightening torque: 1.3 Nm.
7. Reconnect the connecting cables to the system plug.
8. Configure the safety laser scanner.
9. Perform commissioning again, taking particular care to conduct all of the thorough
checks described.
Further topics
•
"Mounting the device", page 49
10.6 Regular thorough check
The test is intended to ensure that the hazardous area is monitored by the protective
de
vice and that unprotected access to the hazardous area is prevented.
b
C
arry out the checks according to the instructions from the manufacturer of the
machine and from the operating entity.
MAINTENANCE 10
8024596/15VP/2019-11-15 | SICK O P E R A T I N G I N S T R U C T I O N S | nanoScan3 I/O
101
Subject to change without notice

 Loading...