Logging 9410 series
8:43:30.000
8:45:30.000
8:54:30.000
8:46:30.000
8:47:30.000
8:48:30.000
8:49:30.000
8:50:30.000
8:51:30.000
8:52:30.000
8:53:30.000
8:44:30.000
8:43:30.000
8:45:30.000
8:55:30.000
8:46:30.000
8:47:30.000
8:48:30.000
8:49:30.000
8:50:30.000
8:51:30.000
8:52:30.000
8:53:30.000
8:44:30.000
8:54:30.000
x
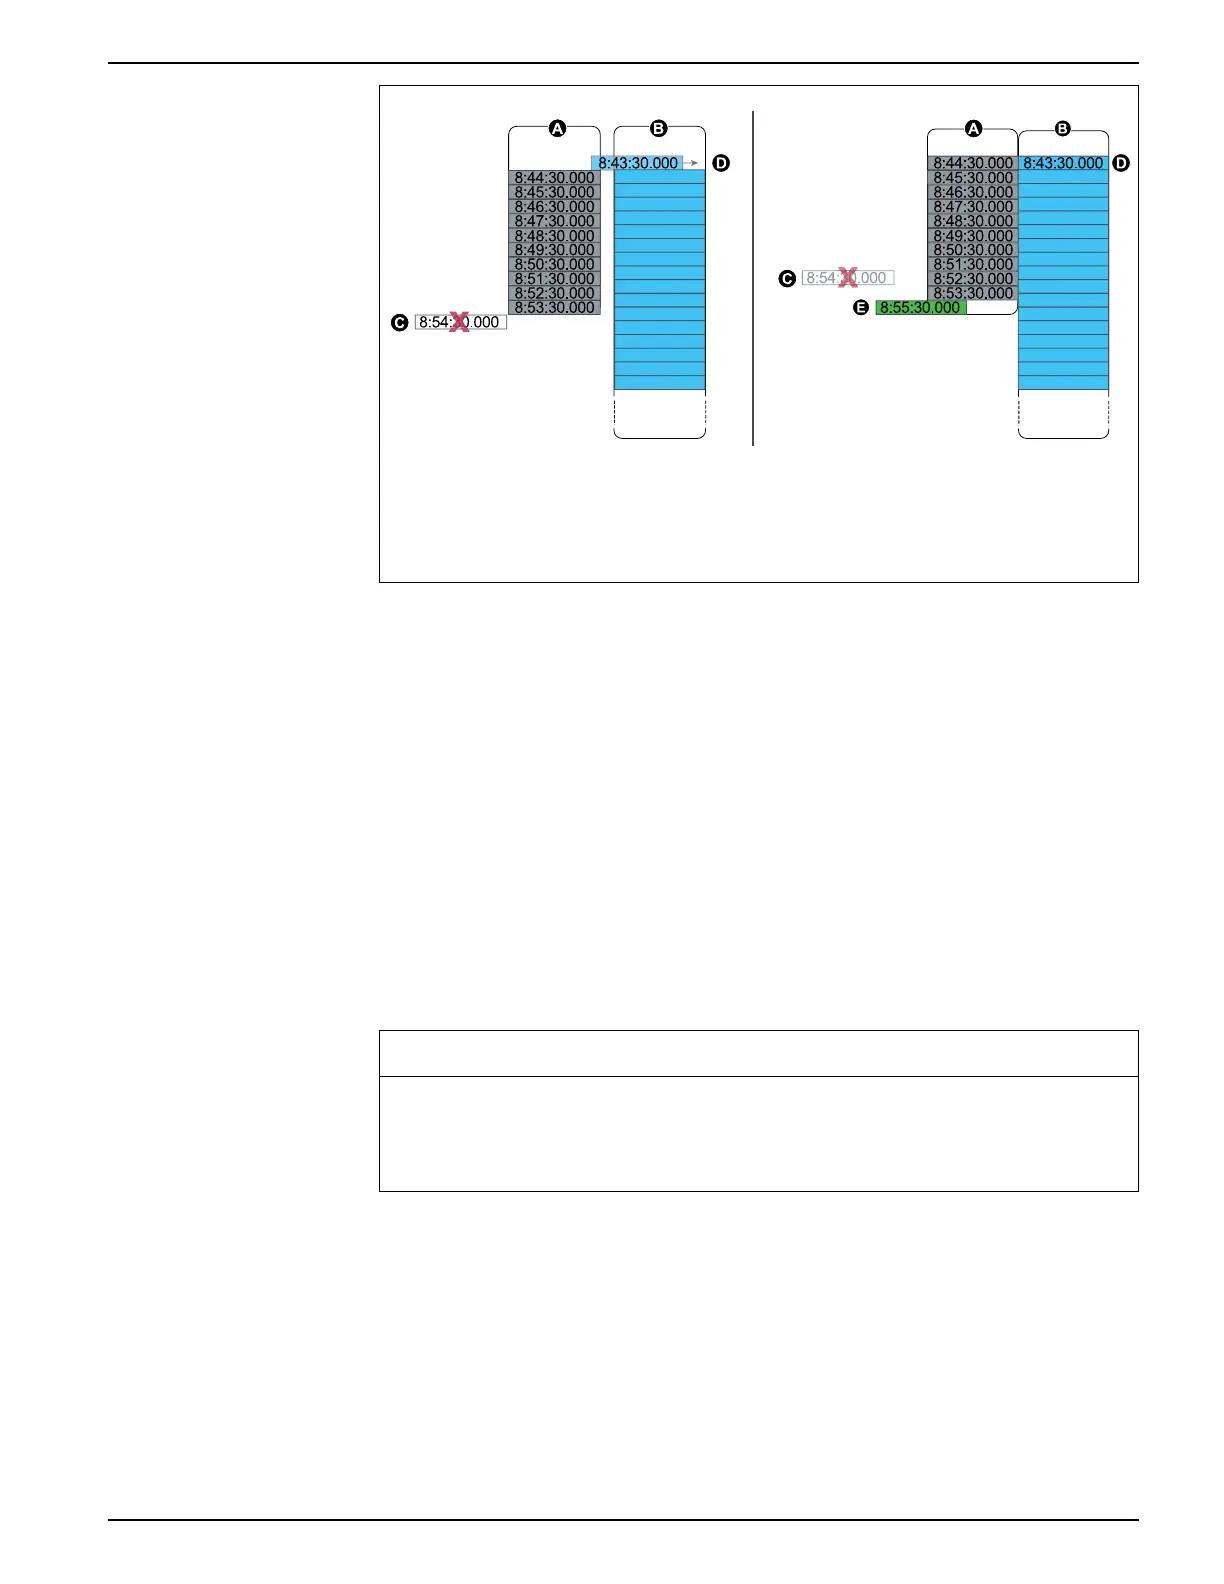
A. Log buffer
B. Long-term memory
C. Record that cannot be logged because log buffer is full (this record is lost)
D. Record moving from short-term memory to long-term memory
E. New record at next interval
In the graphic on the left, the log buffer (A) is full, and the oldest record has not
replicated to the long-term memory yet. This means that the new record (C) is not
logged, and is permanently lost. In the graphic on the right, the oldest record (D) has
been replicated to long-term memory, making space in the buffer. The new record at
the next interval (E) is logged but there is a gap in the data for the lost record (C).
Changing log interval and depth settings using ION Setup
You can configure log intervals, log depths and buffer depths to optimize your memory
usage.
Before you begin, make sure you understand:
• the structure of the meter’s logging framework
• the meter’s existing logging configuration
• your data logging requirements
Changing your meter’s log configuration deletes all existing records from that log.
NOTICE
DATA LOSS
Failure to follow these instructions can result in data loss.
Ensure that all important data has been recorded before configuring a log.
The default log settings are designed to meet the needs of most users.
This procedure provides the steps for configuring settings for a subset of data logs
using the ION Setup Assistant. Configuring these settings for custom logs, and logs
not listed in the Logging > Memory screen, is an advanced procedure; see the ION
Setup help for more information.
1. Start ION Setup.
2. Open the Setup Assistant for your meter.
3. Navigate to the Logging > Memory screen.
7EN05-0336-03 133
 Loading...