Creating a new route
Two methods may be used when creating a new route:
• Plotting the waypoints in the chart
• Manually enter waypoints into the Route Edit dialog
Plotting waypoints is used when a rough position of the waypoints is sufficient, while the
waypoint’s coordinates may be exactly defined in the dialog. Generally, a combination of
these two methods may be the best.
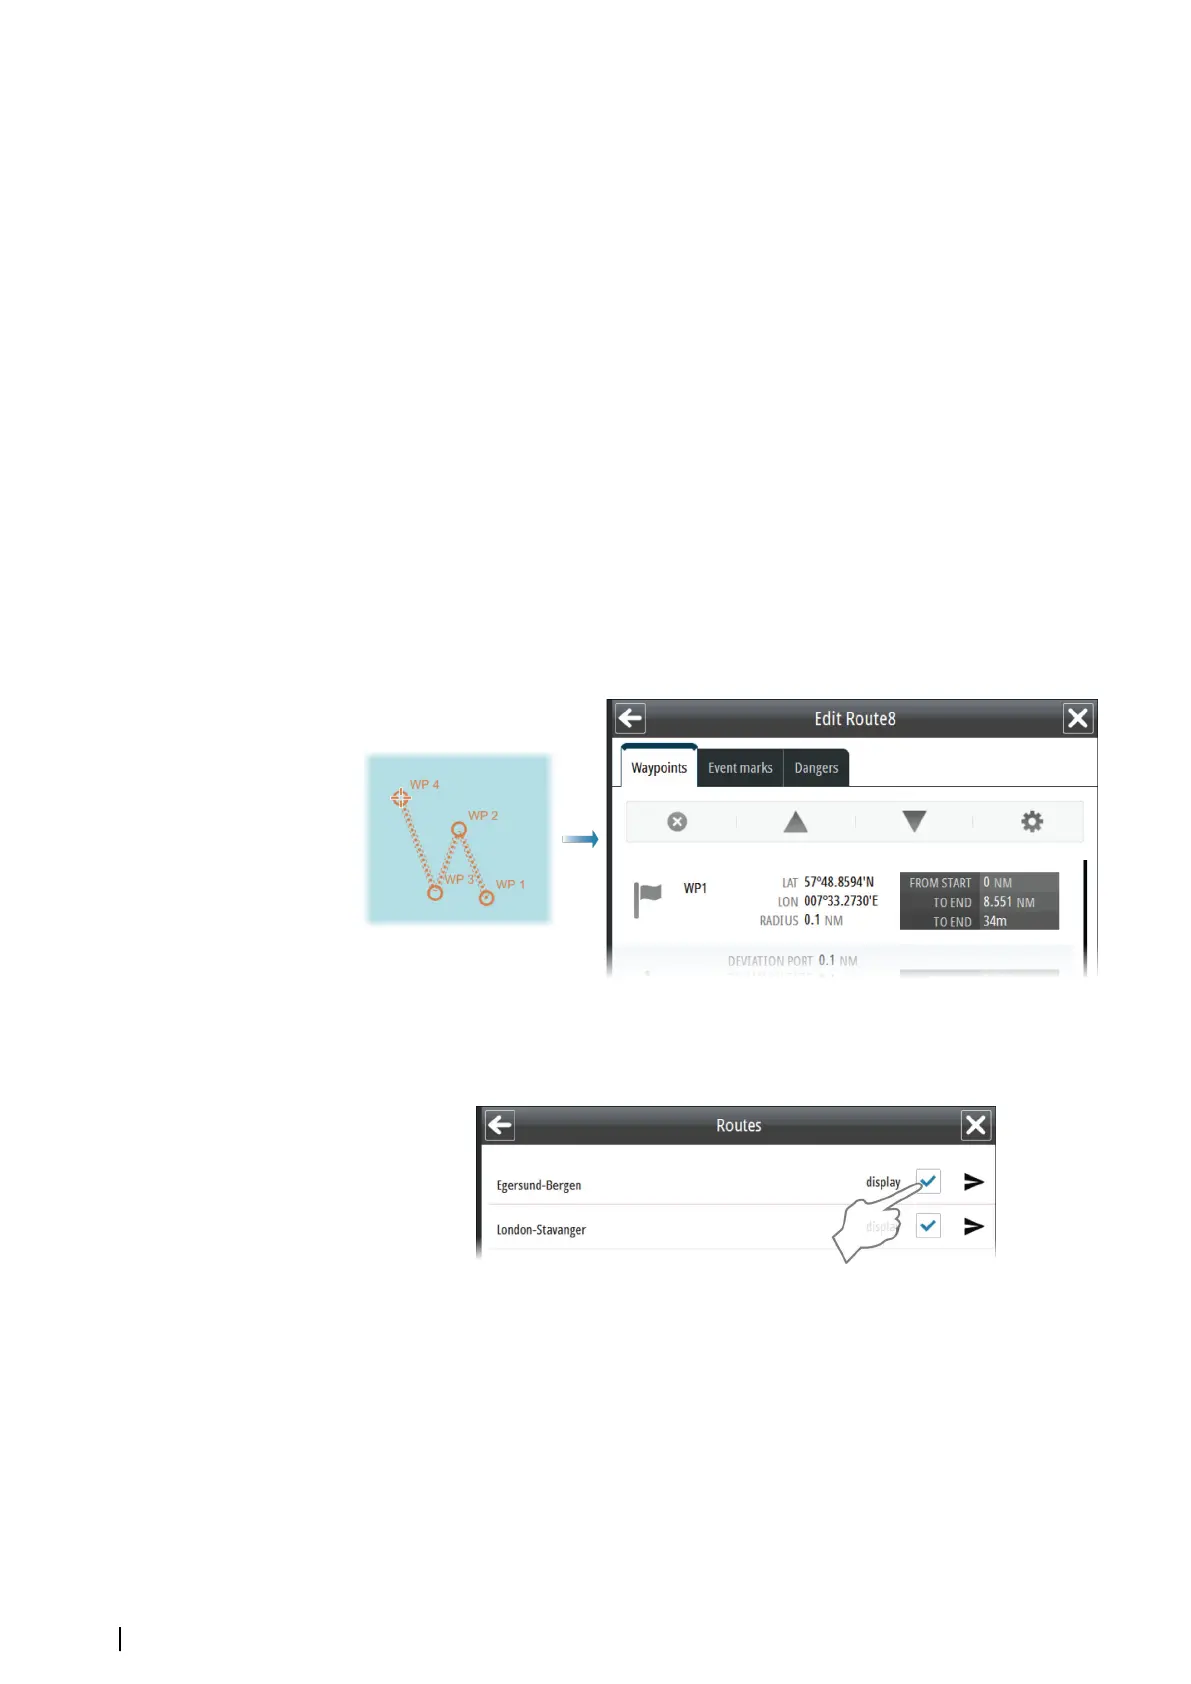
1. Start creating a new route by selecting the New route shortcut button, by selecting the
New route option from the panel menu activated by right-clicking in the chart panel, or
by selecting the Add new route option in the Routes list
2. Enter the new route name, and confirm your selection
-
The Route Edit dialog is displayed
3. Move the cursor to the position of the first waypoint, and press the left cursor key
- The waypoint with waypoint number is positioned on the chart and waypoint details
are shown in the Route Edit dialog
4. Continue entering new waypoints by moving the cursor to new positions and pressing
the left cursor key
5. Save the route by selecting the Save button in the Route Edit dialog
- The Route Edit dialog is replaced with the Route Details dialog
If it should be required to move the chart while using the cursor for planning a route, the
chart can be panned to selected position.
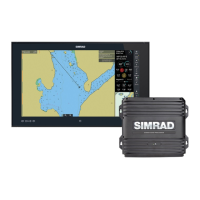
Displaying a route
You display a route in the chart by selecting the Display option in the Routes list.
48
Route planning | E50xx ECDIS Operator Manual