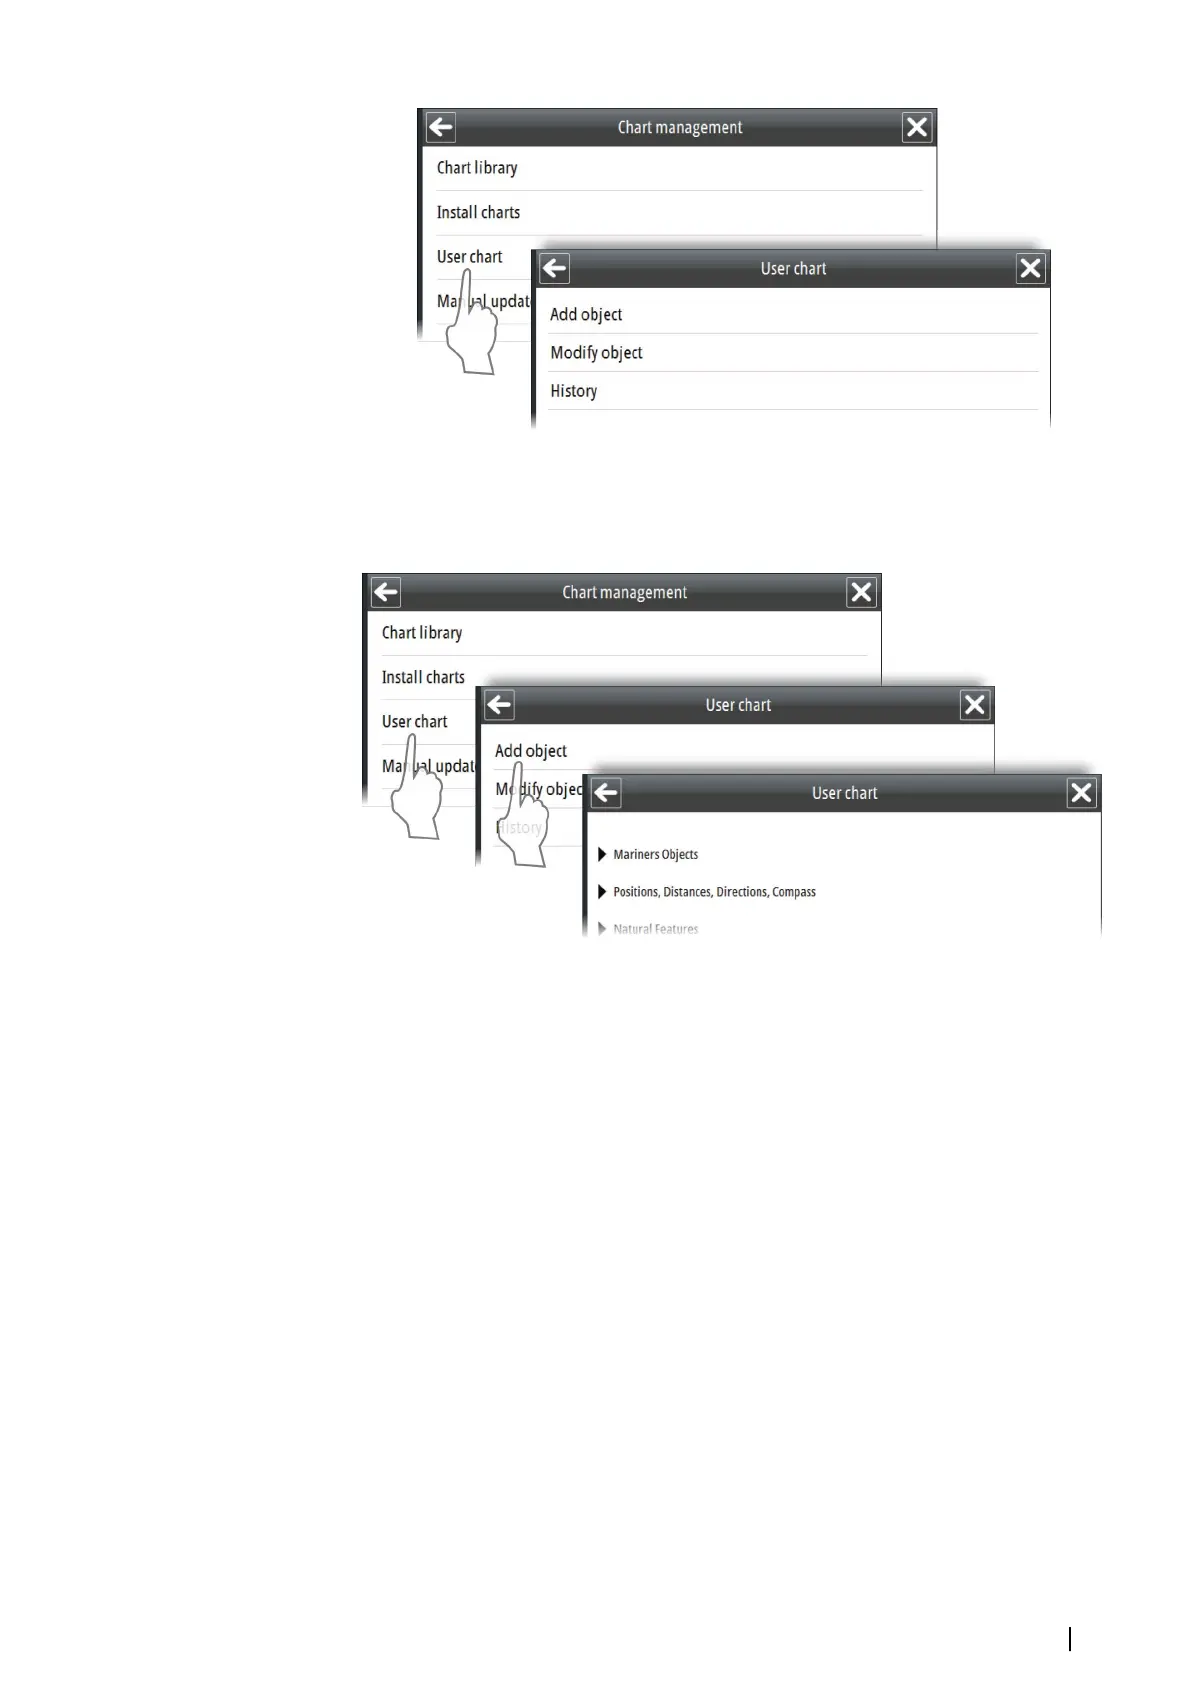
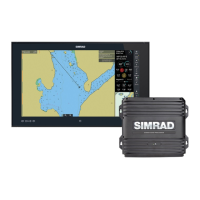
Adding user chart objects
User chart objects are added by using the User chart option in the Chart management
menu.
1. Select the Add object in the User chart menu
-
A list of object categories is displayed in the menu area
2. Select a category and then the type of object you want to add
- The selected object type is displayed in the menu area
3. Select the geometry icon to display option for shape and position
4. Position the object by either entering the coordinates manually or by positioning the
cursor in the chart
5. Continue entering new positions if the object shape is an area or a line
6. Select the Apply button to confirm the object shape and position
7. Edit details for the object if required by using the Settings icon, eventually add child
objects by using the Child icon
8. Select the Save button to save the object
You can quickly place Mariner objects from the Panel menu. This option has only a few
Mariner object categories available. You also need to use the geometry dialog to position the
object, as you do when you add mariner objects from the main menu.
Managing the chart database | E50xx ECDIS Operator Manual
59