© Jun 2022 6-2 TB24 Plus&26J Plus Maintenance Manual
REPAIR PROCEDURES
Platform Controller
ELECTROCUTION HAZARD
Before performing this procedure, be
sure to disconnect the battery and
the charger on AC outlet. Contact
with live conductors may result in
death or serious injury.
NOTICE
Perform this procedure with the machine in stowed
position.
1. Disconnect external power supply, and push in the
emergency stop buttons on the platform and ground
controllers to OFF position.
2. Locate the cable connected to the bottom of the
platform controller.
3. Disconnect and tag the cable from the bottom of the
pltaform controller.
4. Remove the retaining bolts from the platform
controller.
5. Remove the platfrom controller from the machine.
Platform
1. Remove the platform controller from the platform.
For the specific procedure, please reference
Platform Controller, page 6-2.
2. Remove the footswitch.
3. Support and secure the platform to an appropriate
lifting device.
4. Remove the platform mounting bolts.
Figure 6-1
5. Use a brass drift or wooden hammer to tap the
connecting pin out.
6. Slowly move the platform away with a lifting device.
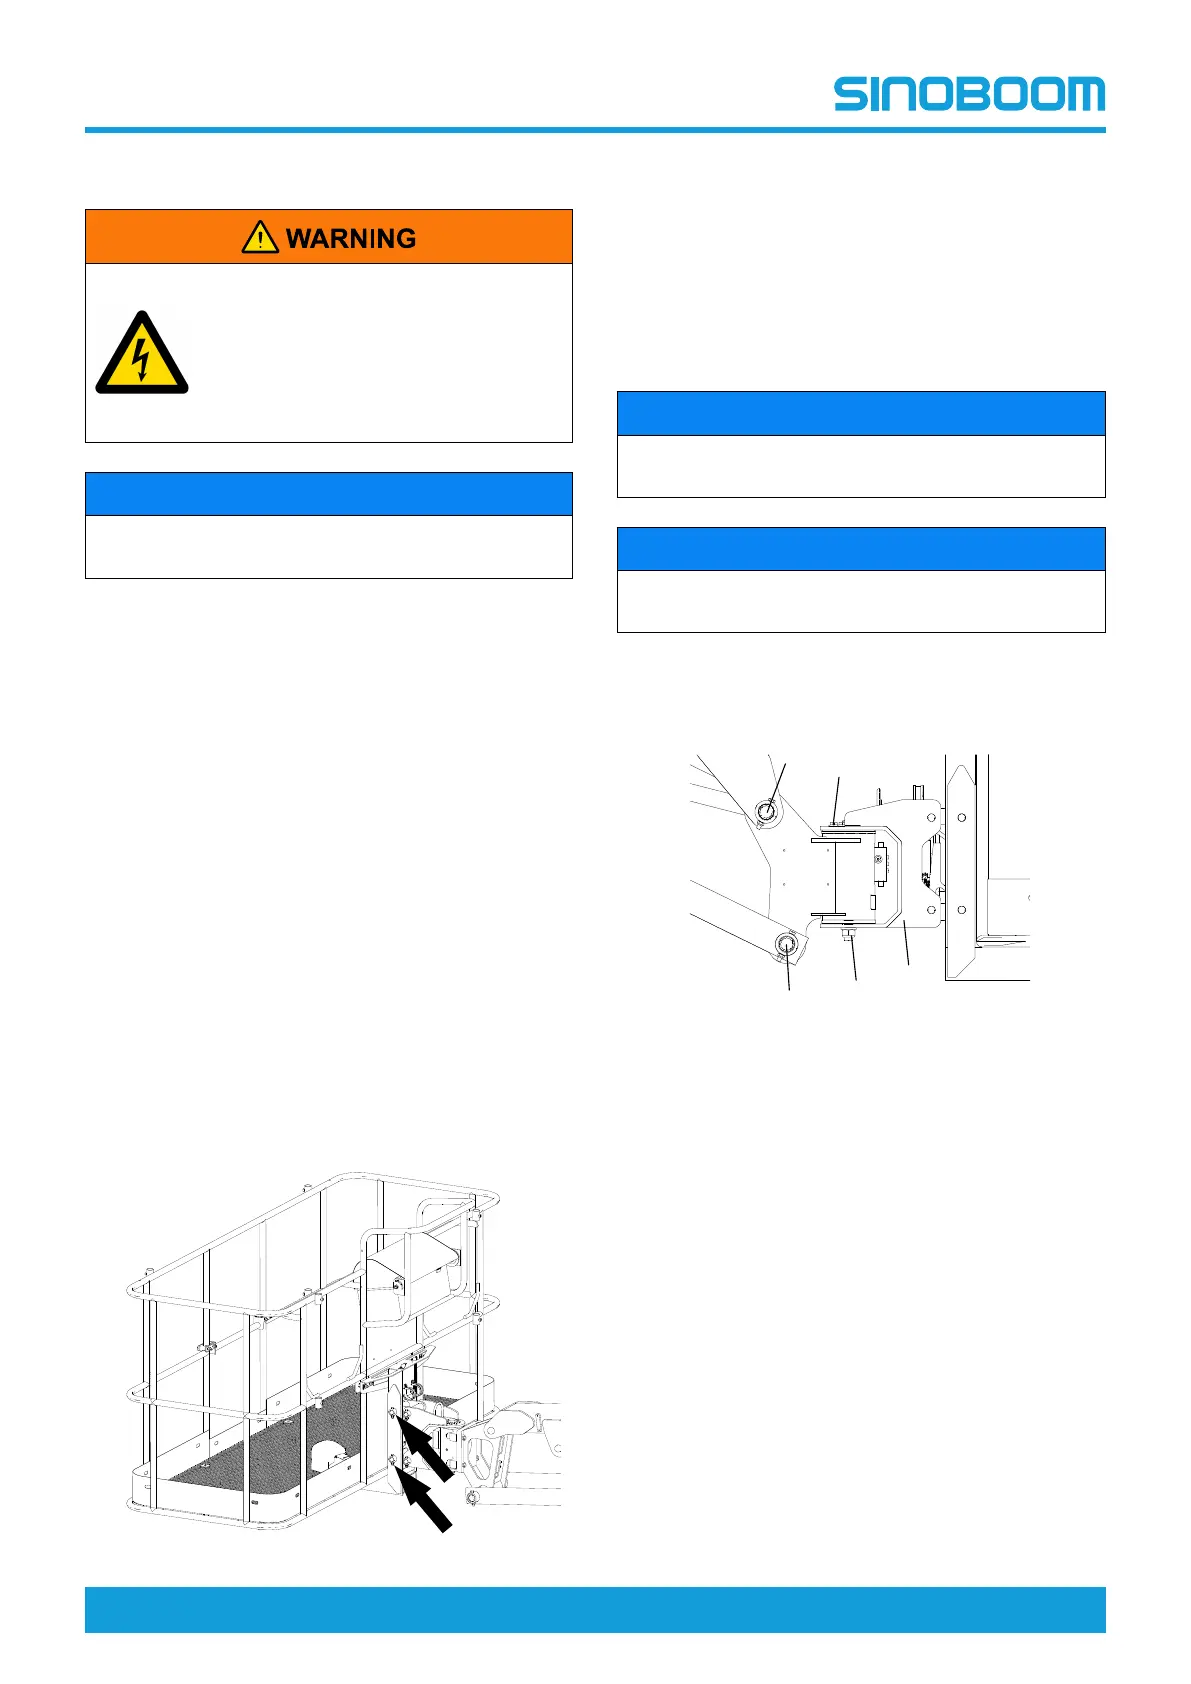
Platform Rotate Motor
NOTICE
Perform this procedure with the machine in stowed
position.
NOTICE
When removing a hose or fitting, the O-ring on the
fitting or hose end must be replaced.
Note:
Platform rotate motor serves for platform rotation within
the range of 160°.
Figure 6-2
1. Remove the platform.
2. Tag, disconnect and plug the hydraulic hoses from
the both ports of platform rotate cylinder, and cap
the fittings on the manifold.
3. Use a suitable device to support the platform rotate
motor bracket 3#.
4. Remove the retaining bolts 1# and pivot pin 2#, and
then remove the bracket 3#.
5. Use a suitable device to support the platform rotate
motor.
6. Remove the bolts and nuts securing the pivot pin 4#
to the platform rotate motor.
7. Remove the platform rotate motor.