• If additional registration marks are desired, copy and paste the middle set and relocate to desired locations.
Note that they do not have to be equally spaced with respect to the others, but do need to be in alignment:
3.06.3 Automatically Adding Intermediate Registration Marks in SignCut Draw
• In Section 3.04.2, it was shown in Option B how to add registration marks without opening a template.
Intermediate registration marks can be added in a similar way. However, at this time, these registration
marks are not recognized as such in SignCut Pro.
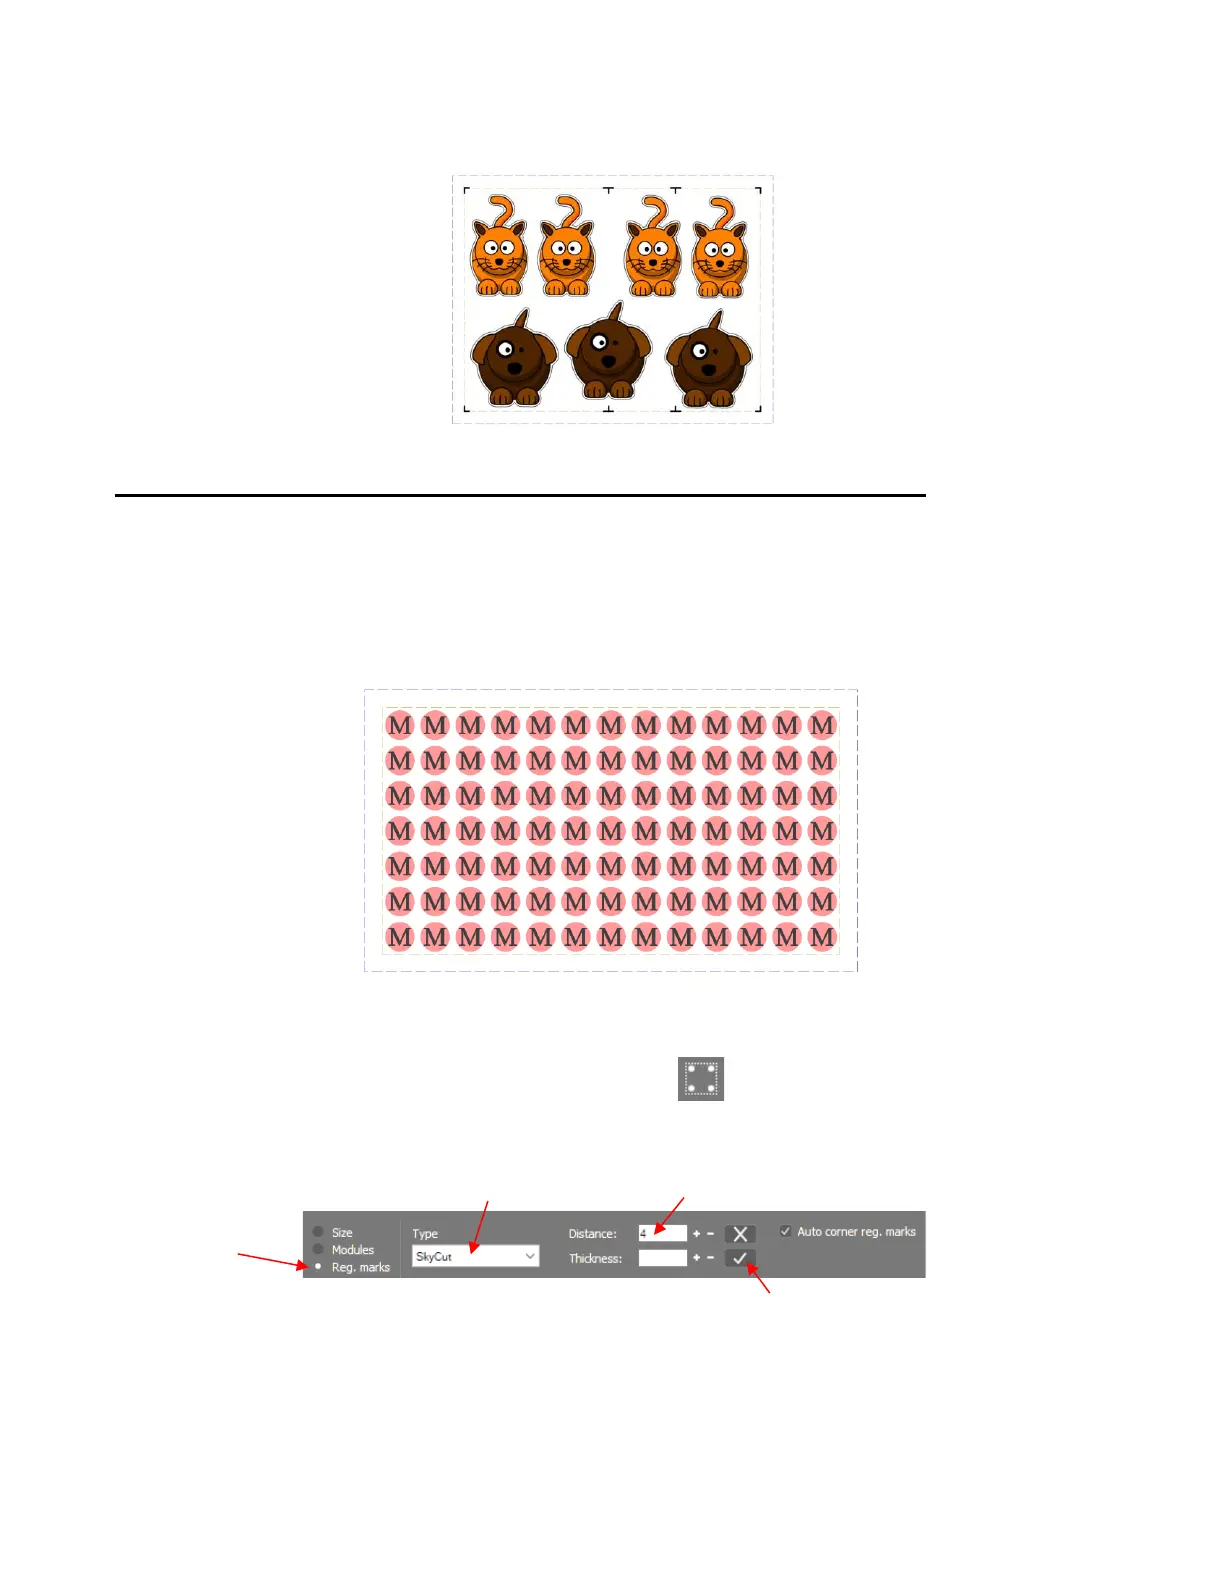
• In this tutorial, a large number of repeats are going to be printed and cut. Adding intermediate registration
marks ensures greater accuracy through the progression of the cut.
• Adding intermediate registration marks ensures greater accuracy through the progression of the cut. In this
project, it is decided to add marks ~ every 4 inches.
• To add the registration marks, click on the Sign setup icon on the Tools Panel (or press the shortcut
W). Mark the Reg marks option. The following appears on the Properties & Functions Bar:
Select Skycut from the Type menu. Entering the spacing (in this example, 4 inches) into the Distance
field. Click on Apply: