lower force will be used, but you may still need several passes. Also, to get more force applied, raise the
tool in the blade holder seat the same way you do with the blade holder (i.e. 20 Post-It notes).
4.02.2 Score and Cut Project
• When a project involves both scoring and cutting, the same process presented in Section 4.01.1 is followed.
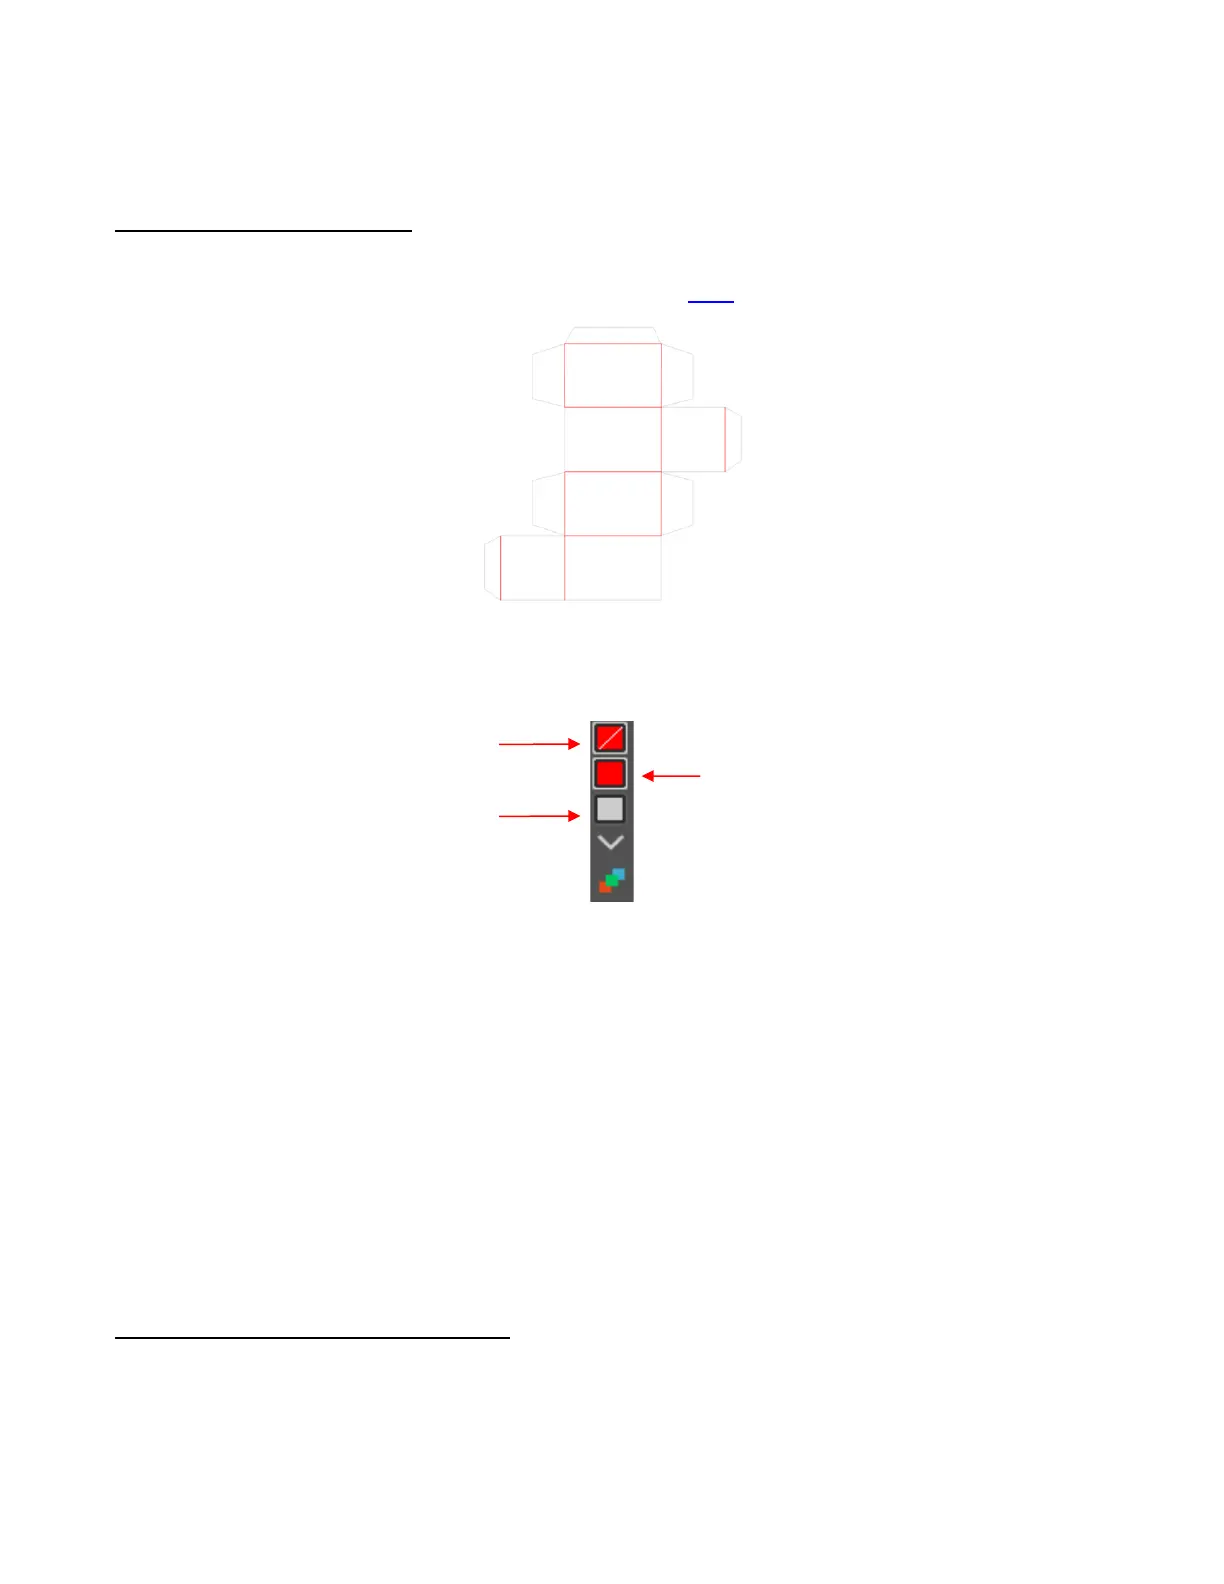
For testing, try out this foldup box which can be downloaded here.
• As with a draw-and-cut application, the score lines should be a different color from the cut lines. Note that
because the two rectangle scores are closed shapes, they are listed separately on the Select by color
panel and will be treated as separate colors when assigning the settings in SignCut Pro:
• After sending the project to SignCut Pro, open the Cut out window and note the following steps which were
used in the Draw and Cut tutorial:
On the Tool settings tab, create separate presets for the scoring and cutting steps making sure the
Blade Offset is set to 0 for the scoring tool and set to the recommended value for the blade being used
for cutting. Refer to Section 2.04.1 for directions on presets.
On the Advanced Settings tab, mark the option for Cut in colour order and move the score layers
above the cut layer.
For each layer, click on the Edit attributes tab and select the appropriate preset from the drop-down
menu. For the cut layer, mark the Pause for tool change option so that after scoring the Skycut will
pause and you can switch the scoring tool for the blade holder.
Load the material and the scoring tool into the Skycut. The small end of the scoring tool is usually best
for scoring. Click on Cut out and, after the scoring is complete, change out the tool and then click on
OK to complete the cutting process.
4.02.3 Embossing Paper or Cardstock
• When embossing paper or cardstock, it is recommended that you use contours to create several very small
outlines with a spacing of, say, 0.01” (0.25 mm). These tiny offset lines will then produce a slightly thicker
overall outline of your shapes. This works better than line-filled embossing which can stress the cardstock
and cause wrinkling. Here are the steps:
Create the shape you wish to emboss. In this example, the number 25 is used: