Note that clicking on the Apply icon above the Threshold setting will allow you to examine the trace
before clicking on Create all. Thus, you can continue to make changes to Threshold until you are
satisfied with the results.
• Additional vectorizing functions and settings are available in SignCut Draw. Refer to the SignCut user
manual.
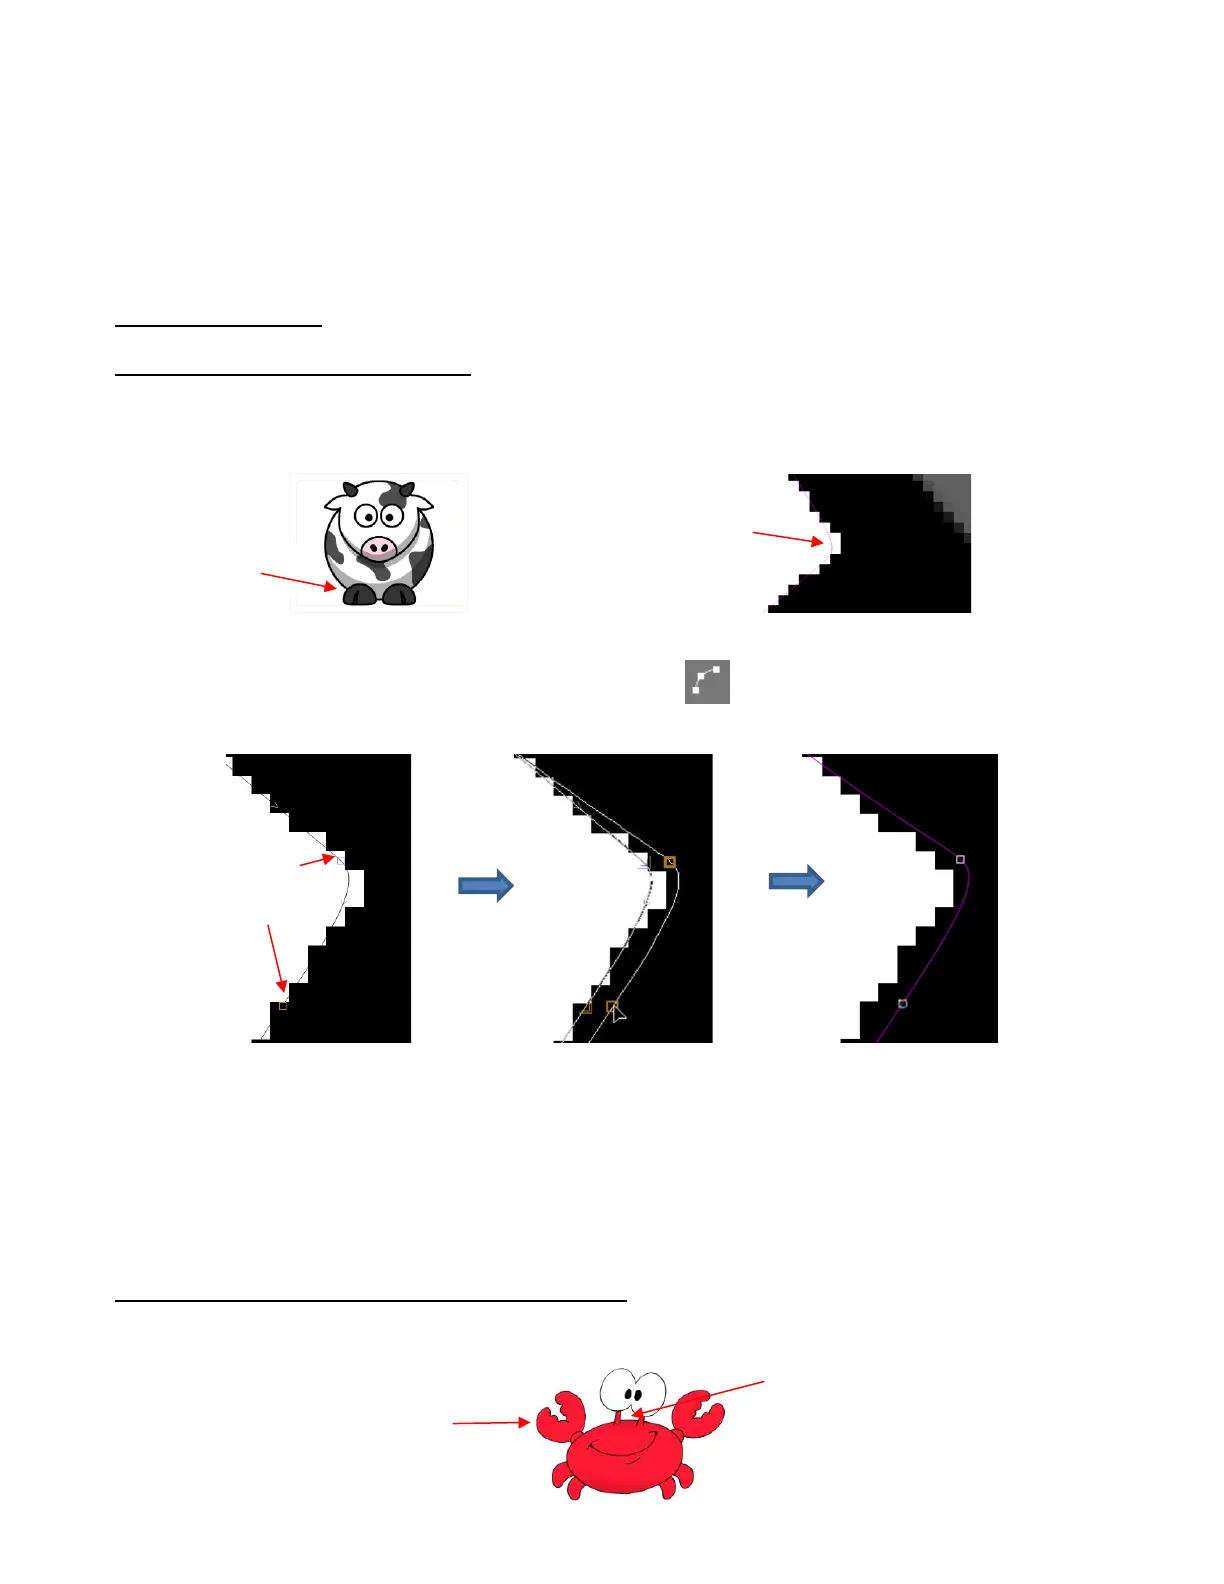
5.02 Editing a Trace
5.02.1 Node Editing a Contour Cut
In the following example, it’s discovered that there are a few gaps between the trace line and the bitmap
that resulted in some white showing during a contour cut. Here’s one example:
With the trace line selected, click on the Node Edit icon (or shortcut O) and the nodes making up
the path of the cut will appear. Drag nodes, as needed, to move the path within the print area:
o Nodes can be individually moved or together at one time. In the prior screenshot, the Shift key was
held so that two nodes were selected and then dragged together to move the path.
o Node editing in SignCut Draw offers many more features which are covered in the SignCut user
manual.
5.02.2 Deleting Paths Within a Contour Cut Trace
In the following example, a crab cartoon from Doodle Dragon Studios is traced:
While dragging nodes, both
current path and new path
are visible