1.12 Connecting the Skycut to Your Computer
• Place your Skycut on a sturdy horizontal surface. If using the cutting mat, be sure to allow enough free room
in both the front and the back for the mat to extend during cutting.
• Powering On:
Connect the power cord to the power adaptor.
Plug the power cord into a wall outlet or power strip. Then plug the power adaptor into the right side of
the cutter.
Turn on the power using the power button below the control panel. After several seconds, the light
inside the Skycut will turn on and the head will do a slight jog.
• Powering Off: Press and hold the power button until the light shuts off.
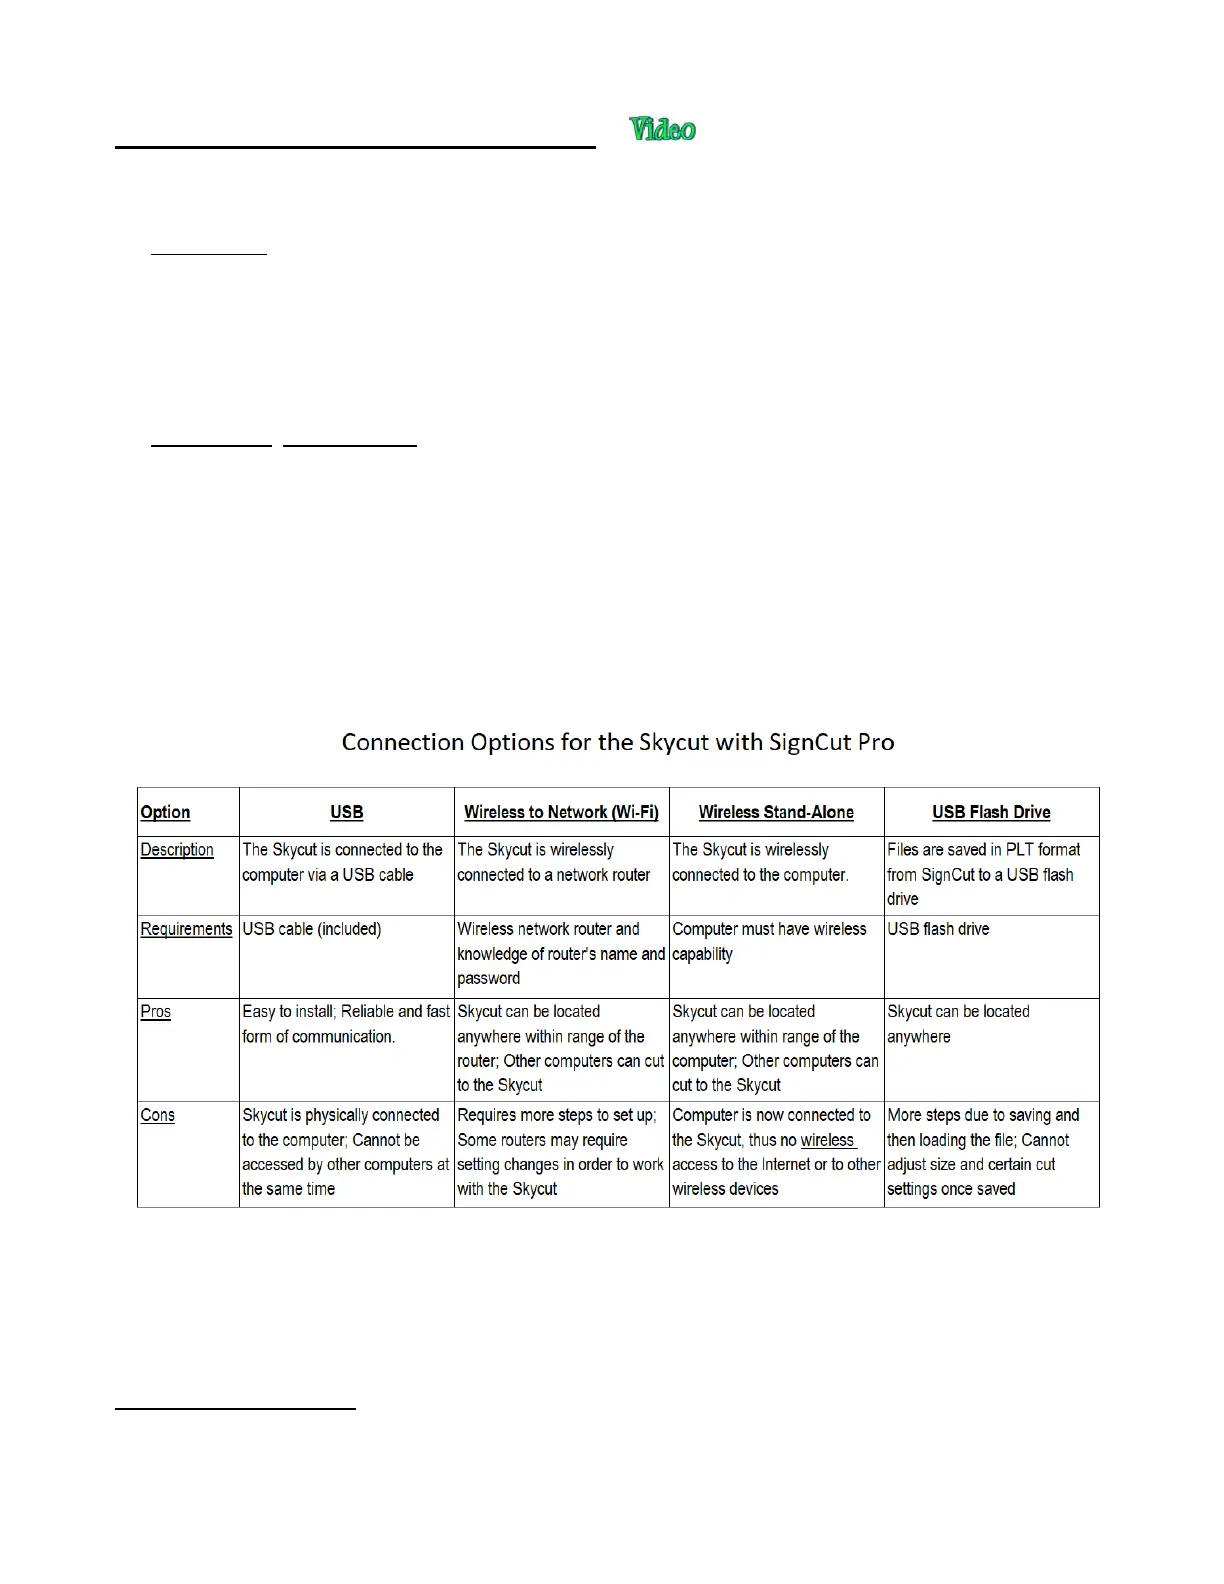
• You have four options for sending files and information from your computer to the Skycut:
Direct USB using the included USB cable
Wi-Fi – adding the Skycut to a home/office network that is also accessed by your computer
Wireless Stand-Alone – connecting wirelessly to your computer
U_Disk - Exporting PLT files from SignCut Pro onto a USB flash drive and then loading those files using
the control panel on the Skycut.
• Review the information in the following table to understand the differences between these options:
• Note that implementing any of these options does not preclude you from changing to another one, as
needed.
• The following sections present what steps are required for each type of connection. If you run into
connectivity issues, please contact your dealer.
1.12.1 USB Connection
• Power on the Skycut and wait for the white light status. Connect the included USB cable into the Skycut’s
USB port and into a USB port on your computer.
• Open SignCutPro and click on the Cutter button near the top of the screen: