Perform the cutting process from SignCut Pro2.
3.04.2 Preparing the Registration Marks
• There are two options for adding registration marks in SignCut Draw for use with the Skycut:
Option A: Open a template file with registration marks already in place
Option B: Add registration marks from within SignCut Draw
• Both of these will be covered in this section. However, note that currently the first option is the only one
working correctly with the Skycut models.
Option A. Using a Template File with Registration Marks
• One of the registration mark templates will be used. These templates can be downloaded from this link:
• After extracting the files, open either the Letter or A4 file. At this time, do not use one of the templates that
contains intermediate registration marks. This will be covered in Section 3.06.
Option B. Adding Registration Marks from within SignCut Draw
• While it’s not a requirement, it can be helpful in designing if the Drawing Board dimensions match the
printout size you plan to use. For this tutorial, Letter size (8.5” x 11”) will be used. But you can use much
larger sizes, if you have the ability to print in those dimensions.
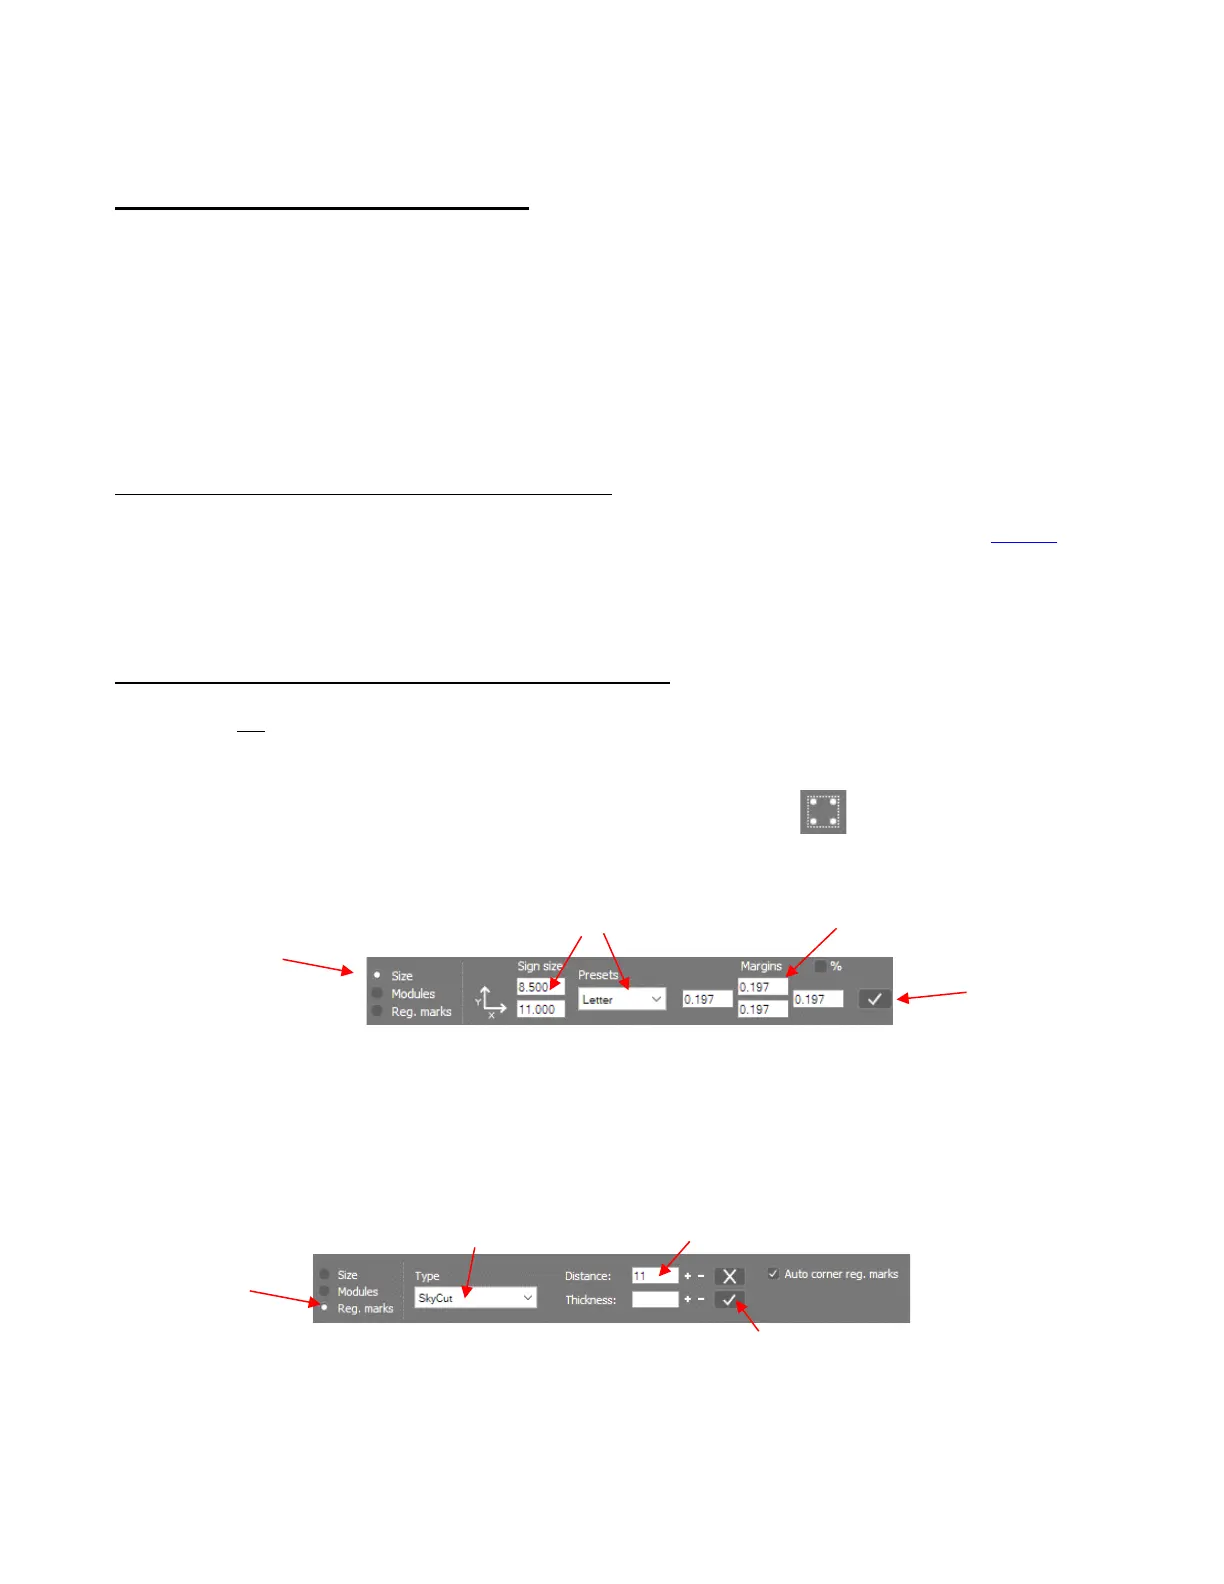
• To change the Drawing Board dimensions, click on the Sign setup icon on the Tools Panel (or
press the shortcut W). The following appears on the Properties & Functions Bar:
It’s important to use Margins because the registration marks will be aligned with them. However, on a
Skycut, these registration marks can be fairly close to the edges of the printout.
• In this same Sign setup mode, click on the Reg marks option and change settings to the following:
Distance: This setting can be made smaller if intermediate registration marks are needed. Refer to
Section 3.06.3.