(7) Load the mat and/or printout so that it is straight, relative to the cutter. The alignment doesn’t need to be
absolutely perfect but close enough that it will allow for a faster and, of course, successful detection by the
camera. Set the Speed and Force (either from within SignCut Pro or on the control panel itself). Insert the
blade holder and perform a test cut, as needed, adjusting the cut settings.
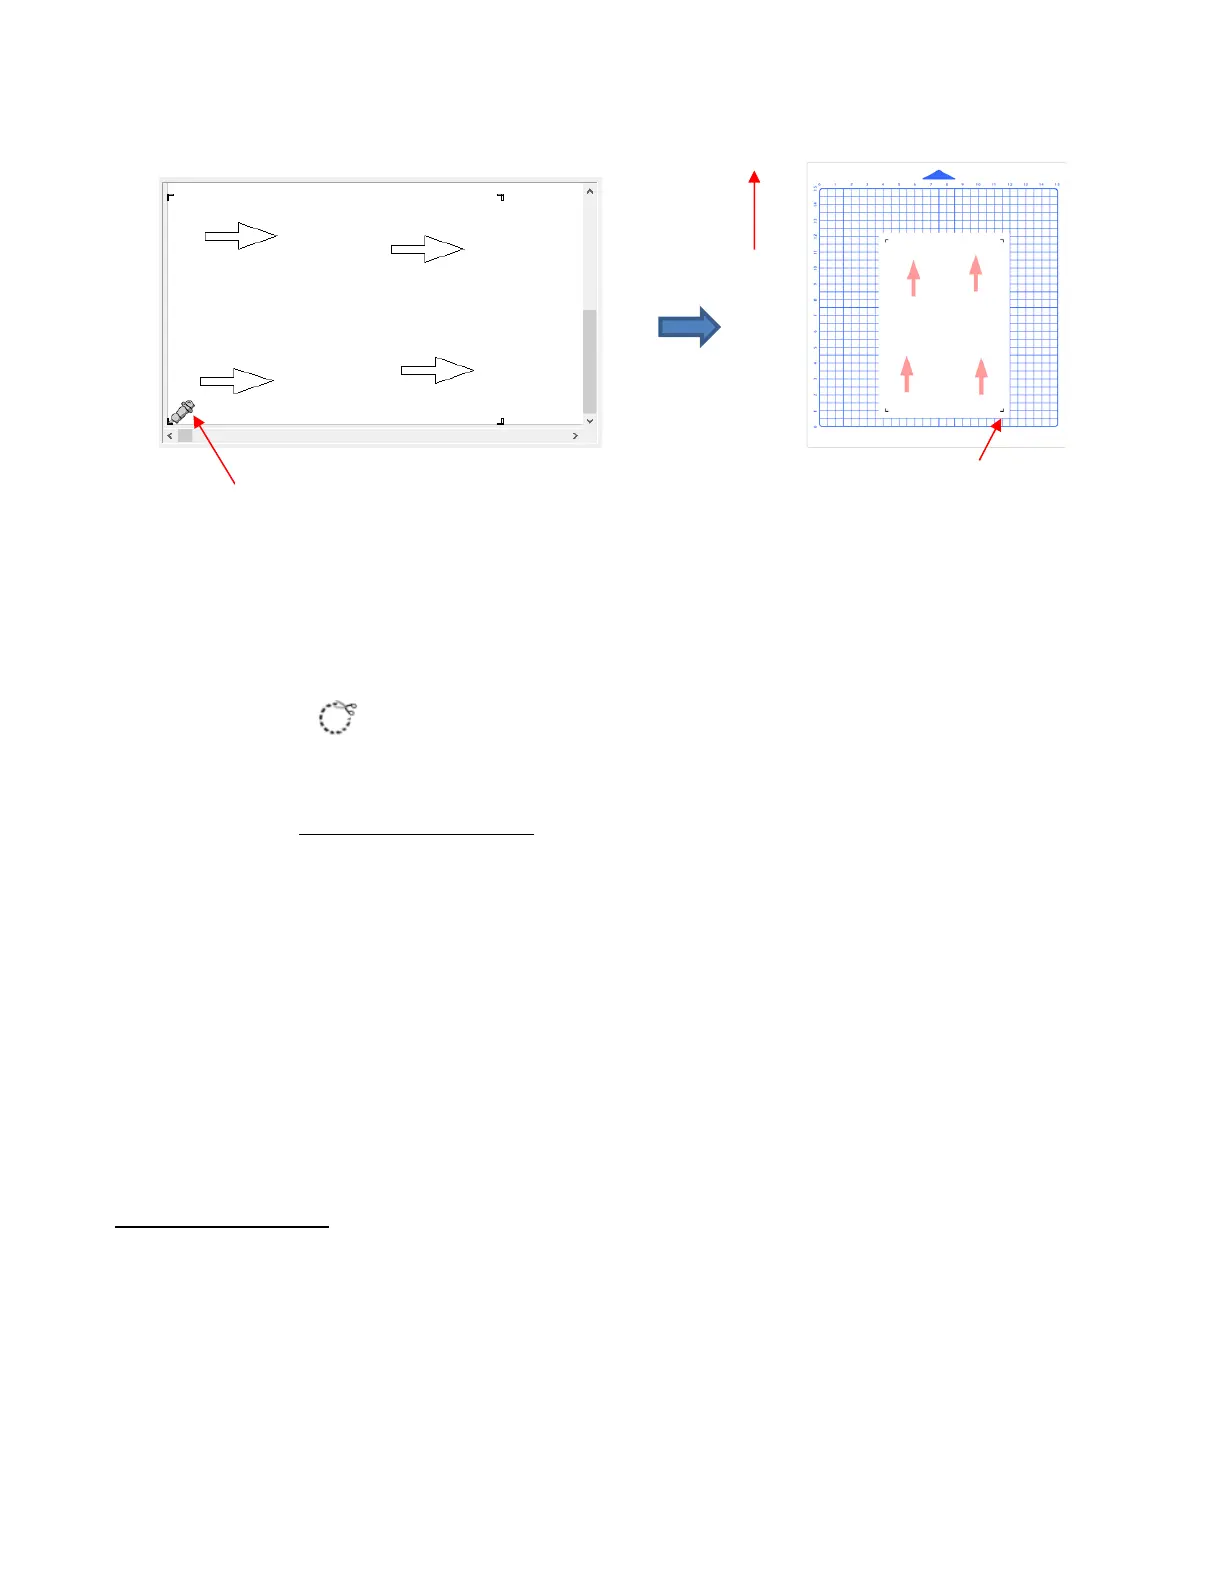
(8) Place the blade holder over the first registration mark. In the main SignCut Pro window, click on the
Contour cut icon .
(9) Click on Next and the Skycut’s camera will now move over each registration mark, take a photo, and make
an adjustment. Once it has read all four marks plus the first one a second time, it will proceed to cut out the
printed shapes. Note which arrow cuts first because it’s the one that should be used for any adjustment to
the calibration values. If there is a difference in the offset with the other arrows, that indicates an issue with
the cut settings. Refer to Section 3.05.3.
(10) After testing out this process, be sure to check out remaining sections in this chapter to understand
additional options, such as:
Adjusting camera calibration settings, if needed – Section 3.05.1
Other reasons for inaccurate results – Sections 3.05.2 and 3.05.3
How to set up a grid of repeats – Section 3.06.1
Adding additional registration marks to improve accuracy on long cuts – Sections 3.06.2 and 3.06.3
Performing a PNC using the USB flash drive – Section 3.07
3.05 Inaccurate Cuts
• There are several reasons why your print and cut results may not be as accurate as you need:
The calibration needs to be adjusted
The contours around the printed image are not accurate
The cut settings or pinch wheels need to be adjusted
• The following sections present solutions for each of these.