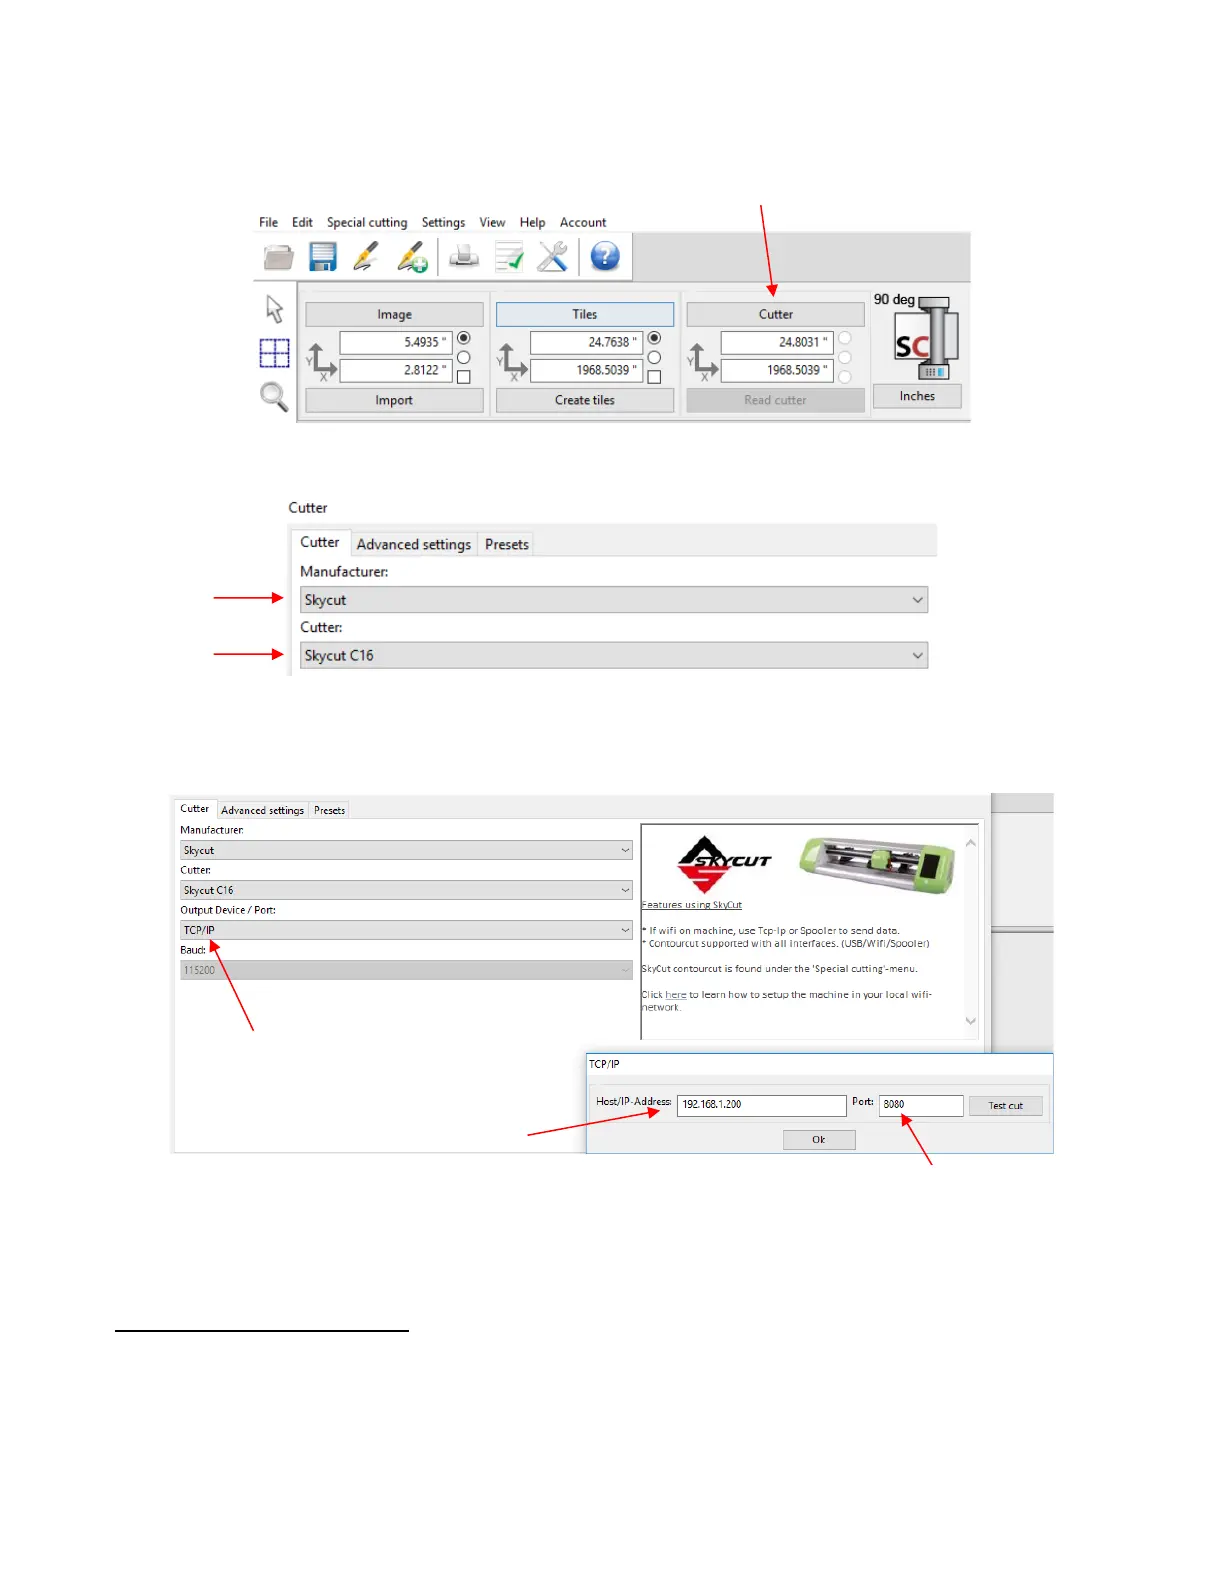
(10) Once you receive the Connected OK display, open SignCut Pro and click on the Cutter button near
the top of the screen:
• The Cutter window will open. From the drop-down menus, select the Manufacturer and Cutter as shown:
• In the drop-down menu for Output Device/Port, select TCP/IP and a new window will open. In that window,
enter the same IP Address you selected earlier on the Skycut’s control panel. Also, enter 8080 for the Port
assignment:
• Click on Ok to close the TCP/IP window and Ok again to close the Cutter window. Proceed to Section 1.13.
1.12.3 Wireless Stand-Alone
• It’s usually best to connect the Skycut while it is next to the wireless computer. Once connectivity is
established, you can then experiment to see how far from the computer the Skycut can be located.
• There are two situations to consider before getting started. If you are not sure which applies to your Skycut,
then select B and go to that section first.
A. The Skycut has never been set up wirelessly to a network.