(4) To enter the password, use the following tips if you are unfamiliar with this type of screen:
“Rapid tap” multiple times in succession to select a letter. For example, if your network password is
cts456, then to enter “c”, you would tap three times on “abc” because “c” is the third letter in “abc”.
Next you would proceed to “stu” and tap two times to enter “t”. Then you would only need to tap on
“stu” once to enter the letter “s.”
To enter numbers, click on “123” to open the number entry screen.
For punctuation, click on “#@~“ to open the extra characters screen.
To enter upper case letters, click on the up arrow in the lower left part of the screen.
(5) Once you have the password entered in the display box at the top, click on OK to return to the Wifi
screen:
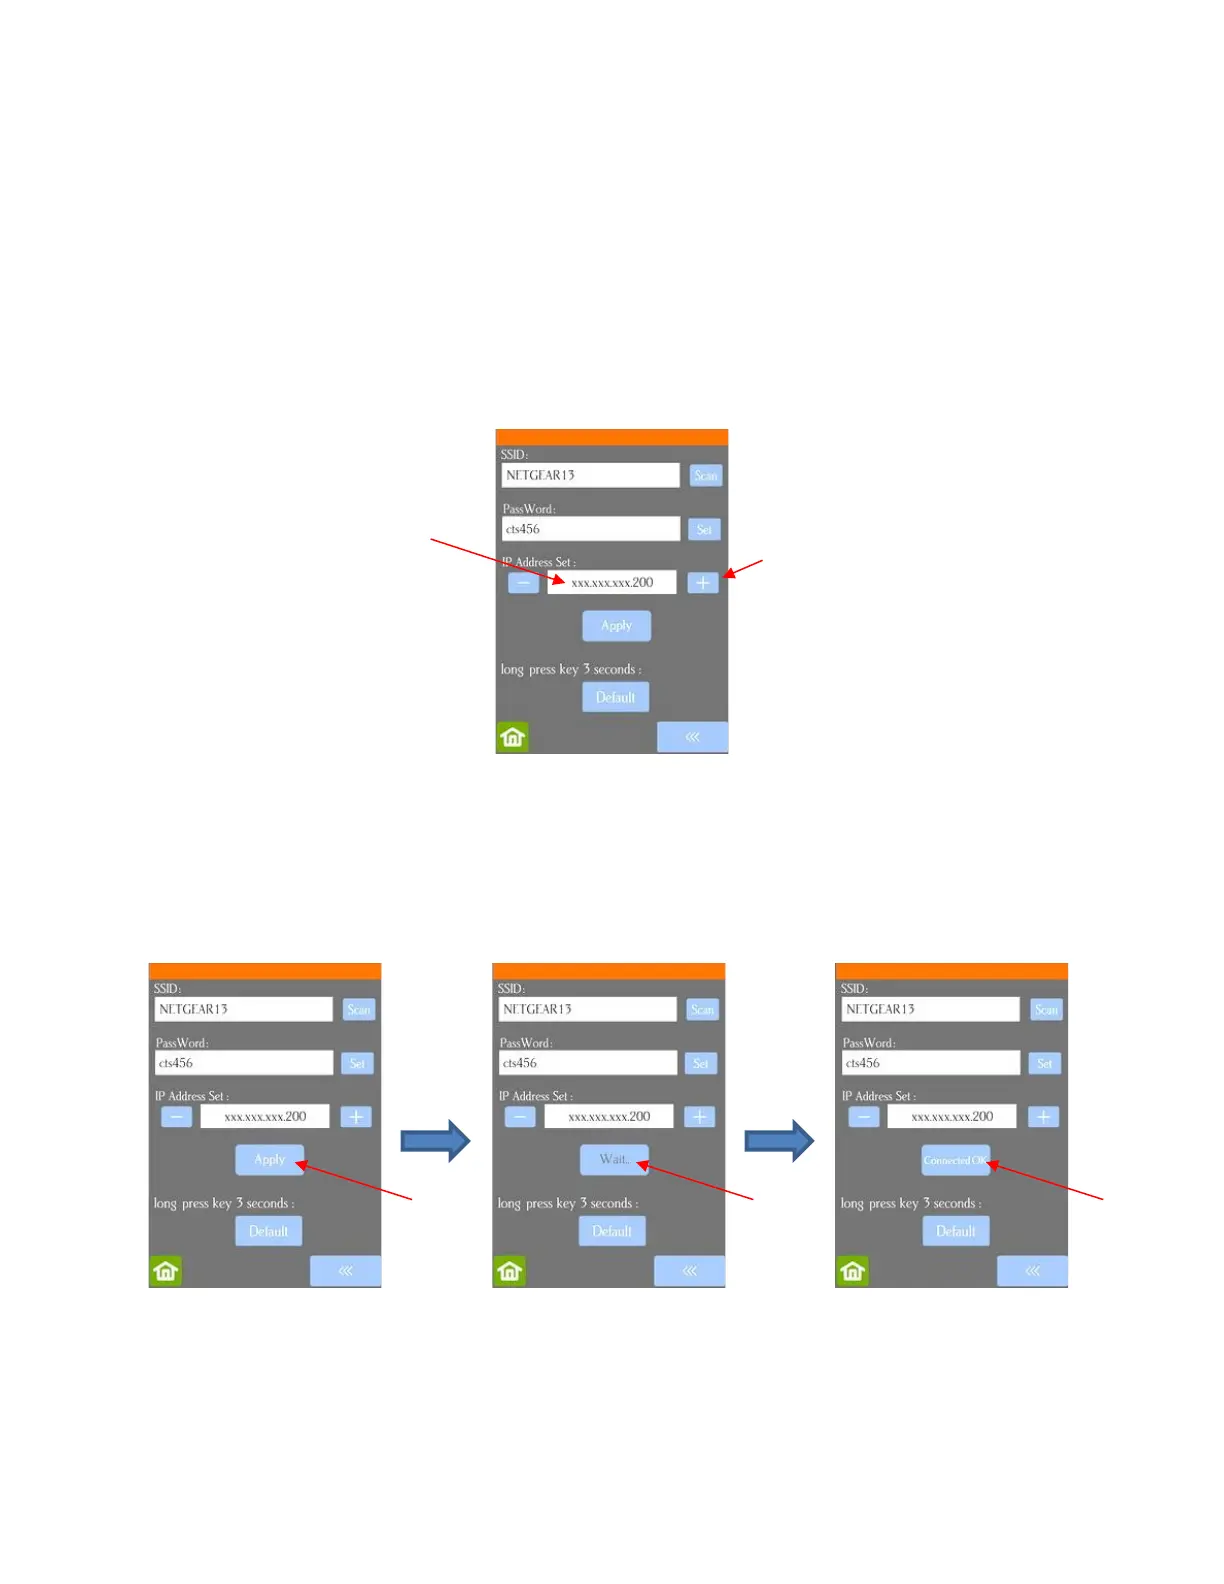
(6) Next check the IP Address that will be assigned to the Skycut. The Skycut will automatically pick up the
first three sets of digits from your router but will continue to display them as shown above. You only
need to decide if the last set, which should be defaulting to “200”, can be used. Use the “+” or “-“ buttons
to make any needed changes.
(7) Click on Apply and wait for several minutes while your router assigns this IP Address to the Skycut.
Eventually, you will see Connected OK appear:
(8) If instead of receiving a Connected OK display, you see Password err, again verify the network you
selected and the password you entered. If you are unable to successfully connect and the Skycut is
within a few feet of your router, please check your router’s user manual and/or search online for issues
with your particular router model.
(9) If you wish to reset and start again, press and hold the Default button for 3 seconds until the button
turns red. Then click on Scan and repeat from Step 3.