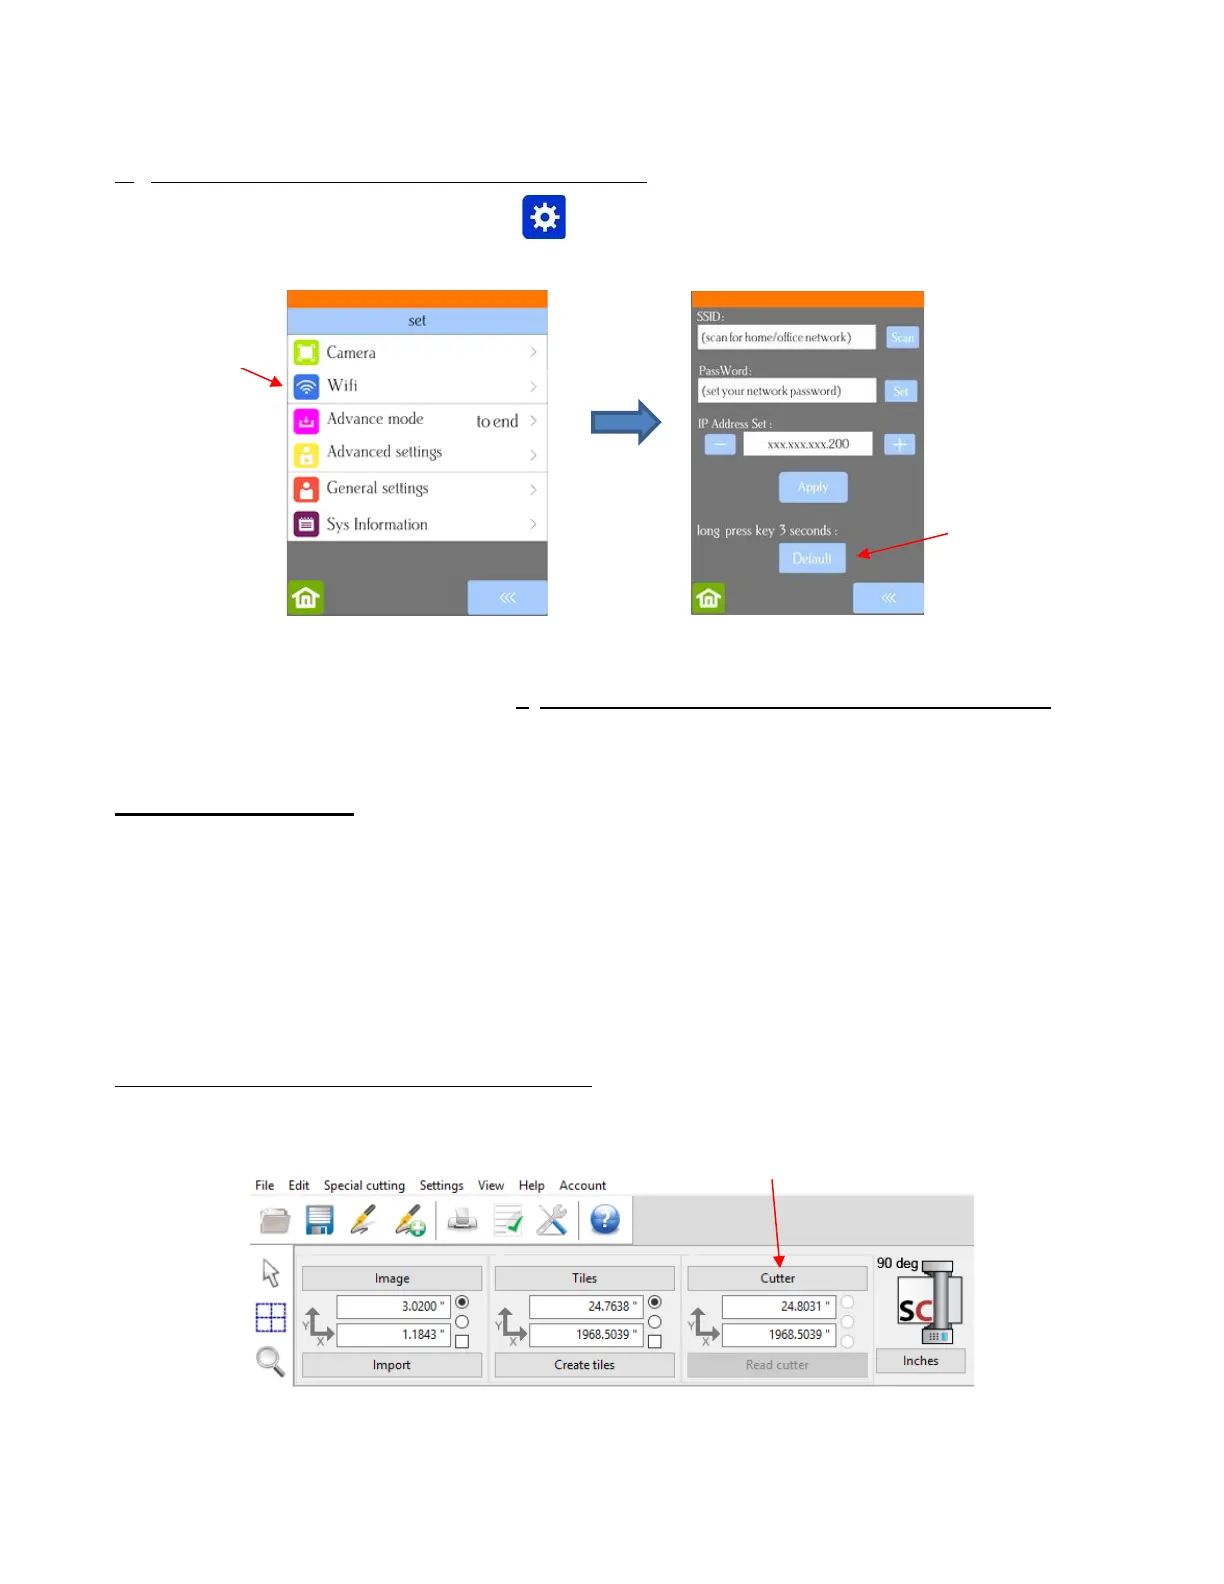
B. The Skycut has previously been connected to a network
• On the Skycut’s control panel, select Set and then select Wifi. The Wifi screen will appear:
• To reset the Skycut so that it will be found as an available network, press and hold the Default button for 3
seconds. Release and you should see the Apply button now displaying Wait. In a minute the Apply should
return and you can then proceed back to A. The Skycut has never been set up wirelessly to a network and
use the same procedure as if the Skycut was never set up on a network.
1.12.4 USB Flash Drive
• With a USB Flash Drive connection, you will normally follow the steps presented in this section. If you are
new to SignCut Pro and/or to your Skycut, it is recommended that you go to Section 1.13 now and set up a
test file using the steps presented there. In that section you will be instructed when to return here to
complete the steps needed to export your file onto a flash drive.
• Insert a USB flash drive into your computer and allow your computer to find it. Note the drive letter assigned.
• If you plan to primarily use the USB flash drive option, complete this next subsection to make it the default
connection setting in SignCut Pro. Otherwise, skip to the subsection called Exporting a File as PLT.
Setting the USB Flash Drive as the default connection
• Click on the Cutter button near the top of the screen
• The Cutter window will open. From each drop-down menu, select the Manufacturer, Cutter, and Output
Device/Port as follows: