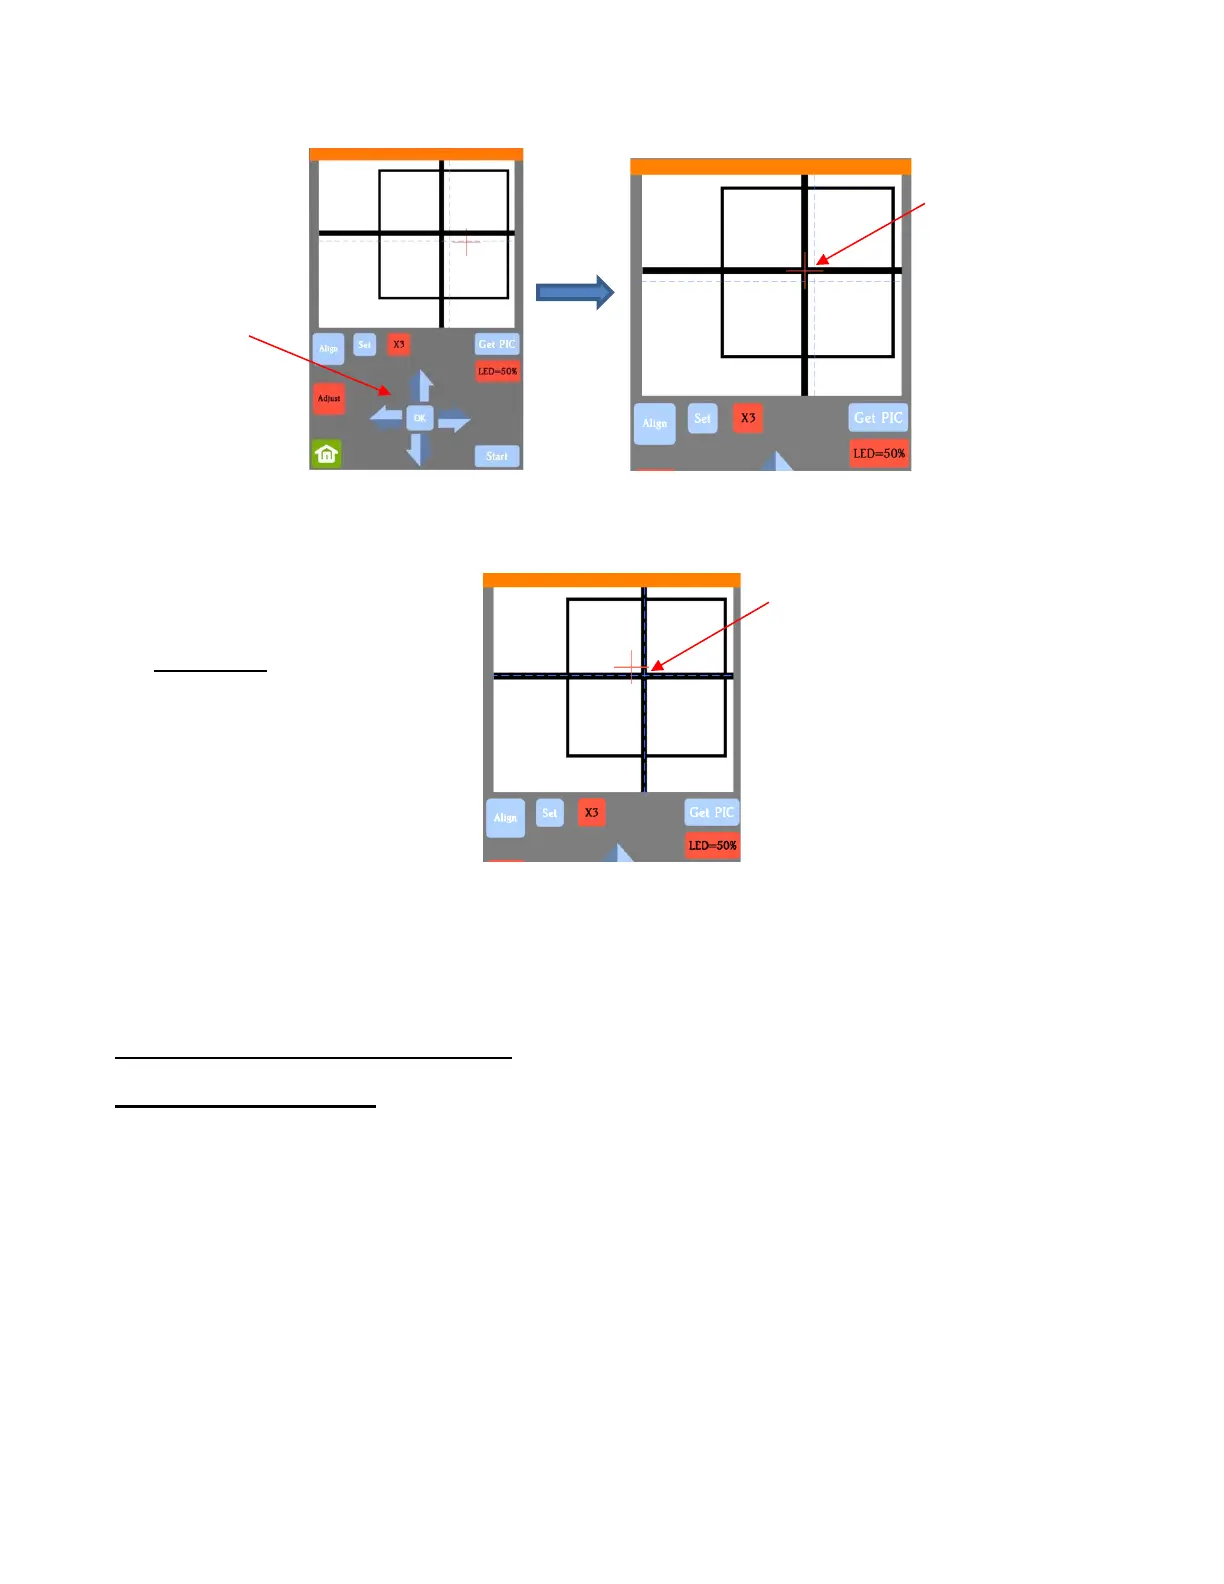
(11) Press OK and a new photo will be taken. The blue dashed + should now be more closely aligned with the
center of the test shape:
(12) If necessary, repeat Steps 10 and 11 until the blue dashed + is near-perfectly centered in the test shape.
(13) Press X3 to return to normal magnification. Click on the Home icon to return to the Main Screen. Your
Skycut is now calibrated for contour cutting applications.
3.04 Performing a PNC in SignCut Pro
3.04.1 Summary of Steps
• Here are the typical steps when performing a contour cut application:
Prepare the image(s) that will be printed and cut. These typically include one or more of the following:
o An imported raster image such as a JPG or PNG or BMP file
o A vector image (imported, designed in SignCut Draw, or traced from the raster)
o Text
Prepare the appropriate registration marks:
o Open a template file that has registration marks
o Have registration marks added in the software
Print the project after selecting appropriate printer options.
Perform a test cut so that you know the best cut settings to use for the printed material. This test cut can
often be performed on the printout itself if there is room in the waste area of the project.
IMPORTANT: the red + is
intentionally moved away from the
test shape with each new photo so
that you can more easily see if the
blue dashed + is centered.