1.14 Default Settings To Consider
• The Skycut’s control panel offers a number of default settings. Some of these may not be important at this
point in the learning process. So, you may want to skip this section for now but remember that it’s here and
could provide you some options to improve your experience with the Skycut.
• Each of the following sections will refer to one of the settings in the Set screen.
1.14.1 Advanced Settings
• The optional settings in the Advanced Settings screen are:
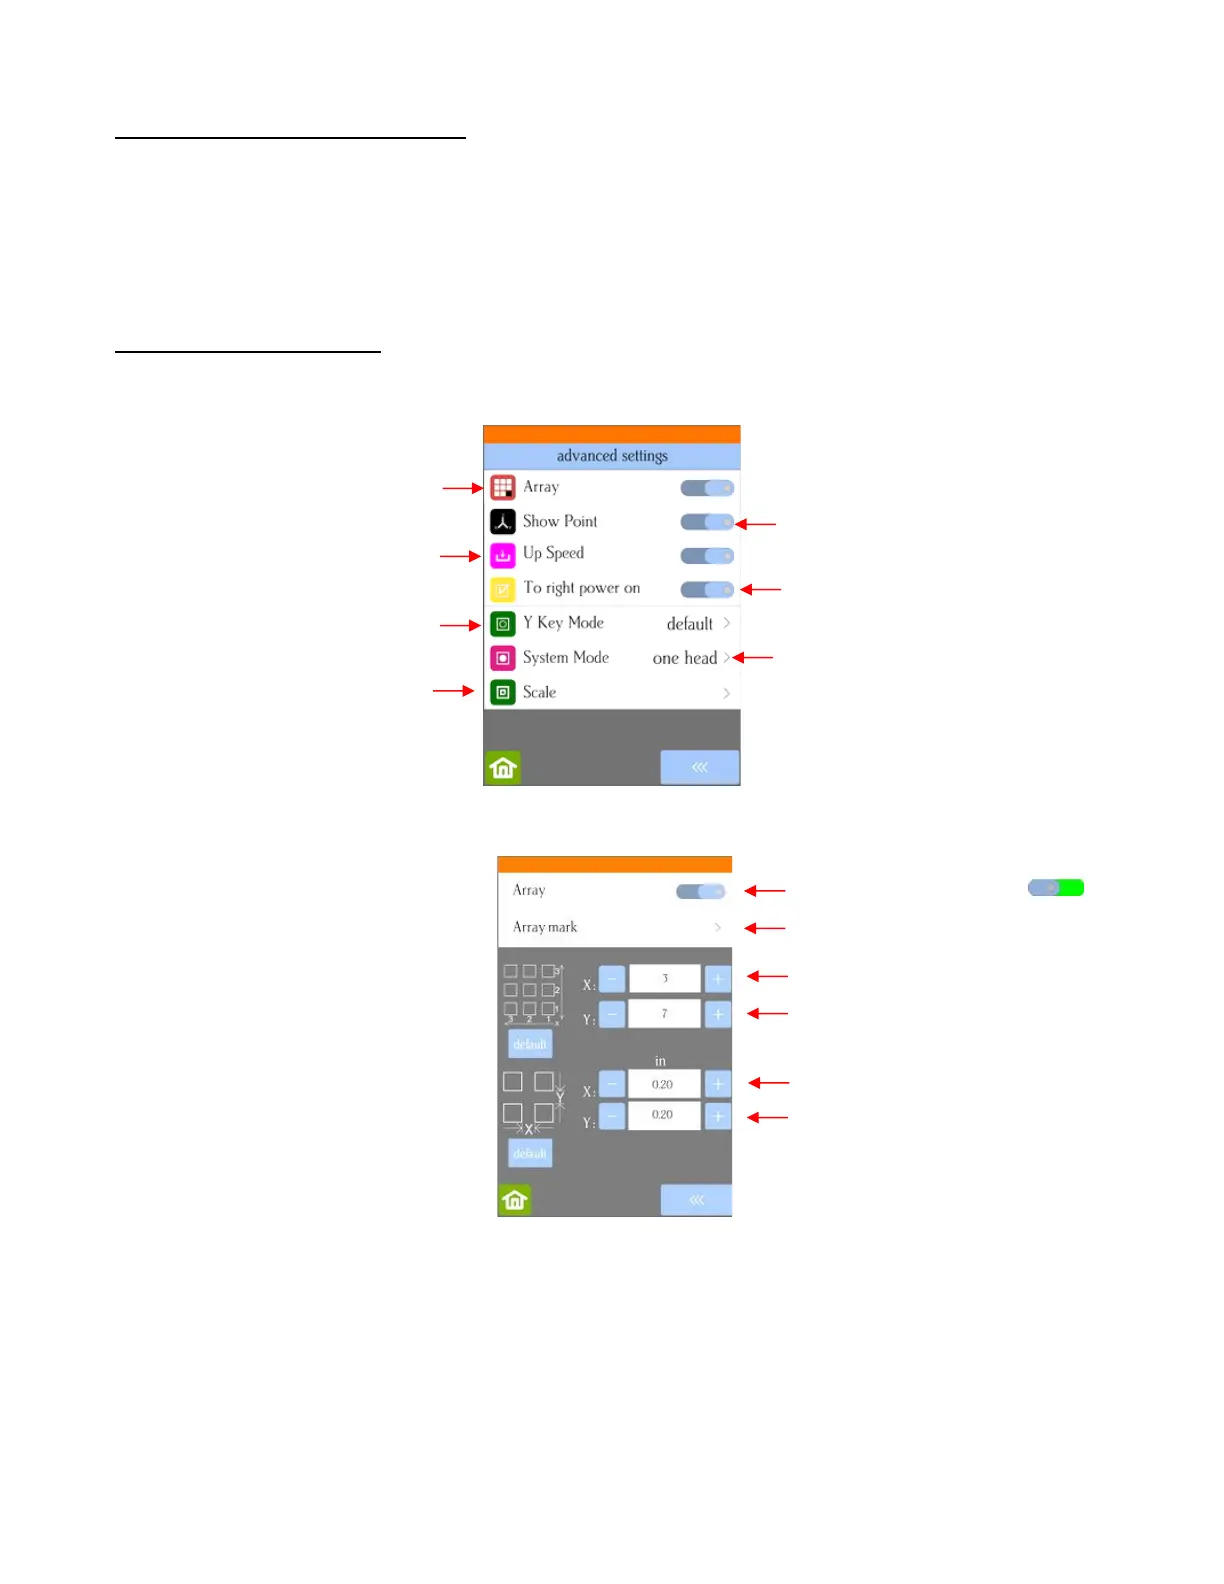
• Array: Tap the Array button to open the Array screen:
In the above screenshot, the shape sent to the Skycut would cut 3 across and 7 up & down, for a total of
21 shapes. The spacing between each shape would be 0.20 inches (Note: to use mm instead of inches,
switch the Units setting. Refer to Section 1.14.2).
• Show Point: When toggled on, the Main Screen displays movement and location output based on the
position of the cutting head: