Once the pen tip is in the lower right corner, you are ready to proceed with the test.
1.13.2 Default Settings in SignCut Pro
• Before creating a test shape in SignCut Draw, there are three settings to verify in SignCut Pro so that your
results will match what is shown in this tutorial:
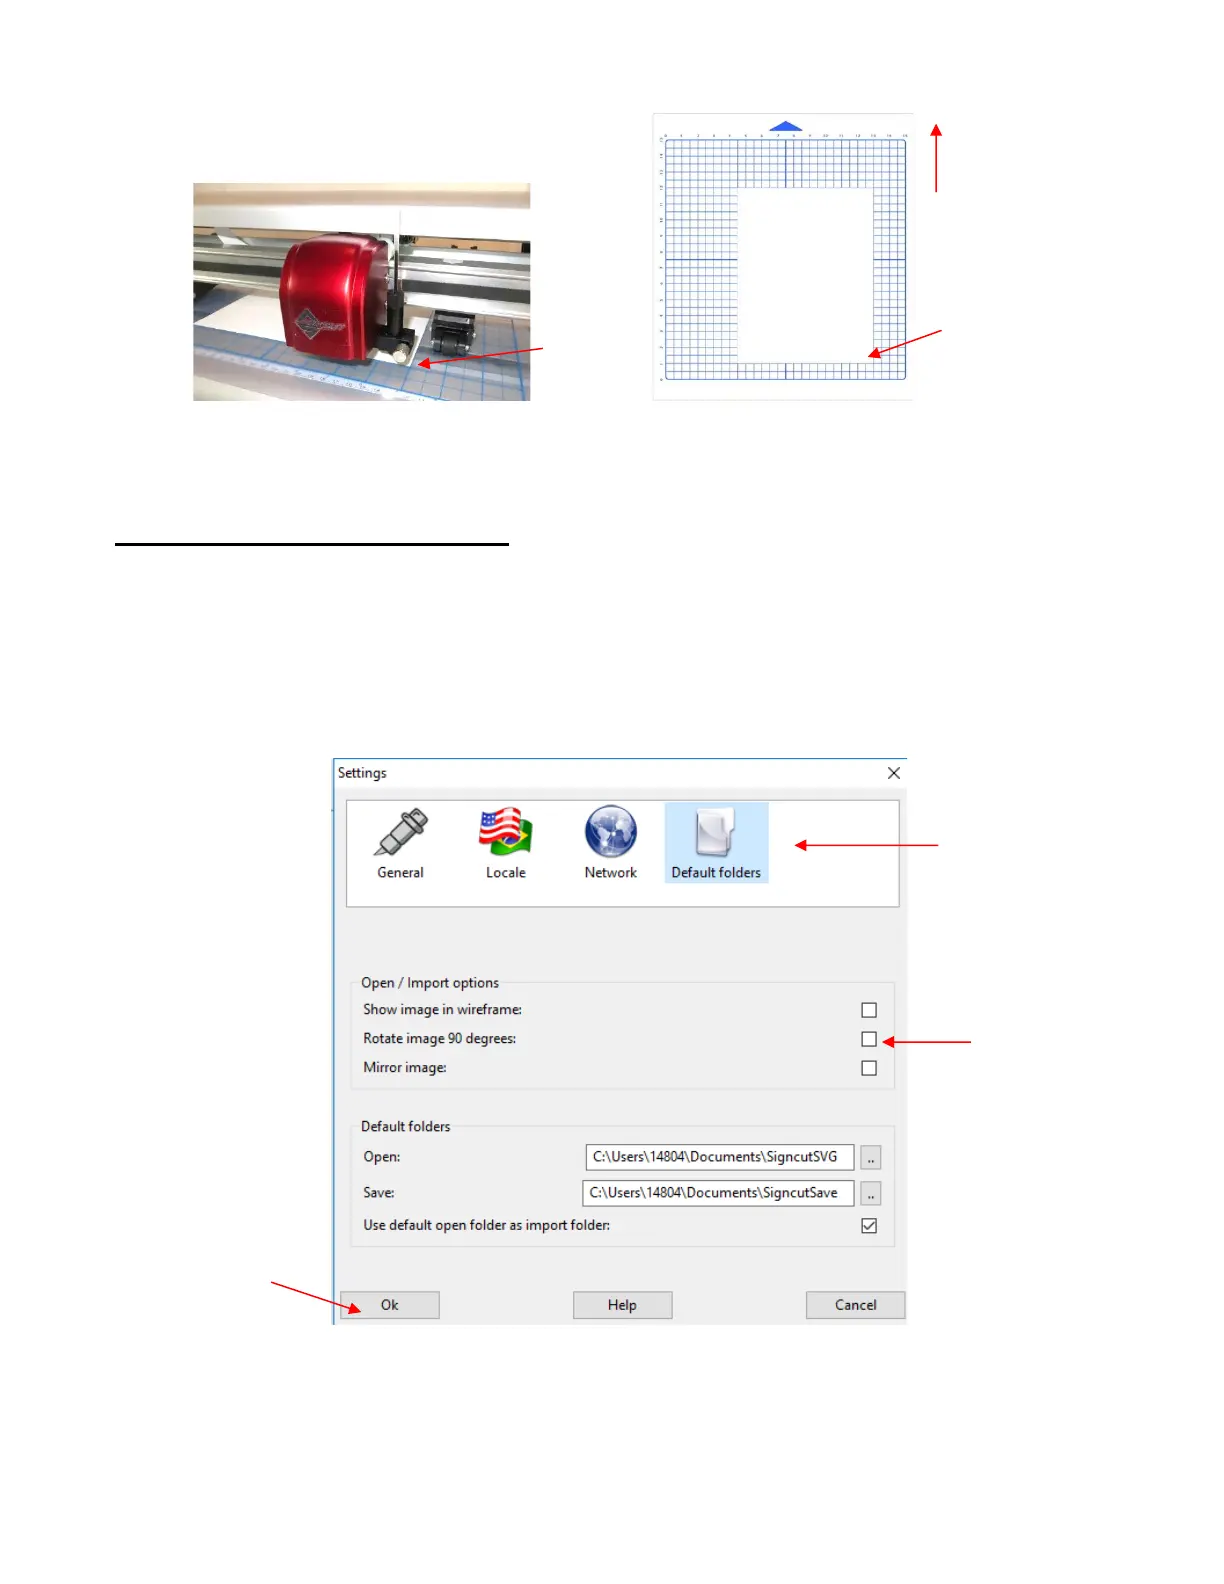
Shapes can always be rotated before cutting. However, you may have a personal preference regarding
how projects transferred from SignCut Draw appear upon opening in SignCut Pro. To set this, go to
Settings>Settings (in SignCut Pro) and select the Default Folders icon. Mark or unmark the Rotate
image 90 degrees setting, as desired. For now, this tutorial will leave this setting unmarked:
• Another setting to verify before proceeding with the testing and all subsequent cutting is to verify that
the correct rotation is set for your Skycut. To do this, go to Cutter>Settings and click on the Advanced
settings tab. Verify the Rotate setting is set to 90 deg: