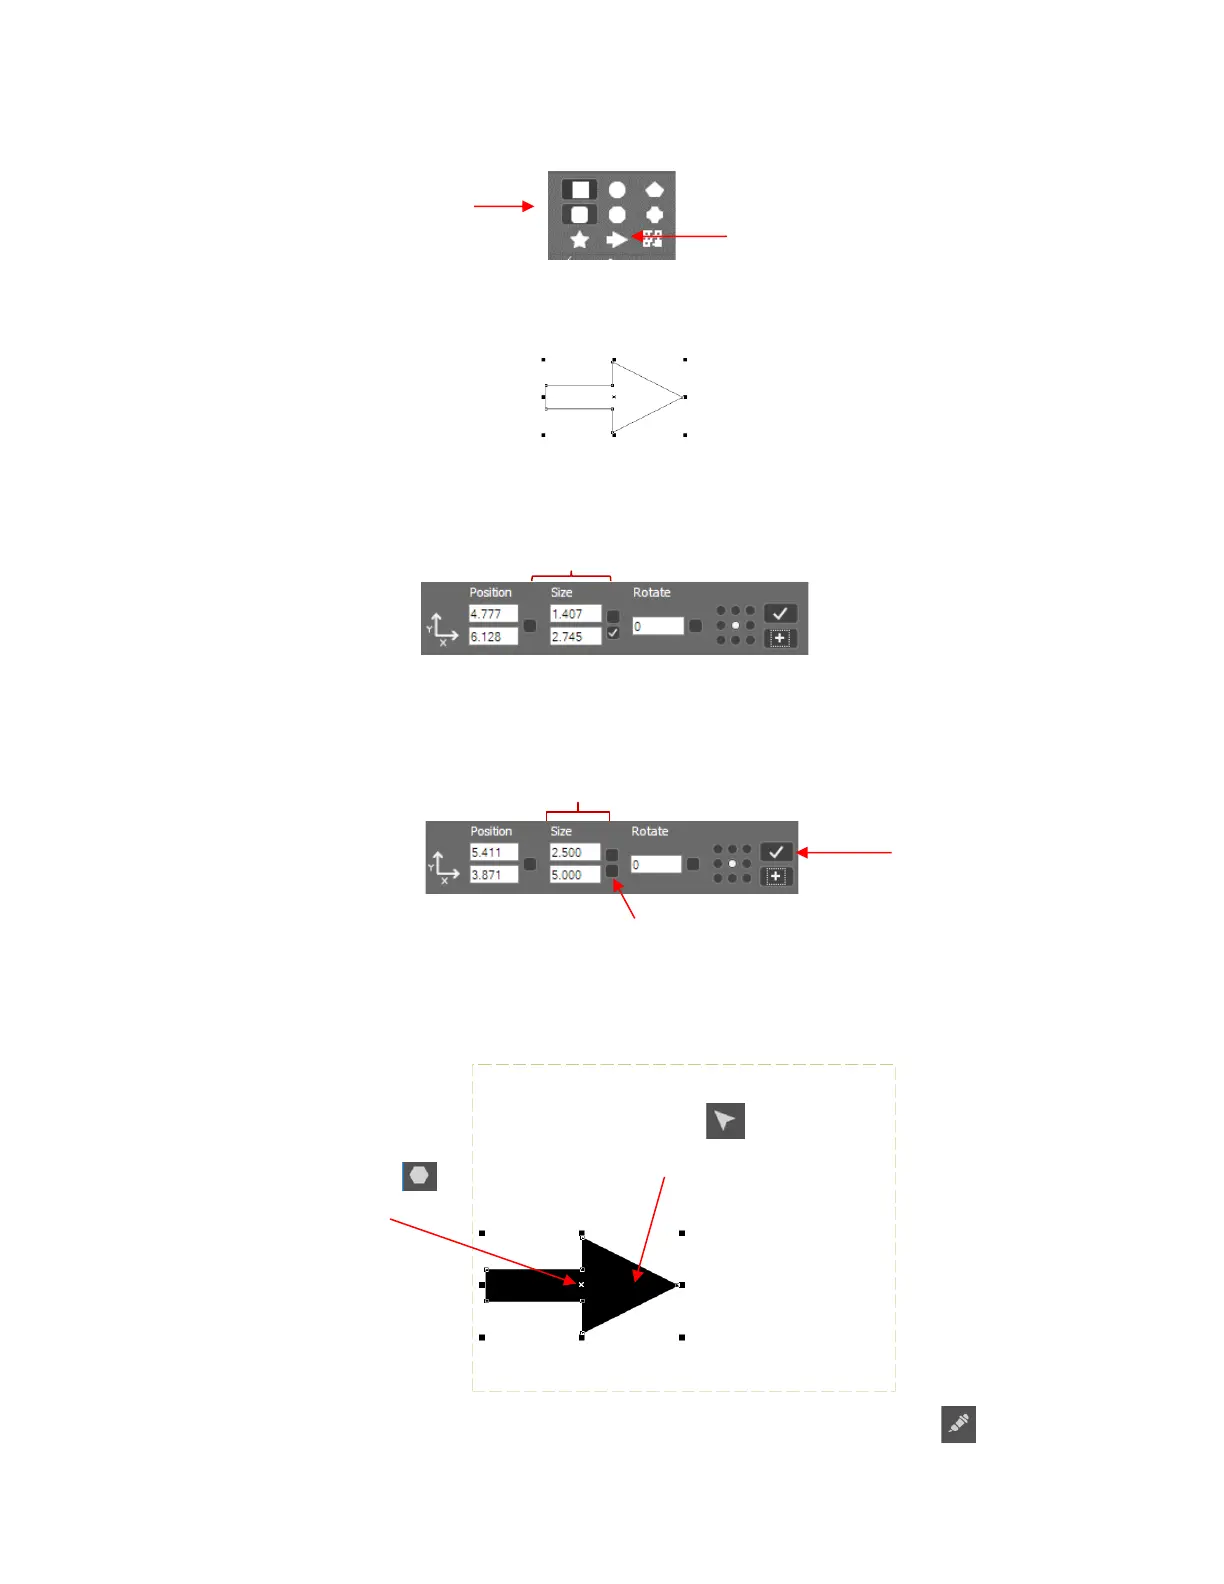
relative to where they will be drawn/cut by the Skycut before you begin cutting actual projects. Click on the
Arrow option:
• Left click once in the Sign Area and then move the cursor towards the right and down to create an arrow
which points towards the right. Left click again to complete the arrow:
• If you wish to resize the arrow, drag any of the square handles around the selected arrow. On the
Properties & Functions Bar, the Height and Width of the arrow will be displayed:
• Alternatively, you can enter new measurements into those fields, if you wish. Uncheck the Proportional
option if you want to separately change Width and Height. When done, click on Apply:
• To position the arrow, drag it to any location within the Sign Area boundaries. Note that if you are still in the
Shape tool mode, you’ll need to drag the shape by having your mouse cursor on the center X. Otherwise in
Object edit mode, you can drag anywhere within the shape:
• To send this arrow to SignCut Pro for drawing, click on the Move Image to SignCut icon (bottommost
icon) on the Tools panel or press the shortcut key S.
• SignCut Pro will open and the arrow will be displayed: