105
Pothole Limit Switch(LS2) Replacement and Adjustment Section 5 – Procedures
5.8 Pothole Limit Switch(LS2)
Replacement and
Adjustment
Machine Preparation
1. Make sure the MEWP is parked on a firm level
surface and fully lower the platform.
2. Chock or block the wheels to keep the MEWP
from rolling forward or backward.
Limit Switches Removal
1. Extend the platform to the service position.
2. Open the service cover door, and properly install
the prop bar.
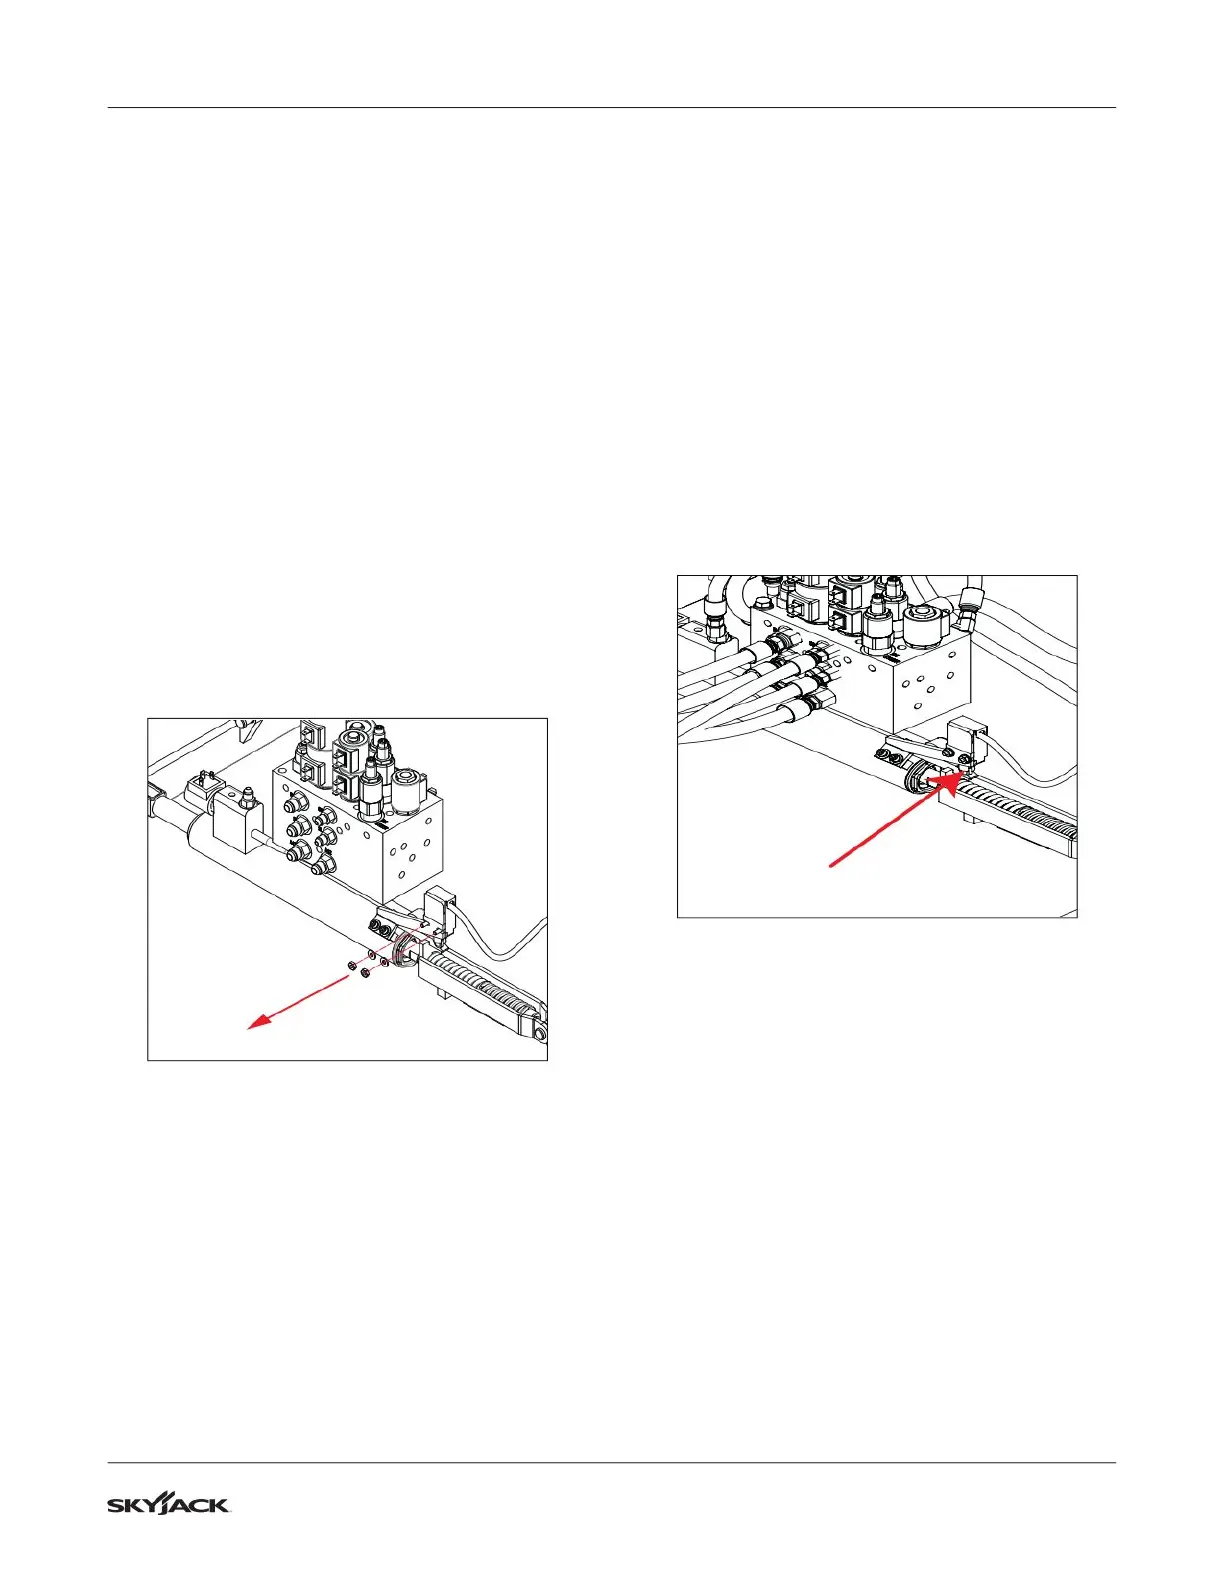
3. Remove the bolts and nuts (x2) securing the
limit switch to the limit switch bracket. Set the
hardware aside for later reinstallation.
4. Remove the limit switch and free the limit switch
cable by cutting the tie wraps.
5. Follow the cable into the main harness, and
disconnect the limit switch wire from the main
harness. Discard the limit switch.
Limit Switch Replacement
1. Mount loosely the new limit switch assembly: ,
using the hardware removed previously.
Limit Switch Electrical Connections
2. Route the new limit switch cable along the same
path as the old one to the main harness. Use
tie wraps as needed to secure them at regular
intervals.
3. Plug the spade connectors into the same wire
numbers. The #71A and #72 wires from the limit
switches connect to the respective wires on the
main harness.
Limit Switch Setup
4. Loosen the hardware securing the limit switch
to the limit switch bracket. Adjust and move
the limit switch towards the lever bar until it
depresses the plunger roller.
5. Fully tighten the bolts securing the limit switch.
Make sure the limit switch does not move while
tightening the bolts.
Limit Switch Testing
1. Place a block, approximately 1.5” (3.75 cm),
under the pothole bar and then raise the
platform to an approximate height of 7 feet
(2 meters) or until the pothole protection is
activated.
2. Attempt to drive forward or reverse. The MEWP
should not move forward or backward when
pothole protection is on a block.