12 Load Control
SMA Solar Technology AG
Operating manual 85HM-20-BE-en-19
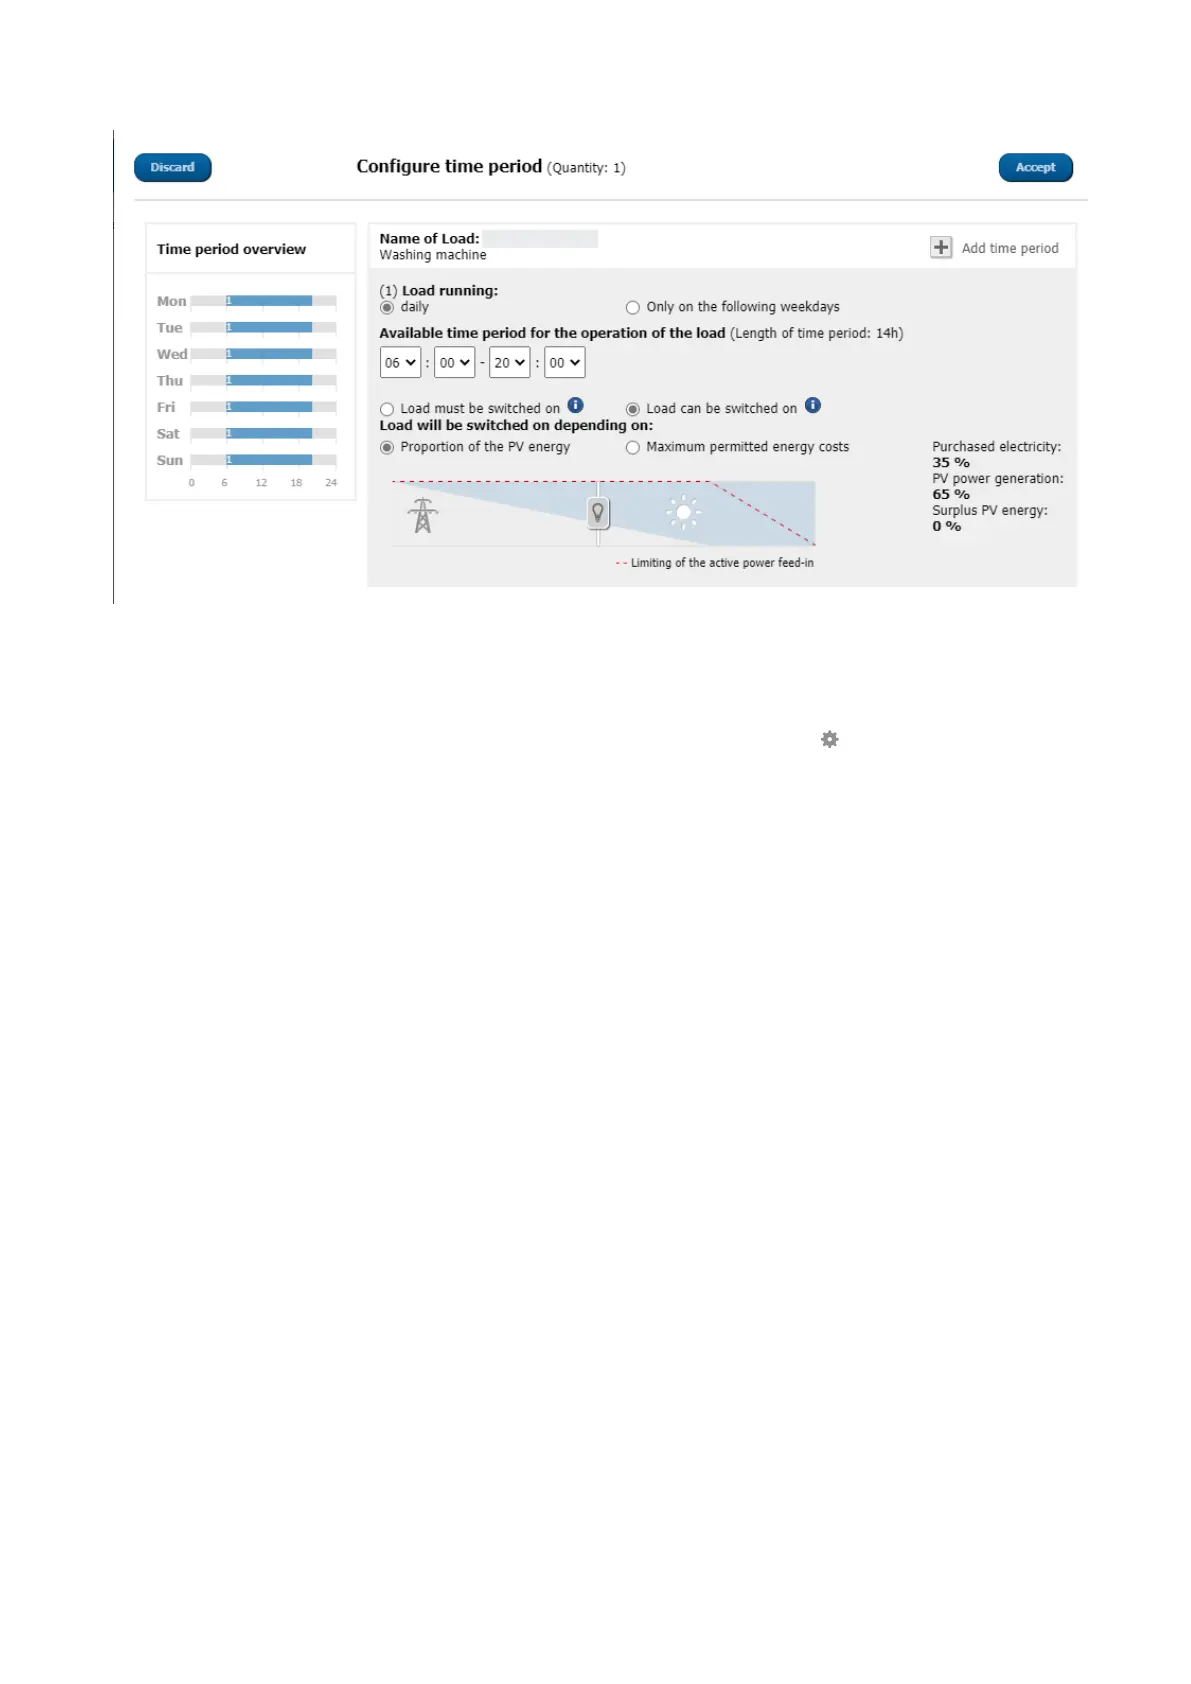
Figure 15: Configuring the time period (example)
12.5.1 Setting or changing the time windows
1. Select Configuration > Load Overview and Planning in the page and menu selection.
2. In the line of the required load, in the column Configuration, select the symbol .
3. In the tab of the selected load, select the button [Edit].
4. Click on [Configure time period].
☑ On the left, the time period overview shows the current (possibly preset) information; on the right, the field for
setting or changing the time period for the selected load.
5. Under Load is switched on you must select whether the load should run Daily or Only on the following
weekdays.
If the load should only be operated on certain days of the week, you must click on the corresponding day(s) of
the week in the line that opens.
6. Under Available time period for the operation of the load, enter the required start time and end time.
7. Under Maximum operating time of the load in the time period, use the slider to set the operating time in 5-
minute intervals.
8. Select the time period type Load MUST be switched on or Load CAN be switched on.
9. If you have selected the time period type Load MUST be switched on, you can set a checkmark to allow the
load to exceed the time period. If you do not set this checkmark, the load must not exceed the specified time
period.