EasyManuals Logo

SMC Networks HRS012-A-10 Series User Manual

SMC Networks HRS012-A-10 Series
222 pages
To Next Page IconTo Next Page
To Previous Page IconTo Previous Page
Page #175 background imageLoading...
Page #175 background image
HRX-MM-N007
Chapter 4 Service Procedure
HRS Series 4.5 Replacement Procedure
4-39
Mounting
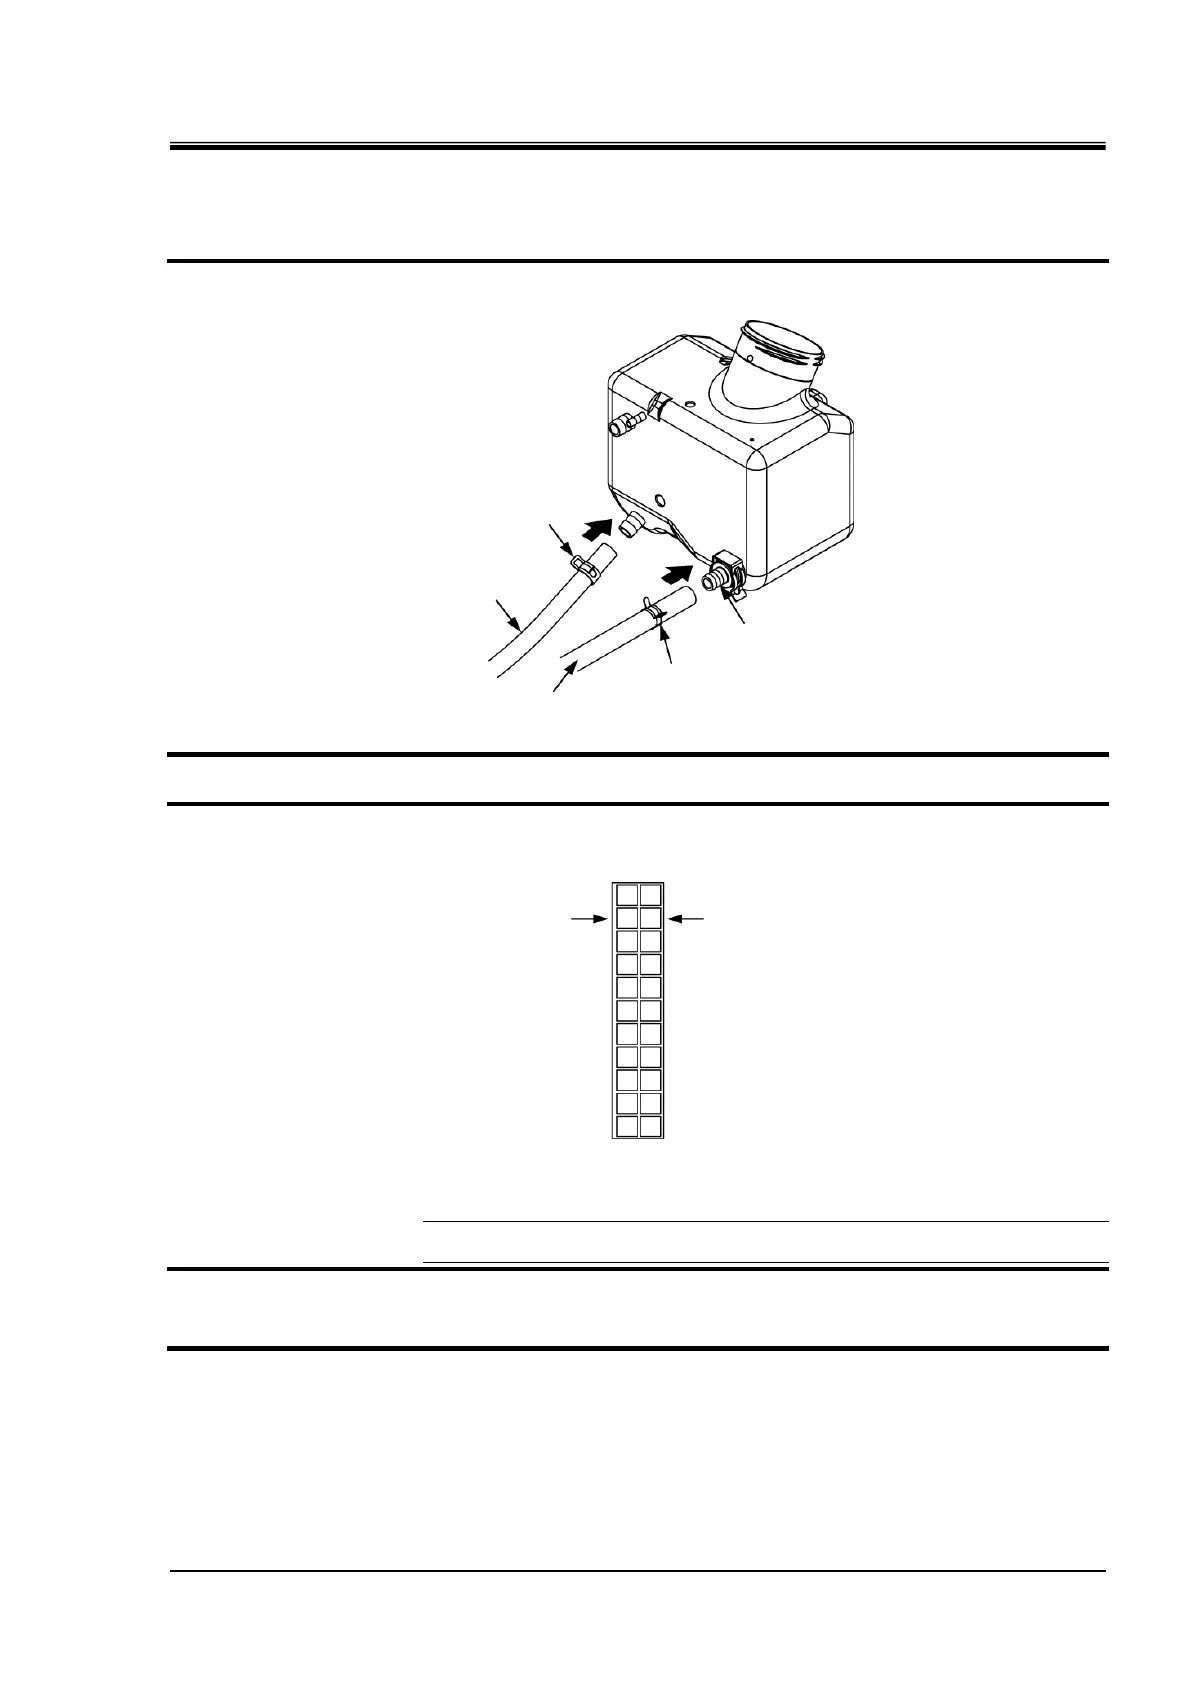
1. Install the tank.
2. Assemble the fitting mounted to the tank and hose A.
Fig. 4.5-23 Hose A attaching
3. Mount the hose B.
4. Put the level switch cable [LS1] (2pcs.) through the grommet. Insert the pin to the connector.
(No.2 & No.13)
Fig. 4.5-24 Location to mount the connector
[Tips]
It does not matter which connector [LS1] is mounted to which socket.
5. Mount the upper panel, the panels on both sides and the front panel in reversed order of
removal.
6. Mount the tank lid.
No.2
No.13
Hose clamp
Fitting
Hose A
Hose clamp
Hose B

Table of Contents

Questions and Answers:

Question and Answer IconNeed help?

Do you have a question about the SMC Networks HRS012-A-10 Series and is the answer not in the manual?

SMC Networks HRS012-A-10 Series Specifications

General IconGeneral
BrandSMC Networks
ModelHRS012-A-10 Series
CategoryChiller
LanguageEnglish

Related product manuals